فن
خوبصورتی اور تندرستی
دستکاری
ثقافت اور تاریخ
تفریح
ماحول
خوراک اور مشروبات
سبز مستقبل
ریورس انجینئرنگ
سائنسز
کھیل
ٹیکنالوجی
پہننے والے آلات
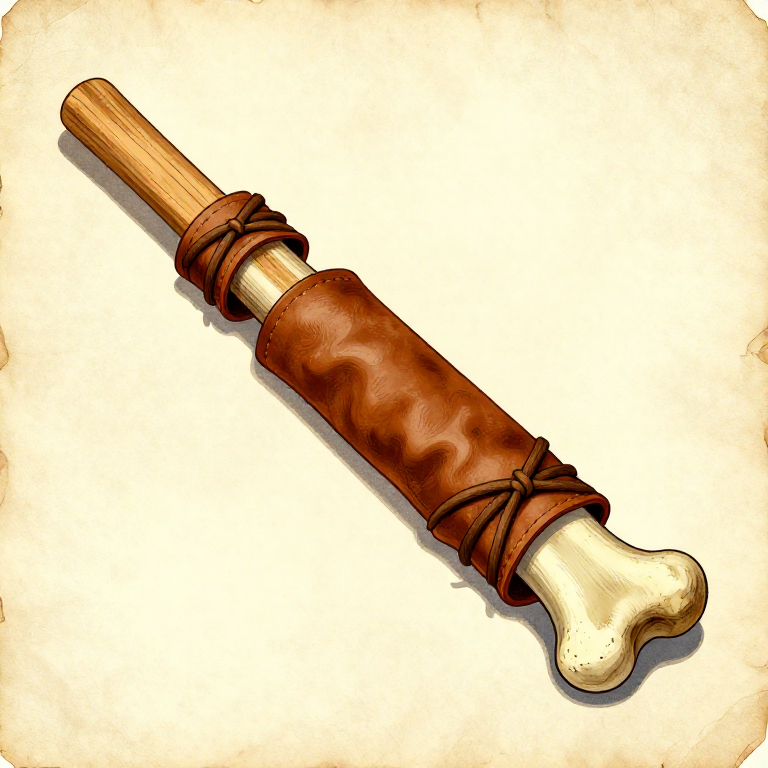
Setting a Broken Bone with a Splint and Bandage — Prehistoric Fracture Treatment
Setting broken bones with splints is one of the oldest medical practices in human history. Archaeological evidence of healed fractures with proper alignment — meaning the bone ends were deliberately held in position during healing rather than left to knit crookedly — has been found in Neanderthal remains dating back over 50,000 years, and in early Homo sapiens remains from sites across Europe, Africa, and Asia. The Shanidar Cave Neanderthal (Shanidar 1, Iraq, approximately 45,000 years old) had a healed fracture of the left arm with evidence of external support during healing. The principle is straightforward: a broken bone (fracture) heals naturally if the broken ends are held in alignment and the limb is immobilized for 4 to 8 weeks. A splint provides this immobilization by placing rigid supports on both sides of the break, padded to prevent pressure sores, and wrapped firmly with binding material. The wrapping must be tight enough to prevent movement but not so tight that it cuts off blood circulation to the extremity below the break. This blueprint teaches the complete process of splinting a simple (closed) fracture of a forearm or lower leg using only materials available to prehistoric humans: straight sticks, soft padding material, and cordage or hide strips for binding.
نیا سیکھنے والا
30-60 minutes
ہدایات
1
1
Assess the Injury and Determine Fracture Type
Assess the Injury and Determine Fracture Type
Examine the injured limb carefully. A simple (closed) fracture shows swelling, tenderness at a specific point, deformity (the limb may look bent or shortened at an unnatural angle), and inability to bear weight or grip. The skin is intact — there is no wound exposing bone. If bone is protruding through the skin (an open or compound fracture), the situation is far more serious and the wound must be treated for infection before splinting. This blueprint addresses simple closed fractures only. Feel gently along the limb — the point of maximum tenderness and swelling marks the fracture site. Do not attempt to move or manipulate the limb more than necessary during assessment.
2
2
Align the Bone Ends by Gentle Traction
Align the Bone Ends by Gentle Traction
If the limb is visibly deformed (bent at an angle or shortened), the bone ends must be realigned (reduced) before splinting. This is done by applying steady, gentle traction: one person stabilizes the limb above the fracture while another grips below the fracture and pulls steadily along the long axis of the bone. The pull must be firm and sustained, not jerky. As traction is applied, the muscles relax and the bone ends slide back into approximate alignment. The limb should look roughly straight and be approximately the same length as the uninjured opposite limb. This is painful for the patient — have them bite down on a piece of leather or wood. Do not attempt to achieve perfect alignment; approximate alignment is sufficient for functional healing.
3
3
Select and Prepare Splint Sticks
Select and Prepare Splint Sticks
Cut 4 straight, rigid sticks from hardwood saplings (oak, ash, maple, or birch) or thick straight branches. Each stick must be long enough to extend from the joint above the fracture to the joint below it — for a forearm fracture, from above the elbow to below the wrist; for a lower leg fracture, from above the knee to below the ankle. The sticks should be approximately 2 to 3 cm in diameter — thick enough to be rigid but not so heavy as to be uncomfortable. Trim off any small side branches and rough bark that could cause pressure sores. You need at least 2 sticks (one for each side of the limb), but 4 is better for a secure splint that prevents rotation.
اس مرحلے کے لیے مواد:
 Hardwood Sapling4 piece
4
4
Prepare Padding Material
Prepare Padding Material
Cut strips of soft brain-tanned hide, bark cloth, or thick moss approximately 5 to 8 cm wide and long enough to wrap around the limb. You need enough padding to create a cushioned layer between the rigid splint sticks and the skin. Without adequate padding, the hard edges of the sticks will press into the skin and create painful pressure sores that can break down into open wounds during the weeks of immobilization. Soft brain-tanned hide is ideal because it is pliable, breathable, and does not irritate skin. Bark cloth (from pounded inner bark) or thick layers of dried sphagnum moss are good alternatives.
اس مرحلے کے لیے مواد:
 Brain-Tanned Hide1 piece
5
5
Wrap the Limb in a Padding Layer
Wrap the Limb in a Padding Layer
While maintaining traction on the fracture (another person must hold the limb steady), wrap the injured area in a layer of soft padding material. Start at the fracture site and wrap outward in both directions, covering from the joint above to the joint below. The padding should be approximately 1 cm thick — enough to cushion but not so thick that the splint sticks cannot hold the limb rigid. Overlap each wrap by half the width of the padding strip to ensure complete coverage with no gaps where sticks could contact bare skin.
6
6
Position the Splint Sticks
Position the Splint Sticks
Place 2 splint sticks along opposite sides of the padded limb — for a forearm fracture, one on the palm side and one on the back of the forearm; for a lower leg fracture, one on each side of the shin. If you prepared 4 sticks, place additional sticks on the remaining sides for a more rigid and secure splint. The sticks must extend beyond both the joint above and the joint below the fracture. Immobilizing the joints above and below the fracture is essential — if the joints are free to move, the muscles attached to them will pull on the bone ends and displace the fracture.
7
7
Bind the Splint with Cordage or Hide Strips
Bind the Splint with Cordage or Hide Strips
Using plant-fibre cordage or strips of rawhide, bind the splint sticks firmly to the padded limb. Tie bindings at 5 to 8 cm intervals along the full length of the splint. Start with a binding above the fracture, then below the fracture, then fill in between. Each binding should be tight enough that the sticks do not shift when the limb is gently moved, but not so tight that the flesh bulges between the bindings (which indicates circulation restriction). Tie each binding with a secure knot — a square knot or clove hitch — that will not slip or loosen. Place the knots on the outer surface of the splint sticks, not against the skin.
اس مرحلے کے لیے مواد:
 Cordage3 m
8
8
Check Circulation Below the Splint
Check Circulation Below the Splint
Immediately after binding the splint, check blood circulation below the fracture by pressing on a fingernail or toenail until it turns white, then releasing. The colour should return to pink within 2 to 3 seconds (capillary refill). If the fingers or toes below the splint are cold, numb, blue or white in colour, or if capillary refill is slow, the bindings are too tight and must be loosened immediately. Loosen one binding at a time until circulation returns. Check sensation by touching the fingers or toes — the patient should be able to feel the touch. Circulation checks must be repeated every few hours for the first day and daily thereafter.
9
9
Create a Sling for Arm Fractures
Create a Sling for Arm Fractures
For a forearm or upper arm fracture, the splinted limb should be supported in a sling to prevent the weight of the arm from pulling on the fracture site. Make a sling from a large piece of brain-tanned hide or bark cloth approximately 80 cm square, folded diagonally into a triangle. Place the forearm across the middle of the triangle with the elbow at the point, bring the two ends up and tie behind the neck. The forearm should rest at a slight angle with the hand higher than the elbow — this reduces swelling. The sling supports the weight of the arm and reminds the patient not to use the injured limb.
10
10
Manage Pain and Swelling in the First Days
Manage Pain and Swelling in the First Days
For the first 2 to 3 days after injury, swelling will increase. If available, apply cool water-soaked moss or hide strips around the splint to help reduce swelling (the prehistoric equivalent of an ice pack). Willow bark tea (Salix species) contains salicin, a natural pain reliever chemically related to aspirin, and was widely used in prehistoric medicine. Chew thin strips of fresh willow bark or steep them in hot water to make a tea. Yarrow (Achillea millefolium) poultices applied around the fracture site also help reduce swelling and promote healing. Keep the injured limb elevated above the level of the heart when possible.
11
11
Monitor Healing and Maintain the Splint for 4 to 8 Weeks
Monitor Healing and Maintain the Splint for 4 to 8 Weeks
The splint must remain in place for 4 to 8 weeks depending on the bone fractured, the patient's age (children heal faster), and the severity of the break. Forearm fractures typically require 4 to 6 weeks; lower leg fractures require 6 to 8 weeks. During this time, check the bindings daily — they may need tightening as swelling decreases, or loosening if swelling increases. Replace padding if it becomes wet, compressed, or develops an odour. The patient should not attempt to use the injured limb or bear weight on it until the fracture has healed — premature use can re-break the partially healed bone.
12
12
Remove the Splint After Healing Is Complete
Remove the Splint After Healing Is Complete
After the appropriate healing period, carefully cut the bindings and remove the splint sticks. The limb will appear thinner than the uninjured side due to muscle atrophy from disuse — this is normal and will resolve with gradual activity. Feel along the fracture site — there should be a firm, painless lump of callus (new bone) at the fracture point. If the area is still tender, swollen, or if gentle pressure produces pain, the fracture has not fully healed and the splint should be reapplied for another 2 weeks. Once healed, the patient should begin gentle use of the limb, gradually increasing activity over several weeks to rebuild strength.
منسلک بلیو پرنٹ مواد
متعلقہ بلیو پرنٹ
یہ بلیو پرنٹ علم بانٹتے ہیں — تکنیک، مواد یا اصول
Making Bark Cloth (Tapa) — Beaten Inner Bark Fabricبذریعہ Tex
Making a Bone Awl — Piercing Tool for Sewing and Basketryبذریعہ Mary
Drying Medicinal Herbs for Winter Storage — Preserving Nature's Pharmacyبذریعہ Bob
Processing Animal Sinew into Thread — Tendon Fiber Preparationبذریعہ Bob
Making Rawhide Cord — Strong Binding from Animal Skinبذریعہ Tex
Plantain Leaf Poultice — The Universal Wound Herb Found on Every Continentبذریعہ Bob
Comfrey Root Poultice — Knitbone, the Ancient Remedy for Sprains and Fracturesبذریعہ Bob
Related blueprints
Other builds that share materials, tools, or techniques with this one.
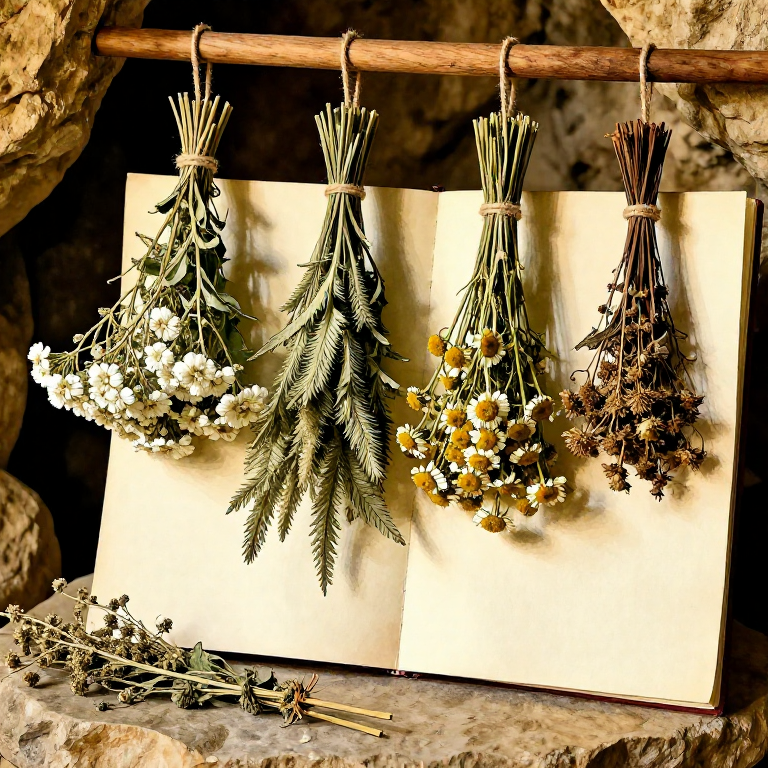
Drying Medicinal Herbs for Winter Storage — Preserving Nature's Pharmacybiology
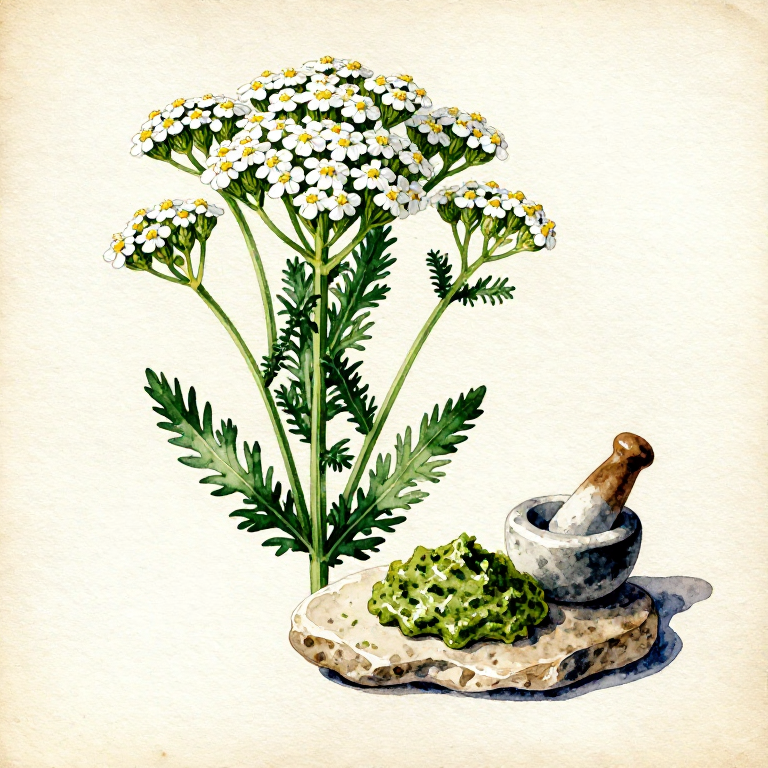
Preparing a Yarrow Wound Poultice — Prehistoric Herbal First Aidbiology

Traditional Deer Hunting with Bow — Stalking, Shot Placement, and Field Dressingbiology
Growing a Kombucha SCOBY from Sweetened Tea — The Symbiotic Culture That Brews Itselfbiology

Roman Tooth Powder and Urine Mouthwash — Ancient Dental Chemistry That Actually Workedbiology
Cultivating a Sourdough Starter from Wild Yeast — The Living Culture Behind the World's Oldest Breadbiology
CC0 پبلک ڈومین
یہ بلیو پرنٹ CC0 کے تحت جاری کیا گیا ہے۔ آپ اجازت لیے بغیر اس کام کو نقل، ترمیم، تقسیم اور کسی بھی مقصد کے لیے استعمال کرنے کے لیے آزاد ہیں۔
میکر کی حمایت کریں ان کے بلیو پرنٹ کے ذریعے پروڈکٹس خرید کر جہاں وہ میکر کمیشن وینڈرز کی طرف سے مقرر، کماتے ہیں، یا اس بلیو پرنٹ کی نئی تکرار بنائیں اور آمدنی شیئر کرنے کے لیے اسے اپنے بلیو پرنٹ میں کنکشن کے طور پر شامل کریں۔