Współpraca
SZTUKA
Piękno i dobre samopoczucie
RZEMIOSŁO
KULTURA I HISTORIA
ROZRYWKA
ŚRODOWISKO
JEDZENIE I NAPOJE
INŻYNIERIA ODWROTNA
NAUKI
LEKKOATLETYKA
TECHNOLOGIA
URZĄDZENIA DO NOSZENIA
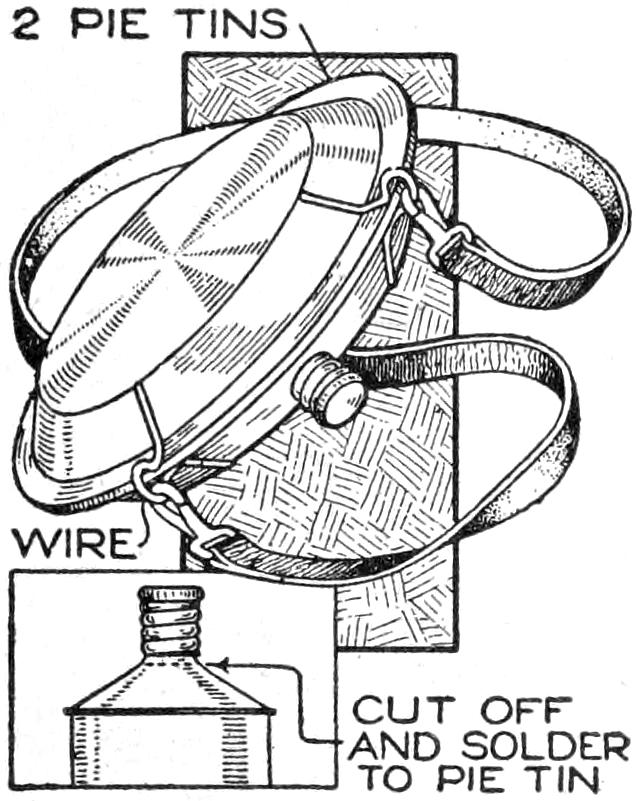


Canteen From Two Pie Plates: Rims Soldered Together, a Screw-Cap Neck in the Edge (Boy Mechanic, 1919)
A canteen "for the camper or hiker", sent to The Boy Mechanic (1919) by J. R. Townsend of Itasca, Texas: two nickel-plated pie plates soldered rim to rim, the screw-capped neck of a metal-polish can soldered over an opening in the edge, and two wire loops for the snap hooks of a shoulder strap.
The book gives no sizes: the plates set the size.
Początkujący
About 2 hours
Instrukcje
1
1
Read The Boy Mechanic
Read The Boy Mechanic
"Two good-quality pie plates were soldered at their edges to form a water-tight container." (J. R. Townsend, Itasca, Texas.)
2
2
Solder the plates together
Solder the plates together
Take two good-quality nickel-plated pie plates of the same size. Clean the rims, set them face to face, and solder them together all round the edge so the joint is water-tight. Use lead-free solder: this holds drinking water (our choice; the book only says solder).
Materiały do tego kroku:
 Forma do tarty2 sztuk
 Lut hydrauliczny bezołowiowy1 sztuka
 Topnik1 sztuka
Potrzebne narzędzia:
 Lutownica elektryczna
 Pilnik do metalu
3
3
Cut the neck off the can
Cut the neck off the can
Take a small metal-polish can with a screw cap. As the book's drawing shows, cut off its sloping top with the threaded neck, and trim the cut edge.
Materiały do tego kroku:
 Puszka blaszana1 sztuka
Potrzebne narzędzia:
 Nożyce do blachy o dużej wytrzymałościPilnik do metalu
4
4
Cut the opening and fit the neck
Cut the opening and fit the neck
Cut an opening in the edge of the canteen to suit the neck. Fit the neck carefully over it and solder it all round.
Materiały do tego kroku:
Lut hydrauliczny bezołowiowy1 sztukaTopnik1 sztukaPotrzebne narzędzia:
 Wiertarka ręcznaPilnik do metaluLutownica elektryczna
5
5
Solder on the strap loops
Solder on the strap loops
Bend two short pieces of wire into loops and solder one at each side of the screw cap, as loops for the snap hooks of the shoulder strap.
Materiały do tego kroku:
 Drut żelazny1 sztukaLut hydrauliczny bezołowiowy1 sztukaTopnik1 sztuka
Potrzebne narzędzia:
 Szczypce płaskieLutownica elektryczna
6
6
Fit the strap and test
Fit the strap and test
Put a snap hook on each end of a shoulder strap and hook them into the loops. Fill the canteen with water, screw on the cap and check every joint for leaks (our test), then rinse it before use.
Materiały do tego kroku:
 Rzemień skórzany1 sztuka
 Karabińczyk2 sztuk
Potrzebne narzędzia:
 Woda słodka
7
7
Troubleshooting
Troubleshooting
Canteen troubleshooting.
Flow
Loading...
8
8
History and honest limits
History and honest limits
From **The Boy Mechanic, Book 3**, edited by H. H. Windsor, Popular Mechanics, Chicago, 1919 (Project Gutenberg 71856), "How to Make a Canteen", sent in by J. R. Townsend of Itasca, Texas. The book gives no sizes and names no tools; the lead-free solder, the tools, the strap material and the leak test are ours.
Materiały
7- 2 sztukZastępnik
- 3 sztukZastępnik
- 3 sztukZastępnik
- 1 sztukaZastępnik
- 1 sztukaZastępnik
- 1 sztukaZastępnik
- 2 sztukZastępnik
Wymagane narzędzia
6- Zastępnik
- Zastępnik
- Zastępnik
- Zastępnik
- Zastępnik
Według tego planu powstaje
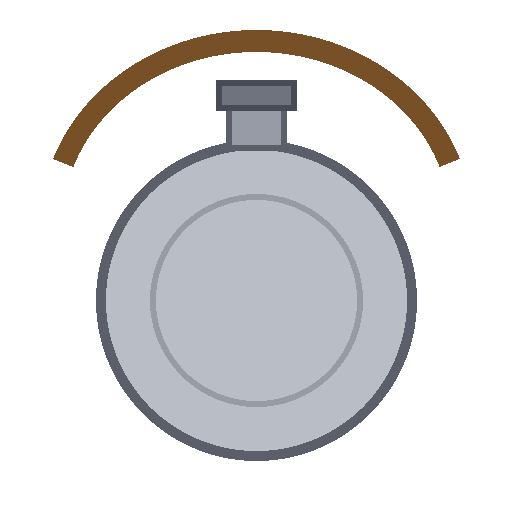
Powiązane blueprinty
Te blueprinty dzielą się wiedzą — technikami, materiałami lub zasadami


CC0 Domena publiczna
Ten plan jest udostępniany na licencji CC0. Możesz go swobodnie kopiować, modyfikować, rozpowszechniać i wykorzystywać do dowolnych celów, bez konieczności uzyskiwania zgody.
Wesprzyj Makera kupując produkty przez jego plan, za co zarabia Prowizja Makera ustalony przez sprzedawców, lub stwórz nową iterację tego planu i dołącz go jako połączenie w swoim własnym planie, aby dzielić się przychodami.