Współpraca
SZTUKA
Piękno i dobre samopoczucie
RZEMIOSŁO
KULTURA I HISTORIA
ROZRYWKA
ŚRODOWISKO
JEDZENIE I NAPOJE
INŻYNIERIA ODWROTNA
NAUKI
LEKKOATLETYKA
TECHNOLOGIA
URZĄDZENIA DO NOSZENIA
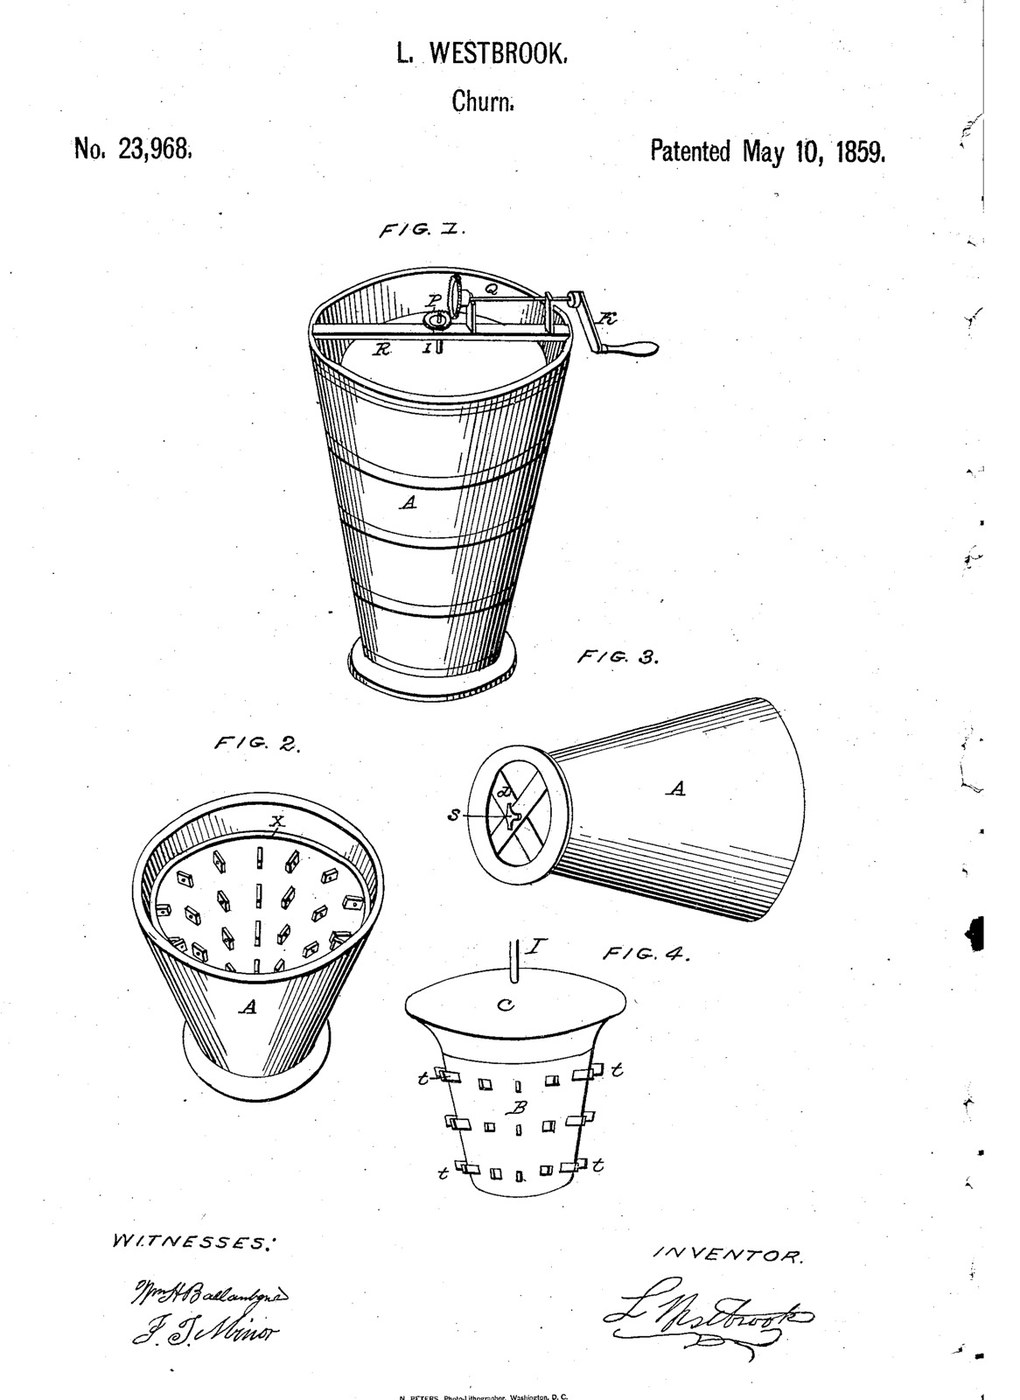


Rim-and-Disk Flow Churn: Cream Is Rubbed Past a Turning Disk, Then Falls Through Fixed and Turning Dashers
Leonardo Westbrook of New York received US 23,968, dated 10 May 1859, for a churn the cream passes through once. It stands over a pail. Cream poured on a turning disk at the top is rubbed between the disk's edge and a rounded rim inside the case, then falls through slats fixed to the case and dashers turning on the spindle, and runs out of the open bottom. A thumb screw under the spindle raises or lowers the disk on the rim.
This rung builds it in a 20-litre bucket with its floor cut out.
Średniozaawansowany
About 6 hours, plus printing
Instrukcje
1
1
The gap at the rim, and the speeds
The gap at the rim, and the speeds
Wczytywanie notatnika Jupyter…
2
2
Cream rubbed in one pass, before it
Cream rubbed in one pass, before it
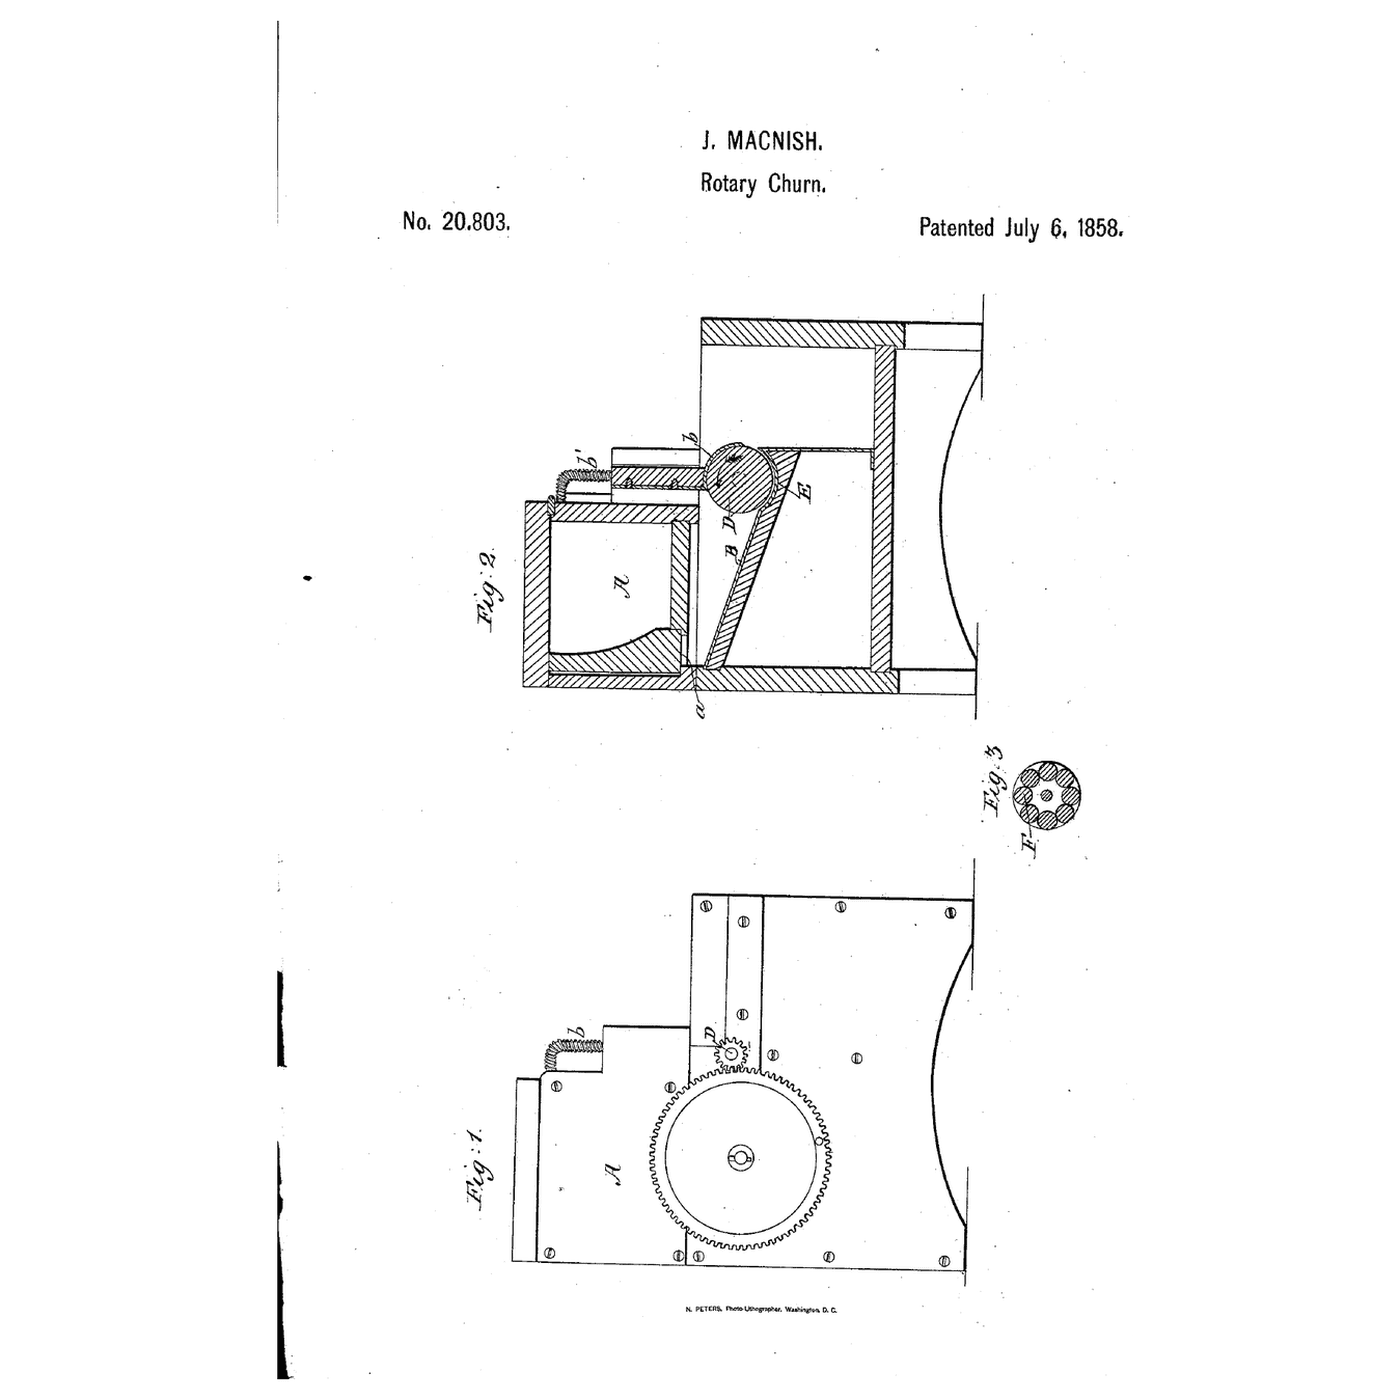
MacNish ran the cream once between a roller and a concave. Westbrook rubs it at a disk's edge, then beats it on the way down.
3
3
Read US 23,968
Read US 23,968
"The disk C, being slightly in contact with the rim X X X, as it revolves, rubs the milk or cream as it passes through ... then falling among the numerous dashers is thoroughly churned, before it passes out into the receiving vessel at the bottom."
4
4
Print the rim segment
Print the rim segment
A quarter of rim X, half-round, 16 mm wide. Print four. PETG, 0.2 mm layers, 40 % infill, 4 walls; wash before first use.
5
5
Print the pinion P
Print the pinion P
The 12-tooth pinion for spindle I's top. PETG, 0.2 mm layers, 40 % infill, 4 walls; wash before first use.
6
6
Print the crown wheel P'
Print the crown wheel P'
The 36-tooth wheel for shaft Q, teeth on its face. PETG, 0.2 mm layers, 40 % infill, 4 walls; wash before first use.
7
7
Print the thumb head
Print the thumb head
The wing head for the thumb screw. PETG, 0.2 mm layers, 40 % infill, 4 walls; wash before first use.
8
8
Case A, bars and thumb screw
Case A, bars and thumb screw
Cut the floor out of a food-grade 20-litre bucket, leaving a 25 mm flange round the edge (a 230 mm hole). Screw two hardwood bars d d' 340 x 30 x 20 mm across under the flange, halved where they cross, and drill the crossing 10.5 mm. Run an M10 threaded rod 123 mm long up through it with a nut on top of the bars, and glue the printed thumb head on its lower end.
Materiały do tego kroku:
 Wiadro 20-litrowe1 sztuka
 Deska z drewna liściastego1 sztuka
 Wkręty do drewna8 sztuk
 Pręt gwintowany1 sztuka
 Nakrętka sześciokątna1 sztuka
 Filament PETG1 sztuka
 Klej do drewna1 sztuka
Potrzebne narzędzia:
 Drukarka 3D z filamentem (FDM)
 Wyrzynarka
 Piła ręczna
 Dłuta
 Wiertarko-wkrętarka akumulatorowa
 Zestaw wierteł
 Piła do metalu
 Zestaw wkrętaków
 Miara zwijana
9
9
Rim X and fixed dashers o
Rim X and fixed dashers o
Screw the four rim segments inside the bucket 300 mm above the cut floor, round side inward, with stainless screws from outside. Cut 24 hardwood slats o 50 x 20 x 12 mm and screw them through the wall in three rings of eight, 80, 160 and 240 mm up, each ring turned half a space from the last.
Materiały do tego kroku:
Deska z drewna liściastego1 sztuka Śruby maszynowe32 sztuk
 Nakrętka samohamowna z wkładką nylonową32 sztuk
Potrzebne narzędzia:
Piła ręcznaWiertarko-wkrętarka akumulatorowaZestaw wiertełZestaw wkrętakówMiara zwijana10
10
Spindle B, dashers t and disk C
Spindle B, dashers t and disk C
Cut a 40 mm hardwood dowel 290 mm long for spindle B and drill an 11 mm hole 10 mm deep in the middle of its foot (the indentation). Chisel twelve mortises and glue in hardwood dashers t 82 x 20 x 12 mm, four at each of 80, 160 and 230 mm above the foot, each ring turned an eighth from the last, so they pass between the slats' rings. Glue a 12 mm stainless rod 145 mm long 30 mm into the top as spindle I. Cut disk C from 12 mm plywood, 282 mm across, and glue it on the spindle 268 mm above the foot.
Materiały do tego kroku:
 Kołki z twardego drewna1 sztukaDeska z drewna liściastego1 sztukaKlej do drewna1 sztuka
 Pręt ze stali nierdzewnej1 sztuka
 Płyta sklejkowa1 sztuka
Potrzebne narzędzia:
Piła ręcznaDłutaWiertarko-wkrętarka akumulatorowa Zestaw wierteł łopatkowychWyrzynarkaPiła do metalu
 Papier ścierny
11
11
Beam R, shaft Q and crank K
Beam R, shaft Q and crank K
Lower the spindle in so its foot sits on the thumb screw and the disk on the rim. Cut a hardwood beam R 320 x 44 x 30 mm with a 13 mm hole in the middle, slip it over spindle I onto the rim and screw two cleats under its ends inside the bucket. Fix the pinion on spindle I. Screw two bearing blocks 95 mm tall on the beam, bore them 12.5 mm 70 mm above it, and run a 12 mm stainless rod through them as shaft Q, with the crown wheel meshing the pinion and a hardwood crank K with a dowel handle on the end beyond the bucket.
Materiały do tego kroku:
Deska z drewna liściastego1 sztukaWkręty do drewna8 sztukPręt ze stali nierdzewnej1 sztukaŚruby maszynowe3 sztukNakrętka samohamowna z wkładką nylonową3 sztukKołki z twardego drewna1 sztukaKlej do drewna1 sztukaPotrzebne narzędzia:
Piła ręcznaWiertarko-wkrętarka akumulatorowaZestaw wiertełPiła do metaluZestaw wkrętaków12
12
The build in 3D
The build in 3D
FreeCAD model of this build, the near half of the bucket and rim cut away: the bars and thumb screw, the three rings of slats, the spindle with its dashers and disk on the rim, the beam with spindle I and the pinion, and shaft Q with the crown wheel and crank.
13
13
Churn
Churn
Stand the churn on its bars over a clean pail or tub. Turn the thumb screw until the disk just touches the rim. Turn the crank and pour about 8 litres of heavy cream at about 15 °C slowly onto the disk, checked with the thermometer; it runs past the rim, through the dashers and into the pail. How many passes it needs is not given: pour it through again until the butter comes, timing it. Then pour off the buttermilk, wash the butter in cold water until it runs clear, work in a pinch of salt and weigh it.
Materiały do tego kroku:
 Śmietanka kremówka8 l
 Sól morska gruboziarnista1 sztuka
 Woda1 sztuka
Potrzebne narzędzia:
 Pojemnik do przechowywania klasy spożywczej
 Termometr z sondą pozostawianą w potrawie
 Stoper
 Cyfrowa waga kuchenna
 Duża misa ze stali nierdzewnej
14
14
Troubleshooting
Troubleshooting
Rim-and-disk churn troubleshooting.
Flow
Loading...
15
15
History and honest limits
History and honest limits
**Leonardo Westbrook** of New York, US 23,968, 10 May 1859, "Churn". He did not claim friction, compression or level turning dashers among fixed ones as such, only the rim with the disk working over it, with the dashers and the thumb screw. His only size is the rim, 1/2 to 3/4 in. wide. We use the plain spindle he allows instead of his cone-shaped one, and a crown wheel and pinion for his two pinions; every other size and material is ours.
Materiały
15- 1 sztukaZastępnik
- 1 sztukaZastępnik
- 16 sztukZastępnik
- 1 sztukaZastępnik
- 1 sztukaZastępnik
- 1 sztukaZastępnik
- 3 sztukZastępnik
- 35 sztukZastępnik
- Zastępnik
- 1 sztukaZastępnik
- 1 sztukaZastępnik
- 1 sztukaZastępnik
- Zastępnik
- 1 sztukaZastępnik
- 1 sztukaZastępnik
Wymagane narzędzia
16- Zastępnik
- 1 vendor sell this, none ship to you yetZastępnik
- Zastępnik
- Zastępnik
- 1 vendor sell this, none ship to you yetZastępnik
- Zastępnik
- Zastępnik
- Zastępnik
- 1 vendor sell this, none ship to you yetZastępnik
- Zastępnik
- Zastępnik
- Zastępnik
- Zastępnik
- Zastępnik
Pliki projektowe
5Według tego planu powstaje


Powiązane blueprinty
Te blueprinty dzielą się wiedzą — technikami, materiałami lub zasadami



CC0 Domena publiczna
Ten plan jest udostępniany na licencji CC0. Możesz go swobodnie kopiować, modyfikować, rozpowszechniać i wykorzystywać do dowolnych celów, bez konieczności uzyskiwania zgody.
Wesprzyj Makera kupując produkty przez jego plan, za co zarabia Prowizja Makera ustalony przez sprzedawców, lub stwórz nową iterację tego planu i dołącz go jako połączenie w swoim własnym planie, aby dzielić się przychodami.