ART
BEAUTY & WELLNESS
CRAFT
CULTURE & HISTORY
ENTERTAINMENT
ENVIRONMENT
FOOD & DRINKS
REVERSE ENGINEERING
SCIENCES
SPORTS
TECHNOLOGY
WEARABLES
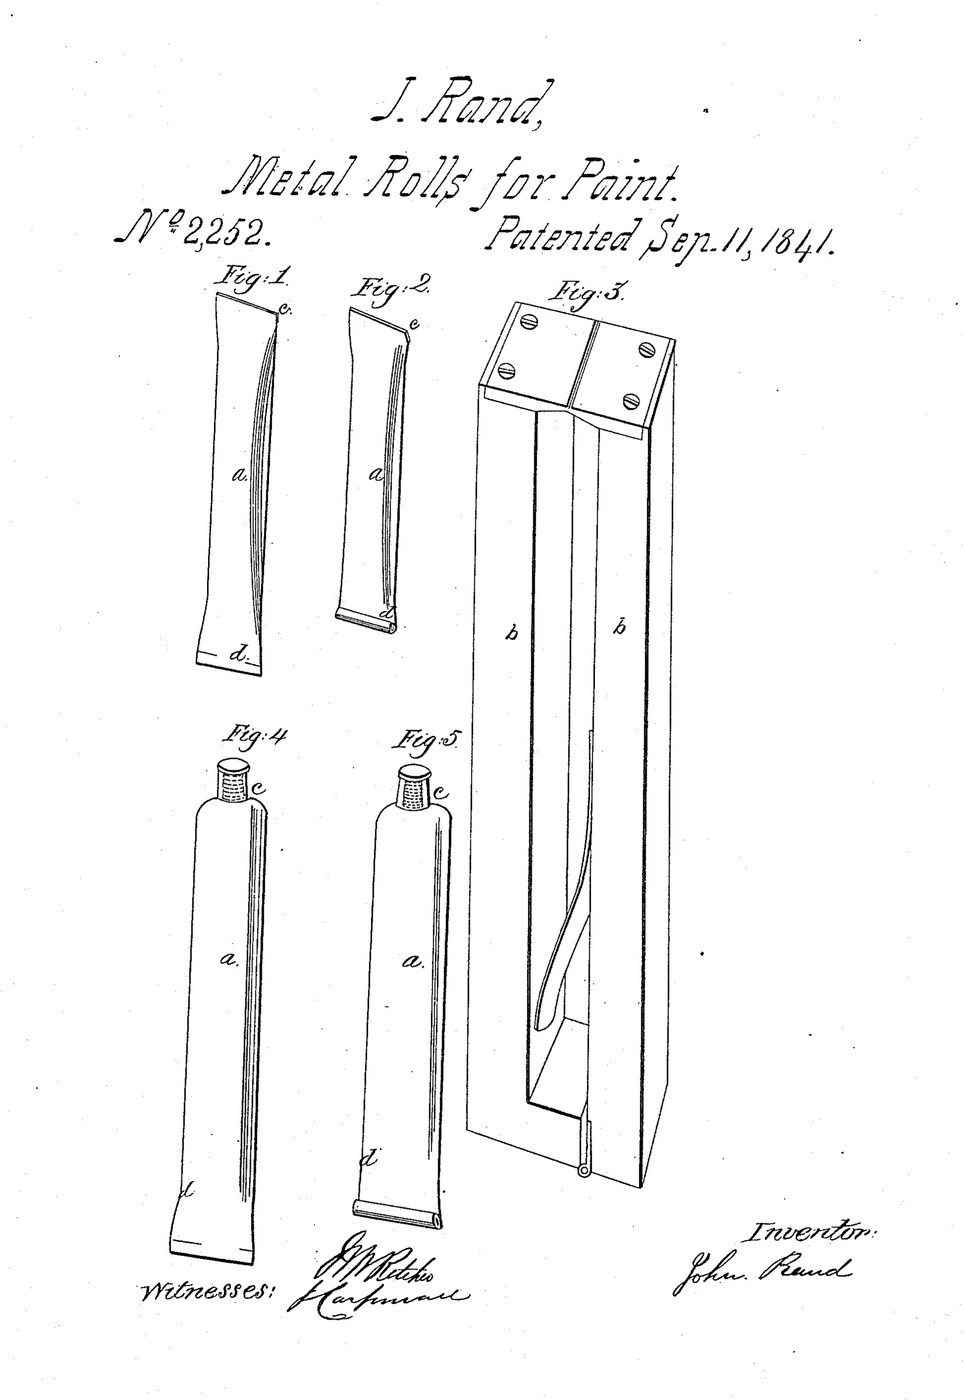


Empty Paint Tube: Soldered Sheet Lead, Rand 1841
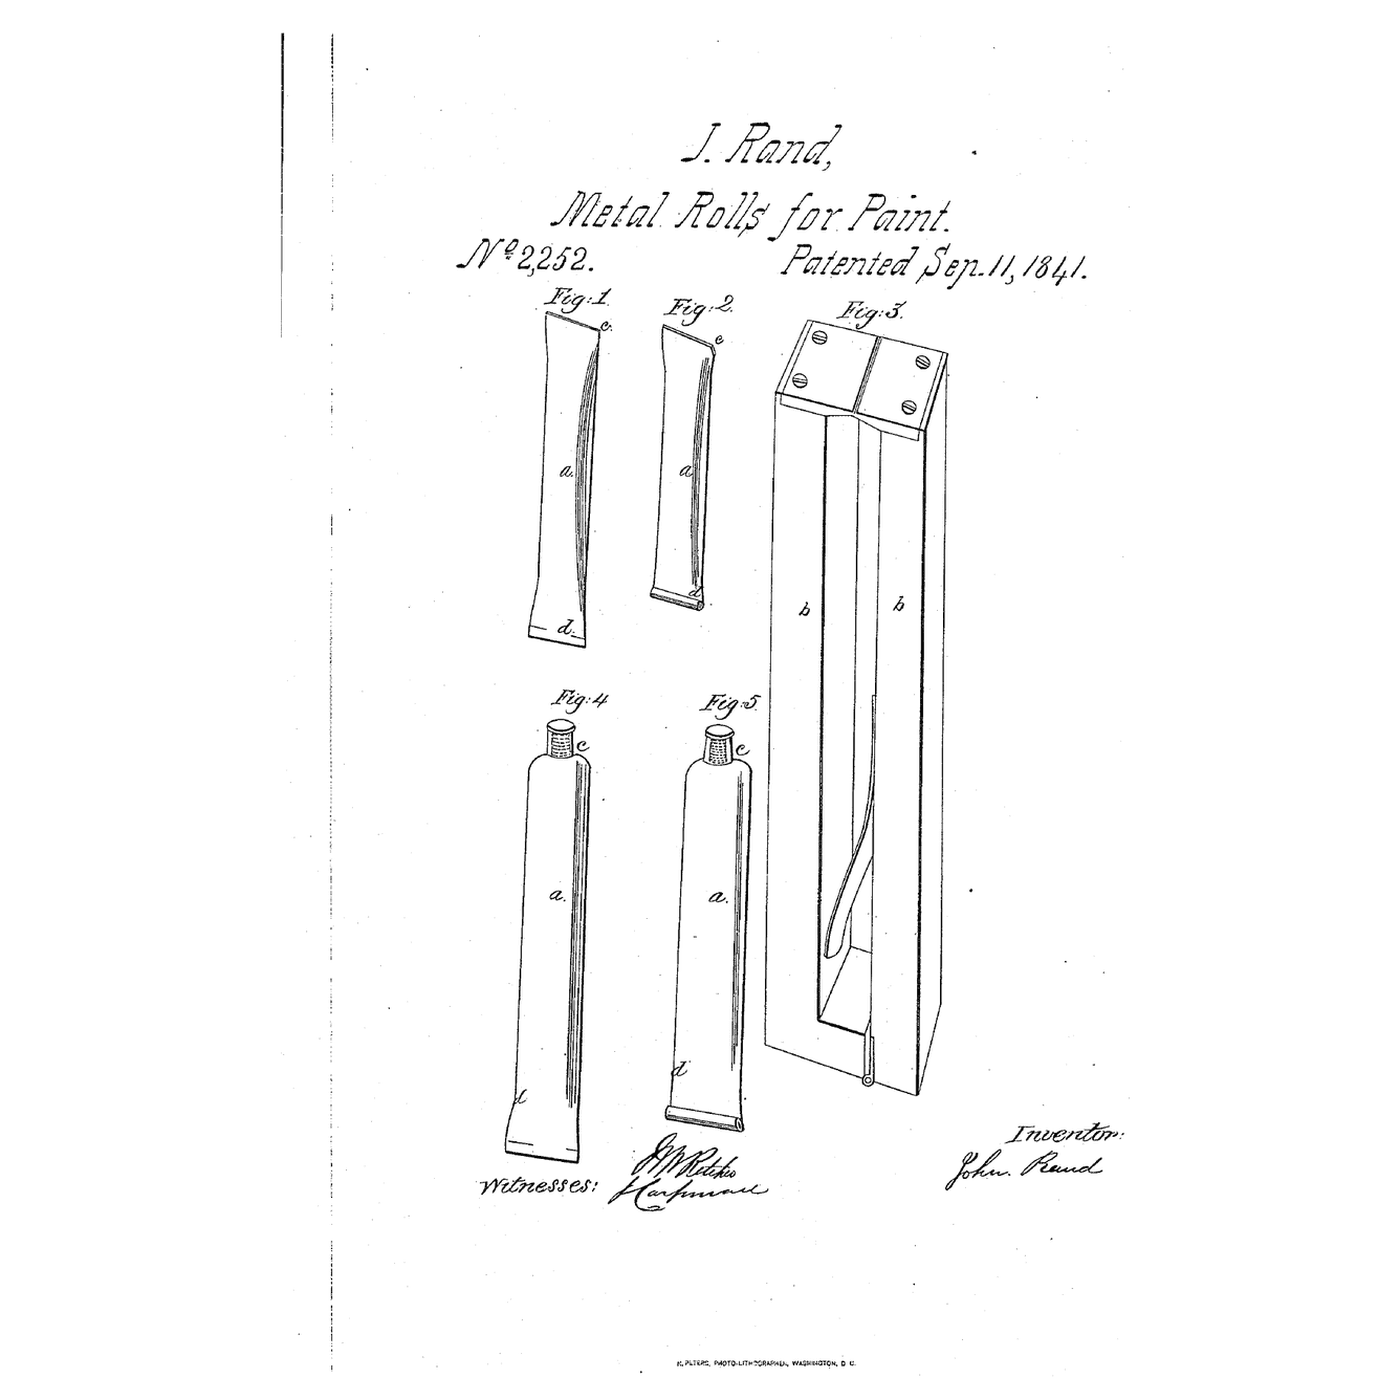
John Rand's 1841 patent names grain-tin, lead and pewter for paint tubes. The metal only has to be thin enough to yield to pressure and stay collapsed. His own tube was drawn tin about 1/75 inch thick, but he writes that a tube of sheet metal with a soldered seam works as well. This is that route in lead: roll a strip round a former, solder the seam, close one end, and leave the other open for filling.
Source: J. Rand, US 2,252 (1841). The sheet thickness, former, flux, size and tools are ours. The picture is the patent's drawing sheet.
Intermediate
1 hour
Instructions
1
1
Cut the strip
Cut the strip
Cut a strip of thin lead sheet as long as the tube and wide enough to go once round the former with a narrow overlap. Rand asks only for metal thin enough to yield to pressure and stay collapsed; ours is Ure's thinner cast sheet, 1/48 in (0.5 mm). Longer tubes need somewhat thicker metal.
Materials for this step:
 Lead Sheet1 as required
Tools needed:
 Tin Snips
 Ruler
2
2
Roll it round a former
Roll it round a former
Roll the strip round a round wooden dowel so the edges overlap, and press the seam flat. The dowel and the overlap are ours.
Tools needed:
 Wooden Dowel
3
3
Solder the seam
Solder the seam
Join the edges by soldering, one of the two ways Rand gives (the other is melting the edges together). Ours: a little rosin flux and tin-lead solder run along the seam with a hot iron, on the dowel. Slide the tube off.
Materials for this step:
 Tin-Lead Solder1 as required
 Soldering Flux Paste (Rosin-Based)1 as required
Tools needed:
 Soldering IronWooden Dowel
4
4
Close one end
Close one end
Press the edges of one end together with flat pliers (Rand used forceps that leave a groove along the end). Close it by adding a little solder with a hot iron. Leave the other end open: the tube is filled from there and then closed the same way.
Materials for this step:
Tin-Lead Solder1 as requiredTools needed:
 Flat-Nose PliersSoldering Iron
Materials
3- 1 as requiredPlaceholder
- 2 as requiredPlaceholder
- 1 as requiredPlaceholder
This blueprint makes

Related Blueprints
These blueprints share knowledge with this one — techniques, materials, or principles that connect them in the learning graph.

CC0 Public Domain
This blueprint is released under CC0. You are free to copy, modify, distribute, and use this work for any purpose, without asking permission.
Support the Maker by purchasing products through their Blueprint where they earn a Maker Commission set by Vendors, or create a new iteration of this Blueprint and include it as a connection in your own Blueprint to share revenue.