
Collaboration
ART
BEAUTY & WELLNESS
CRAFT
CULTURE & HISTORY
ENTERTAINMENT
ENVIRONMENT
FOOD & DRINKS
REVERSE ENGINEERING
SCIENCES
SPORTS
TECHNOLOGY
WEARABLES
Saddle Breastplate: Rounded Side Straps, Neck Strap and Girth Strap on Covered Rings (Hasluck, Saddlery, 1904)
Tex

Created by

Tex

13. November 2026FO
1
0
0
0
0

Saddle Breastplate: Rounded Side Straps, Neck Strap and Girth Strap on Covered Rings (Hasluck, Saddlery, 1904)

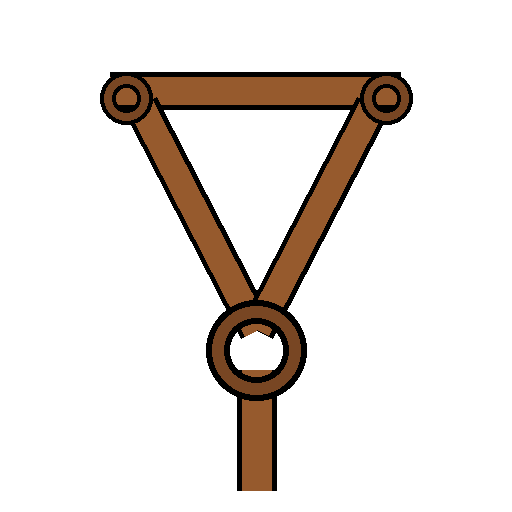
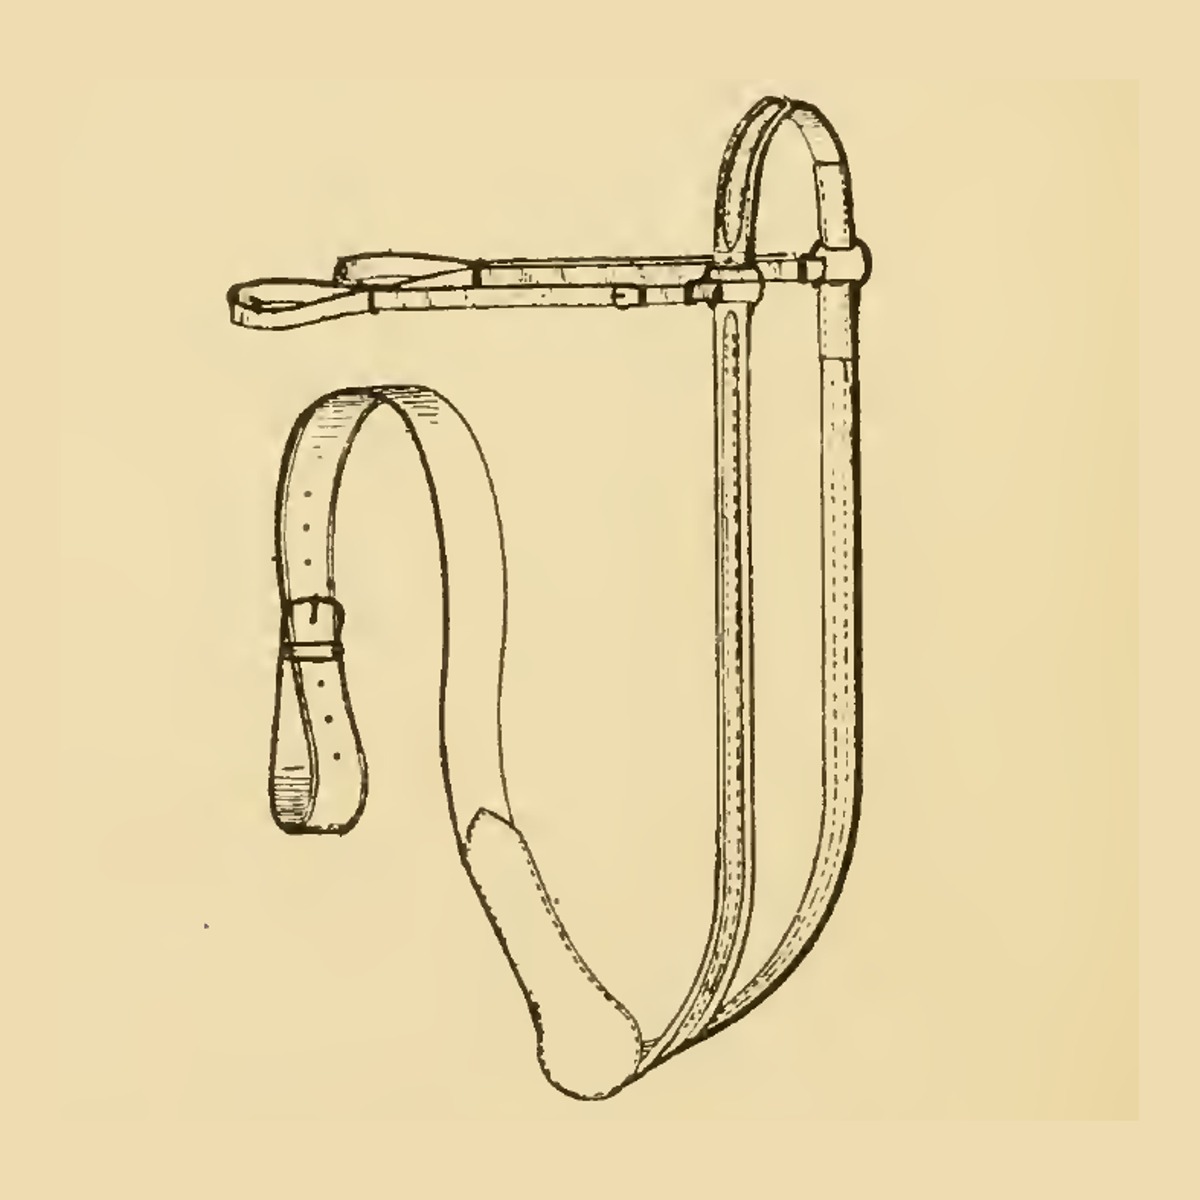
A breastplate stops a riding saddle sliding backwards, as a crupper stops it sliding forwards. This is the hunting saddle breastplate from Paul N. Hasluck's Saddlery (1904): two rounded side straps from the shoulders to a ring at the chest, a cross strap over the neck, two small buckle straps to the saddle staples, and a strap between the forelegs to the girth. Every size is his.
Advanced
About 1 day

Instructions

1

His sizes in centimetres

Loading Jupyter Notebook...
2

Read Saddlery, ch. V

"Breastplates (Fig. 10) are made for hunting saddles to prevent them falling backwards, just as the crupper keeps them from advancing too far."
3

Get the rings and buckles

You need one 1-1/2 in covered ring, two 1 in covered rings, two 5/8 in covered buckles and one 1 in covered buckle.

Materials for this step:

Covered RingCovered Ring3 pieces
Covered BuckleCovered Buckle3 pieces

Tools needed:

Tape MeasureTape Measure
4

Make the two side straps

Cut two side straps 7/8 in wide and 2 ft long when turned over the rings at each end. Round the top on the groove board, stuffing it with strands of soft cord. Stitch them along both sides very finely with silk cotton or linen thread, putting a 1 in ring at one end of each and both other ends into the 1-1/2 in ring. Polish the edges well after stitching.

Materials for this step:

Harness LeatherHarness Leather1 piece
CordCord1 piece
Linen ThreadLinen Thread1 piece
BeeswaxBeeswax1 piece
Covered RingCovered Ring3 pieces

Tools needed:

Leather KnifeLeather Knife
Groove BoardGroove Board
AwlAwl
Two Harness NeedlesTwo Harness Needles
Stitching PonyStitching Pony
Edge SlickerEdge Slicker
Tape MeasureTape Measure
5

Make the cross strap

Cut a 1-3/8 in strap to be 10 in long when bent over the rings at each end; shave the ends and prick the sides finely like the shoulder piece. Cut another piece 9-1/4 in long when bent for the rings, 7/8 in wide at both ends and widening gradually to 1-3/4 in in the centre. Put the chapes in the 1 in rings and stitch both pieces together.

Materials for this step:

Harness LeatherHarness Leather1 piece
Linen ThreadLinen Thread1 piece
BeeswaxBeeswax1 piece

Tools needed:

Leather KnifeLeather Knife
Pricking IronPricking Iron
AwlAwl
Two Harness NeedlesTwo Harness Needles
Stitching PonyStitching Pony
Tape MeasureTape Measure
6

Make the two buckle straps

Make two 5/8 in straps 2 ft long, one end prepared for the buckle, the other narrowed; edge, rub and crease them with a hot checker. Put one in each 1 in ring to within 3 in of the buckle. Double the 3 in length with the buckle on top and make two loops between the two leathers. Stitch from the ring along both sides to the buckle, fastening the loops at the same time. Finish the edges of the stitched part and make seven or eight holes in the points.

Materials for this step:

Harness LeatherHarness Leather1 piece
Covered BuckleCovered Buckle2 pieces
Linen ThreadLinen Thread1 piece
BeeswaxBeeswax1 piece

Tools needed:

Leather KnifeLeather Knife
Edge BevellerEdge Beveller
Edge SlickerEdge Slicker
Creasing ToolCreasing Tool
Propane TorchPropane Torch
Loop StickLoop Stick
AwlAwl
Two Harness NeedlesTwo Harness Needles
Leather Hole PunchLeather Hole Punch
7

Make the girth strap

Cut a strap 1-1/4 in wide and 3 ft long. Narrow it to 1 in at 1 ft from the bend at the ring and turn it down for the 1 in buckle at the narrow end; edge, rub and crease it, then put the buckle in the reverse way. Cut eight or nine holes, beginning about 8 in from the buckle, and buckle the strap back on itself to make a loop for the girth (bellyband) to pass through.

Materials for this step:

Harness LeatherHarness Leather1 piece
Covered BuckleCovered Buckle1 piece
Linen ThreadLinen Thread1 piece
BeeswaxBeeswax1 piece

Tools needed:

Leather KnifeLeather Knife
Edge BevellerEdge Beveller
Edge SlickerEdge Slicker
Creasing ToolCreasing Tool
Propane TorchPropane Torch
AwlAwl
Two Harness NeedlesTwo Harness Needles
Leather Hole PunchLeather Hole Punch
8

Fit the safe

Put the other end of the girth strap in the 1-1/2 in ring. Cut a safe to go under it, running up under the ring round the top part and down about 3-1/2 in below the bend, narrowing towards the end almost to the width of the strap. Crease the safe and place it under the chape and ring; stitch it down on both sides with a fancy stitch in the centre. Line the safe with chamois or very thin buff, stitched in all round, stuff a little flock through the opening at the bottom, and close the opening with fancy stitching such as an arrow point. He adds that it can be made of single leather without lining, only the bends being stitched.

Materials for this step:

Harness LeatherHarness Leather1 piece
Chamois LeatherChamois Leather1 piece
Wool FlockWool Flock1 piece
Linen ThreadLinen Thread1 piece
BeeswaxBeeswax1 piece

Tools needed:

Leather KnifeLeather Knife
Creasing ToolCreasing Tool
Propane TorchPropane Torch
AwlAwl
Two Harness NeedlesTwo Harness Needles
Stitching PonyStitching Pony
9

Put it on the horse

The long side straps run down from the shoulder to the chest, and the short cross strap passes over the neck at the top. The two small straps buckle to the staples in front of the saddle, and the girth strap runs from the big ring under the belly between the forelegs to the girth.
10

Troubleshooting

Breastplate troubleshooting.

Flow

Loading...
11

History and honest limits

From **Saddlery**, edited by Paul N. Hasluck, David McKay, 1904 (archive.org saddlery00hasl), chapter V, "Saddle Cruppers, Breastplates, and Other Accessories", breastplates, pp. 41-44, Fig. 10; every fraction was read on the scan. He says the cross strap is pricked "like the shoulder piece" without describing a shoulder piece; check the cross strap against Fig. 10. The crupper, martingale, girths, stirrup leathers and saddle cloths of the same chapter are not made here. The tools and metric figures are ours.

Materials

8

Tools Required

13

CC0 Public Domain

This blueprint is released under CC0. You are free to copy, modify, distribute, and use this work for any purpose, without asking permission.

Support the Maker by purchasing products through their Blueprint where they earn a Maker Commission set by Vendors, or create a new iteration of this Blueprint and include it as a connection in your own Blueprint to share revenue.

Discussion

(0)

Log in to join the discussion

Loading comments...