Collaboration
ART
BEAUTY & WELLNESS
CRAFT
CULTURE & HISTORY
ENTERTAINMENT
ENVIRONMENT
FOOD & DRINKS
REVERSE ENGINEERING
SCIENCES
SPORTS
TECHNOLOGY
WEARABLES
Rinsing-Ring Churn: Lid, Gearing, Dasher and Breaker Bars Lift Out as One, a Perforated Ring Under the Lid Washes Them
Buttercup

Created by

Buttercup

11. November 2026IE
0
0
0
0
0

Rinsing-Ring Churn: Lid, Gearing, Dasher and Breaker Bars Lift Out as One, a Perforated Ring Under the Lid Washes Them

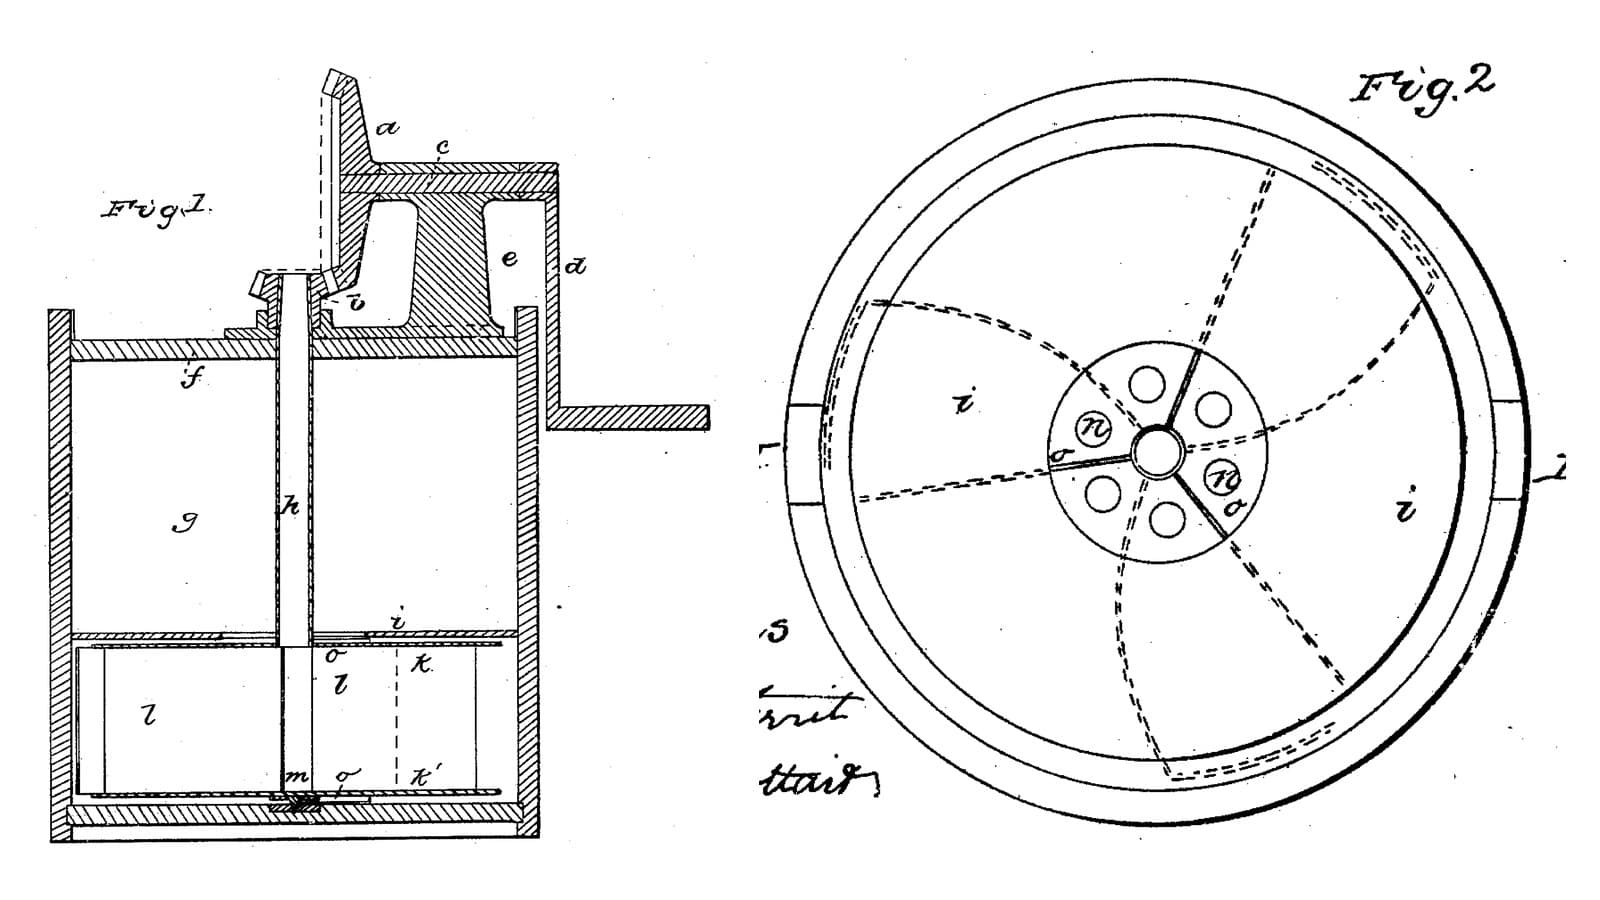
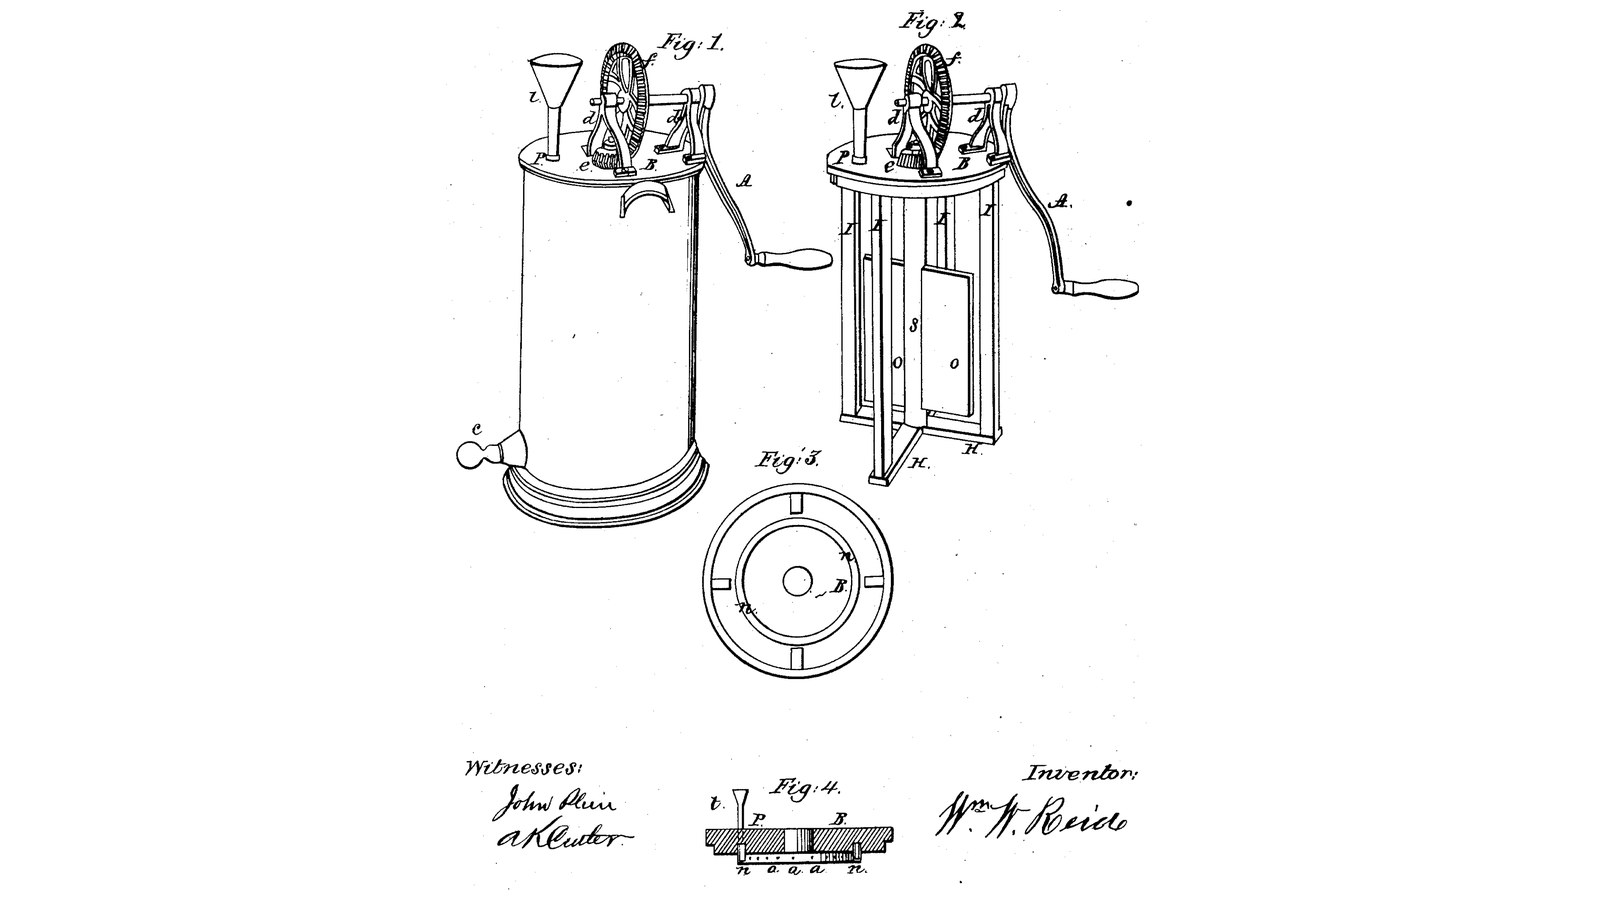
William W. Reid of Rochester, New York, received US 30,424, dated 16 October 1860, for a geared churn whose lid, gearing, two-slat dasher and four upright breaker bars are joined into one frame that lifts out of the body together. Under the lid runs a ring-shaped tube with small holes on both faces: water poured into a funnel on the lid sprays inward onto the dasher and outward onto the bars and wall, rinsing them, or tempering the cream, without lifting the lid. The patent's only size is the holes about an inch apart; every other size here is ours.
Intermediate
About 2 days

Instructions

1

The rinsing ring

Loading Jupyter Notebook...
2

A geared frame that sits on the churn, four months before

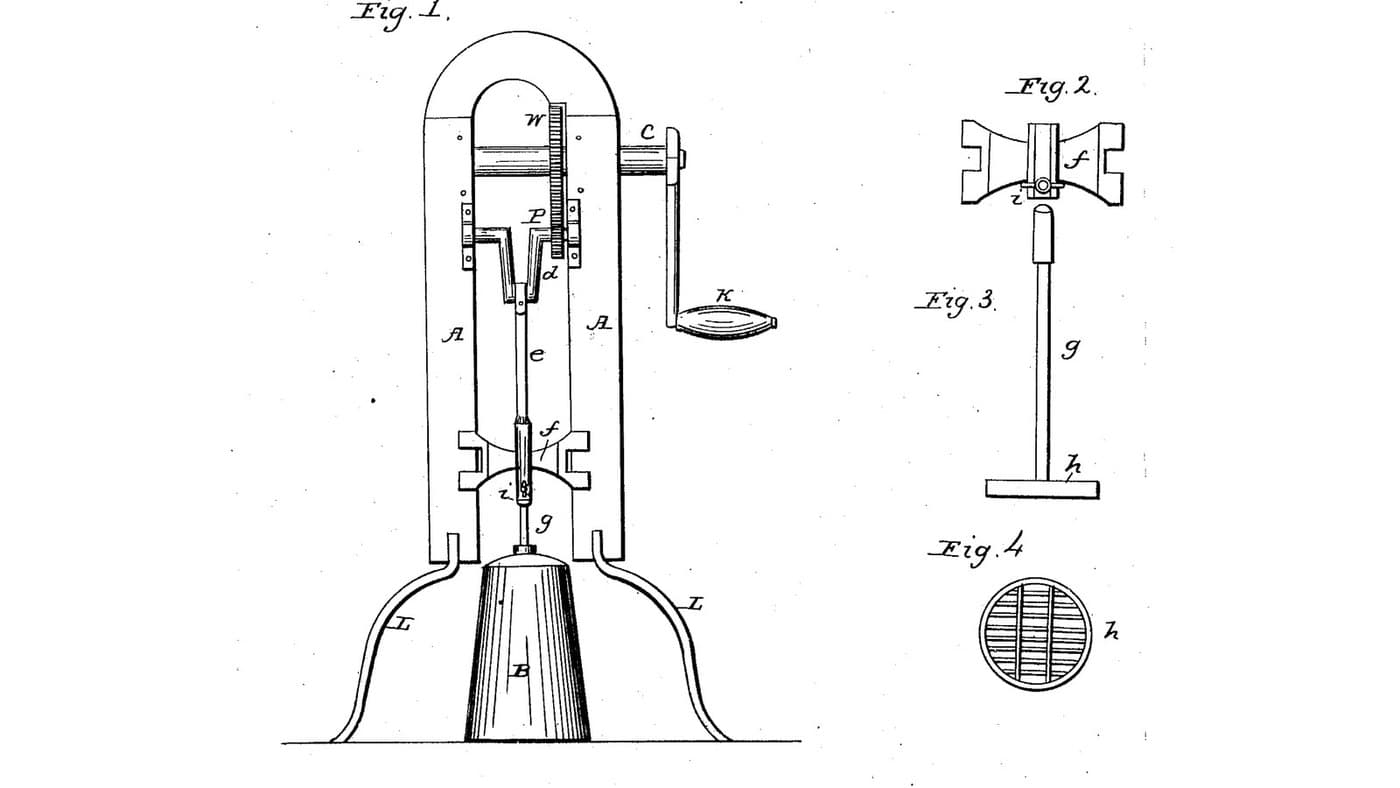
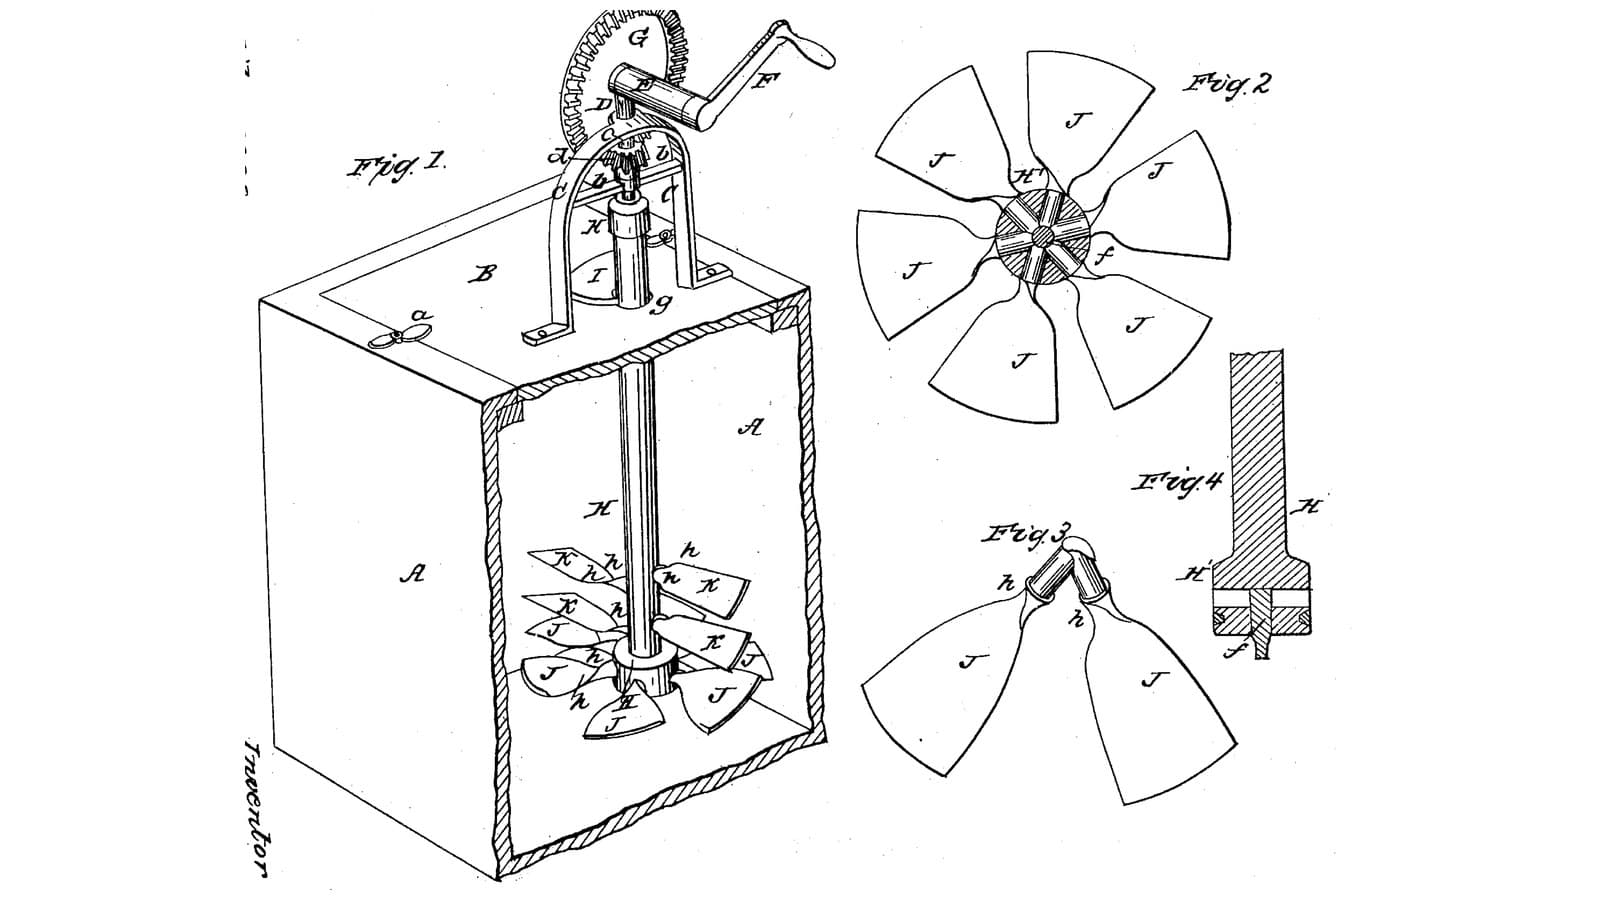
Evans sets his gearing on a frame over the churn. Reid joins gearing, dasher and breakers to the lid so all come out together.
3

Read US 30,424

"The tunnel t, fits into a short tube P, which passes through the lid B, and is inserted into the annular tube n, so that when water is poured into the tunnel t, it is projected in numerous small jets both inwardly upon the dasher and also outwardly against the upright bars I, I, I, I, and sides of the churn, and thus washes off the milk and small particles of butter."
4

Body and faucet C

Use a 20-litre food-grade bucket as the body. Bore a 21 mm hole 40 mm above its floor and fit a brass spigot C with its washers and nut. Screw two hardwood stop blocks 22 x 24 x 25 mm inside the rim, one above the spigot and one opposite, from outside through the wall, so the lid cannot turn.

Materials for this step:

20-Liter Bucket20-Liter Bucket1 piece
Brass SpigotBrass Spigot1 piece
Hardwood BoardHardwood Board1 piece
Wood ScrewsWood Screws4 pieces

Tools needed:

Spade Bit SetSpade Bit Set
Cordless DrillCordless Drill
Adjustable SpannerAdjustable Spanner
Screwdriver SetScrewdriver Set
5

Print the ring tube n

The annular tube n: hollow, 16 x 16 mm in section with 2 mm walls, 196 mm across outside and 164 inside, with 23 holes of 2 mm on its inner face and 23 on its outer face, about an inch apart, and an inlet on top for the tube P. Needs a 200 mm bed. PETG, 0.2 mm layers, 30 % infill, 4 walls.
Design FileSTLCC0 - Free
6

Lid B, ring n, tube P and funnel t

Cut a 12 mm HDPE lid B to the bucket's top, 304 mm across, bore it 16.6 mm at the centre as the shaft's top bearing, and cut two notches at its edge to drop over the stop blocks. Rout a groove 17 mm wide and 8 mm deep under it, 180 mm across its middle, and seal the ring tube n into it so half the ring stands below. Bore 12.2 mm through the lid over the ring's inlet, 90 mm out from the centre, and seal in a 12 mm stainless tube P 40 mm long standing 30 mm proud; set a small kitchen funnel t in it.

Materials for this step:

HDPE SheetHDPE Sheet1 piece
PETG FilamentPETG Filament1 piece
Silicone SealantSilicone Sealant1 piece
Stainless Steel TubeStainless Steel Tube1 piece
Kitchen FunnelKitchen Funnel1 piece

Tools needed:

FDM 3D PrinterFDM 3D Printer
CompassCompass
JigsawJigsaw
RouterRouter
Spade Bit SetSpade Bit Set
Cordless DrillCordless Drill
Drill Bit SetDrill Bit Set
HacksawHacksaw
Files (Hand File)Files (Hand File)
7

Bars H and I, shaft S and dasher O

Halve two hardwood bars H 260 x 40 x 20 mm across each other and glue them; bore a 10.6 mm socket 20 mm deep at the middle. Screw four hardwood bars I 20 mm square and 351 mm long upright on their ends, 120 mm from the centre, and their tops to the lid's underside. Cut a hardwood shaft S 32 mm square and 325 mm long, set a 10 mm stainless pin 15 mm out of its foot and a 16 mm stainless rod 108 mm long 20 mm into its top. Screw two hardwood slats O 95 x 12 x 290 mm on opposite faces of S, reaching out opposite ways, 15 mm above its foot. Stand S in the socket and up through the lid's bearing.

Materials for this step:

Hardwood BoardHardwood Board2 pieces
Wood GlueWood Glue1 piece
Wood ScrewsWood Screws16 pieces
Stainless Steel RodStainless Steel Rod2 pieces

Tools needed:

Table SawTable Saw
Chisel Set - WoodChisel Set - Wood
Cordless DrillCordless Drill
Drill Bit SetDrill Bit Set
HacksawHacksaw
Bar ClampBar Clamp
Screwdriver SetScrewdriver Set
Tape MeasureTape Measure
8

Print the wheel f

The wheel f on the crank shaft: a crown wheel of 42 teeth, module 2.5, 16.2 mm bore. PETG, 0.2 mm layers, 30 % infill, 4 walls.
Design FileSTLCC0 - Free
9

Print the pinion e

The pinion e on the top of S: 14 teeth, module 2.5, 16.2 mm bore. PETG, 0.2 mm layers, 30 % infill, 4 walls.
Design FileSTLCC0 - Free
10

Supports d, wheel f, pinion e and crank A

Pin the pinion e on the rod of S with its teeth centred 40 mm above the lid. Screw two hardwood supports d 50 x 25 x 118 mm to the lid either side of it, one 60 to 85 mm in front and one 25 to 50 mm behind, bored 16.6 mm across 92 mm up. Run a 16 mm stainless crank shaft 180 mm long through them, pin the wheel f on it meshing e, hold it with a shaft collar, and pin on a crank A of mild steel flat bar, 100 mm throw, with a hardwood handle.

Materials for this step:

Stainless Steel RodStainless Steel Rod1 piece
Hardwood BoardHardwood Board1 piece
Shaft CollarShaft Collar1 piece
Split PinSplit Pin3 pieces
Mild Steel Flat BarMild Steel Flat Bar1 piece
Hardwood DowelsHardwood Dowels1 piece
Wood ScrewsWood Screws4 pieces
PETG FilamentPETG Filament1 piece

Tools needed:

FDM 3D PrinterFDM 3D Printer
Table SawTable Saw
Cordless DrillCordless Drill
Drill Bit SetDrill Bit Set
HacksawHacksaw
Files (Hand File)Files (Hand File)
Bench ViseBench Vise
Screwdriver SetScrewdriver Set
11

The build in 3D

FreeCAD model of this build, the bucket and lid cut open: the crossed bars and four upright bars, the shaft with its two slats, the ring tube under the lid with its holes, the tube and funnel, the spigot and stop blocks, and the gearing and crank on the lid.
Design FileBLENDCC0 - Free
12

Churn and rinse

Pour about 12 litres of heavy cream at about 15 °C, checked with the thermometer, into the bucket and lower the whole frame in, the lid's notches over the stop blocks. Turn the crank steadily, timing it; to warm or cool the cream, pour a little warm or cold water into the funnel. When the butter comes, draw the buttermilk off at the spigot into a bowl, then pour cold water into the funnel to rinse the dasher, bars and walls, turning slowly, and draw it off. Lift the frame out, take out the butter, wash it in cold water until it runs clear, salt and weigh it.

Materials for this step:

Heavy CreamHeavy Cream12 l
WaterWater1 piece
Coarse Sea SaltCoarse Sea Salt1 piece

Tools needed:

Leave-In Probe ThermometerLeave-In Probe Thermometer
StopwatchStopwatch
Digital Kitchen ScaleDigital Kitchen Scale
Stainless Steel Mixing Bowl (Large)Stainless Steel Mixing Bowl (Large)
13

Troubleshooting

Rinsing-ring churn troubleshooting.

Flow

Loading...
14

History and honest limits

**William W. Reid** of Rochester, Monroe County, New York, US 30,424, 16 October 1860, "Churn". He claimed "the annular perforated tube n in combination with the bars I I and dasher O". His tube was rectangular tin; ours is printed. His wheel and pinion were bevel gears on cast supports; ours are a printed crown wheel and pinion on wooden supports. The holes about an inch apart are his; every other size here is ours.

Materials

18

Tools Required

20

Design Files

4

CC0 Public Domain

This blueprint is released under CC0. You are free to copy, modify, distribute, and use this work for any purpose, without asking permission.

Support the Maker by purchasing products through their Blueprint where they earn a Maker Commission set by Vendors, or create a new iteration of this Blueprint and include it as a connection in your own Blueprint to share revenue.

Discussion

(0)

Log in to join the discussion

Loading comments...