ART
BEAUTY & WELLNESS
CRAFT
CULTURE & HISTORY
ENTERTAINMENT
ENVIRONMENT
FOOD & DRINKS
REVERSE ENGINEERING
SCIENCES
SPORTS
TECHNOLOGY
WEARABLES


Rotary Stirring Churn: Three Floats That Stop the Cream Merely Going Round
Goodwin set out to prevent "a gyratory motion of the fluid" in a stirred churn.
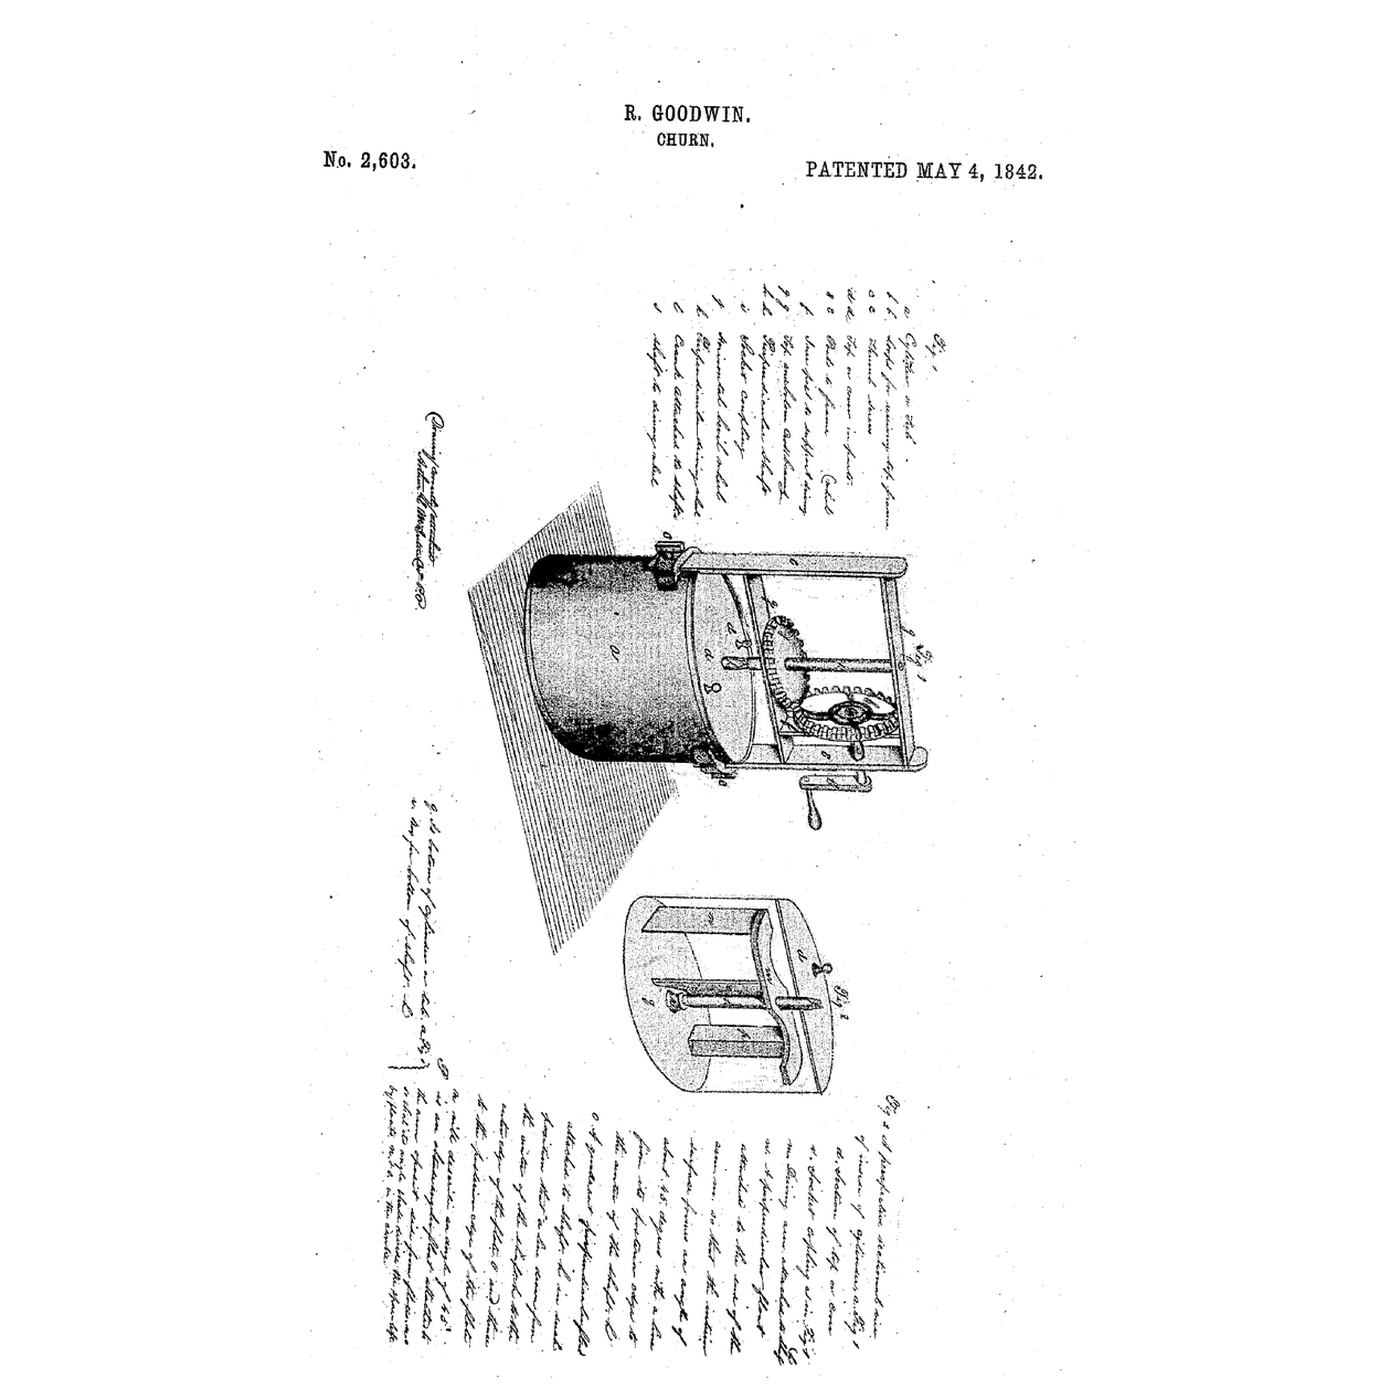
Roderick Goodwin of North Bergen, New York, received US 2,603, dated 4 May 1842, for what he called "the improved rotary stirring-churn": a tub with a frame clamped on top by thumb screws, a crank turning mitred wheels and an upright shaft, and on its arm three floats. The first, at about 45°, throws the cream "inwardly toward the said lower shaft"; a curved float at the shaft throws it "back toward the sides of the churn"; a third, bent to an obtuse angle, divides the stream between them.
This rung works out the floats' push, then prints the three-float rotor, fits it to a stock pot, and makes butter.
Intermediate
About 3 hours, plus printing
Instructions
1
1
Shaft speed and float push
Shaft speed and float push
Loading Jupyter Notebook...
2
2
Upright shafts with beaters before it
Upright shafts with beaters before it
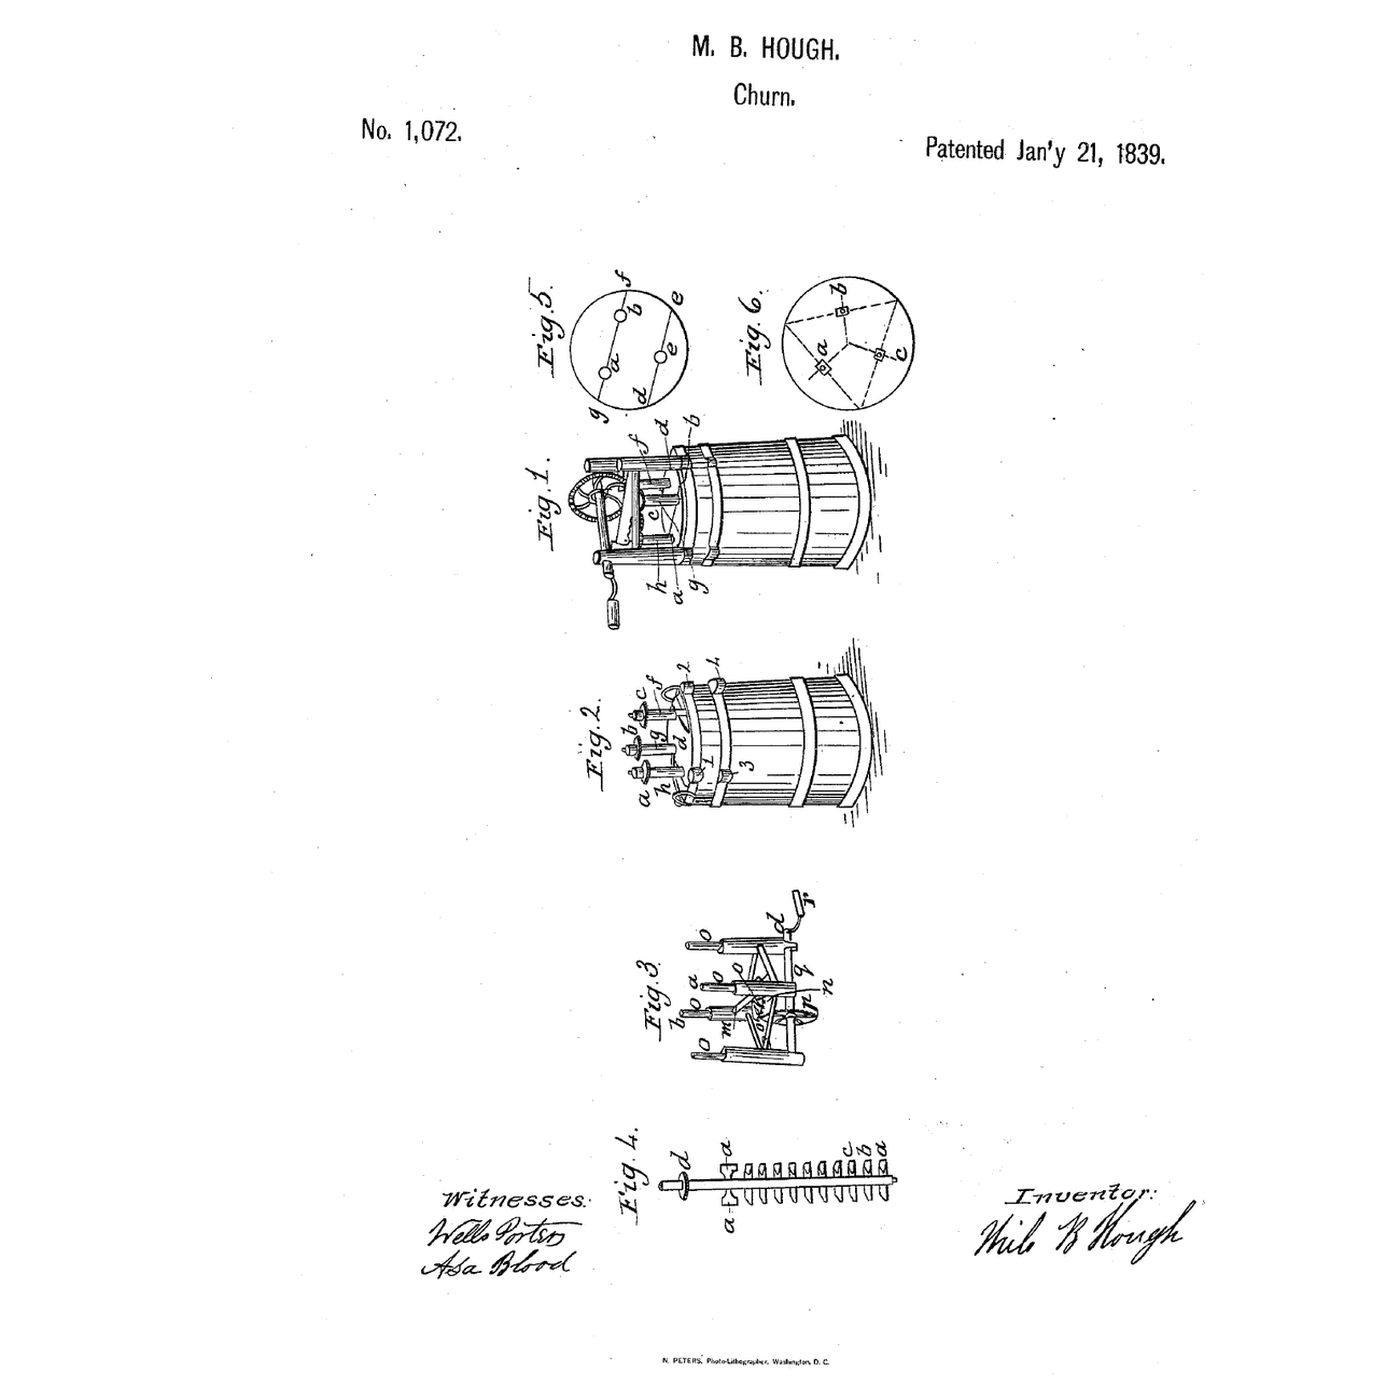
The embedded blueprint turns three upright shafts in a round churn. Goodwin uses one shaft and shapes its floats so the cream cannot simply swirl round.
3
3
Read US 2,603
Read US 2,603
"To the long end of the arm I attach firmly a perpendicular float (n, Fig. 2,) its outer edge being parallel to the sides of the churn and reaching nearly to the bottom being in width about one third of the length from the shaft to the end of the arm to which it is attached, and placed in such position that the side of the float would form an angle of about forty five degrees with a line drawn from its inner edge to the center of the lower shaft."
4
4
Print the rotor and fittings
Print the rotor and fittings
Print the rotor upside down on its arm (/uploads/blueprints/rotary-stirring-churn-floats.stl): the arm with the long 45° float, the curved float at the shaft and the angled float on the short end. Print the foot socket (/uploads/blueprints/rotary-stirring-churn-foot-socket.stl), the top bearing (/uploads/blueprints/rotary-stirring-churn-top-bearing.stl) and the crank arm (/uploads/blueprints/rotary-stirring-churn-crank-arm.stl). Print in PLA at 0.2 mm layers, 30 % infill, 4 walls; wash before first use.
Materials for this step:
 PLA Filament1 piece
Tools needed:
 FDM 3D Printer
5
5
Fit the pot
Fit the pot
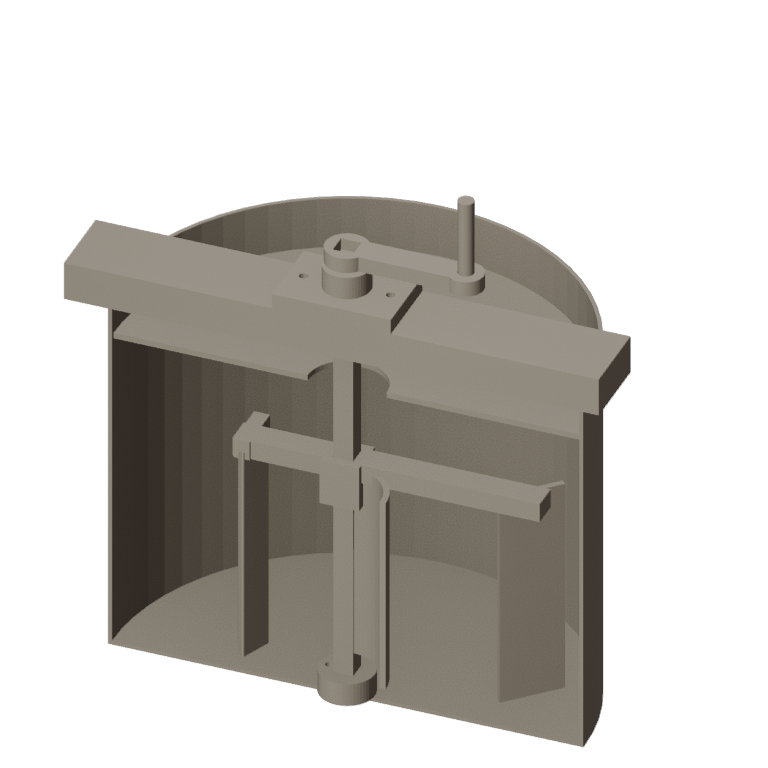
Bed the foot socket in the centre of a stock pot's floor with silicone. Screw the top bearing to a pine batten laid across the pot's rim, its hole over the socket. Cut a lid from plywood in two halves with a 40 mm hole where they meet, for air, as his two lids.
Materials for this step:
 Stock Pot1 piece
 Silicone Sealant1 piece
 Pine Board1 piece
 Plywood Sheet1 piece
 #8 x 1" Wood Screw1 piece
Tools needed:
 Hand Saw
 Coping Saw
 Cordless Drill
 Drill Bit Set
 Screwdriver Set
6
6
Shaft and crank
Shaft and crank
Cut a 10 mm square hardwood shaft from the socket to 30 mm above the bearing. Slide the rotor on so its floats clear the floor, glue it, stand the shaft in the socket and through the bearing, and glue the crank arm and a dowel handle on top.
Materials for this step:
 Hardwood Dowels1 piece
 Wood Glue1 piece
Tools needed:
Hand Saw Sandpaper
7
7
The build in 3D
The build in 3D
FreeCAD model of this build, not of the patent: the pot cut away to show the rotor on its square shaft — the long float at 45°, the curved float at the shaft and the angled float — with the foot socket, the batten, top bearing and crank, and half the lid.
8
8
Crank and make butter
Crank and make butter
Let the heavy cream stand until it reaches about 15 °C, checked with the thermometer. Pour in 1 litre, fit the lid halves, and crank steadily; time until the butter comes. Pour off the buttermilk, add cold water, churn a little and pour off again until it runs clear; work in a pinch of salt and weigh the butter.
Materials for this step:
 Heavy Cream1000 ml
 Coarse Sea Salt1 piece
 Water1 piece
Tools needed:
 Leave-In Probe Thermometer
 Stopwatch
 Digital Kitchen Scale
 Stainless Steel Mixing Bowl (Large)
9
9
Floats that scrape, cream that swirls
Floats that scrape, cream that swirls
Rotary stirring churn troubleshooting.
Flow
Loading...
10
10
History and honest limits
History and honest limits
**Roderick Goodwin** of North Bergen, Genesee County, New York, received US 2,603, dated 4 May 1842. His frame's two posts went into loops on the tub, held by thumb screws, so it could be raised, lowered or taken off; the upper and lower shafts joined by a square tenon and socket; the whole could be wood, or partly wood and partly iron or other metal, and "can be separated in a moment for the purpose of cleaning." He claimed the shape, position, arrangement and relative situation of the floats on the arm.
**Honest limits.** A stock pot, a batten and printed parts stand in for his tub and frame, and our crank turns the shaft directly, without his mitred wheels. FDM prints hold food in their layer lines, so wash well and replace when worn. Your times and weights are the result.
Materials
11- 1 piecePlaceholder
- 1 piecePlaceholder
- 1 piecePlaceholder
- 1 piecePlaceholder
- 1 piecePlaceholder
- 1 piecePlaceholder
- 1 piecePlaceholder
- 1 piecePlaceholder
- 1000 mlPlaceholder
- 1 piecePlaceholder
- 1 piecePlaceholder
Tools Required
11- Placeholder
- Placeholder
- Placeholder
- 1 vendor sell this, none ship to you yetPlaceholder
- Placeholder
- Placeholder
- Placeholder
- Placeholder
- Placeholder
- Placeholder
- Placeholder
Design Files
1Related Blueprints
These blueprints share knowledge with this one — techniques, materials, or principles that connect them in the learning graph.



CC0 Public Domain
This blueprint is released under CC0. You are free to copy, modify, distribute, and use this work for any purpose, without asking permission.
Support the Maker by purchasing products through their Blueprint where they earn a Maker Commission set by Vendors, or create a new iteration of this Blueprint and include it as a connection in your own Blueprint to share revenue.