ART
BEAUTY & WELLNESS
CRAFT
CULTURE & HISTORY
ENTERTAINMENT
ENVIRONMENT
FOOD & DRINKS
REVERSE ENGINEERING
SCIENCES
SPORTS
TECHNOLOGY
WEARABLES


Tilting-Tub Counter-Fan Churn: Two Fans Turn Opposite Ways, the Tub Tips to Drain and Work
Brown and Bigelow wanted one churn to make the butter and then work it, by tipping the tub on its side.
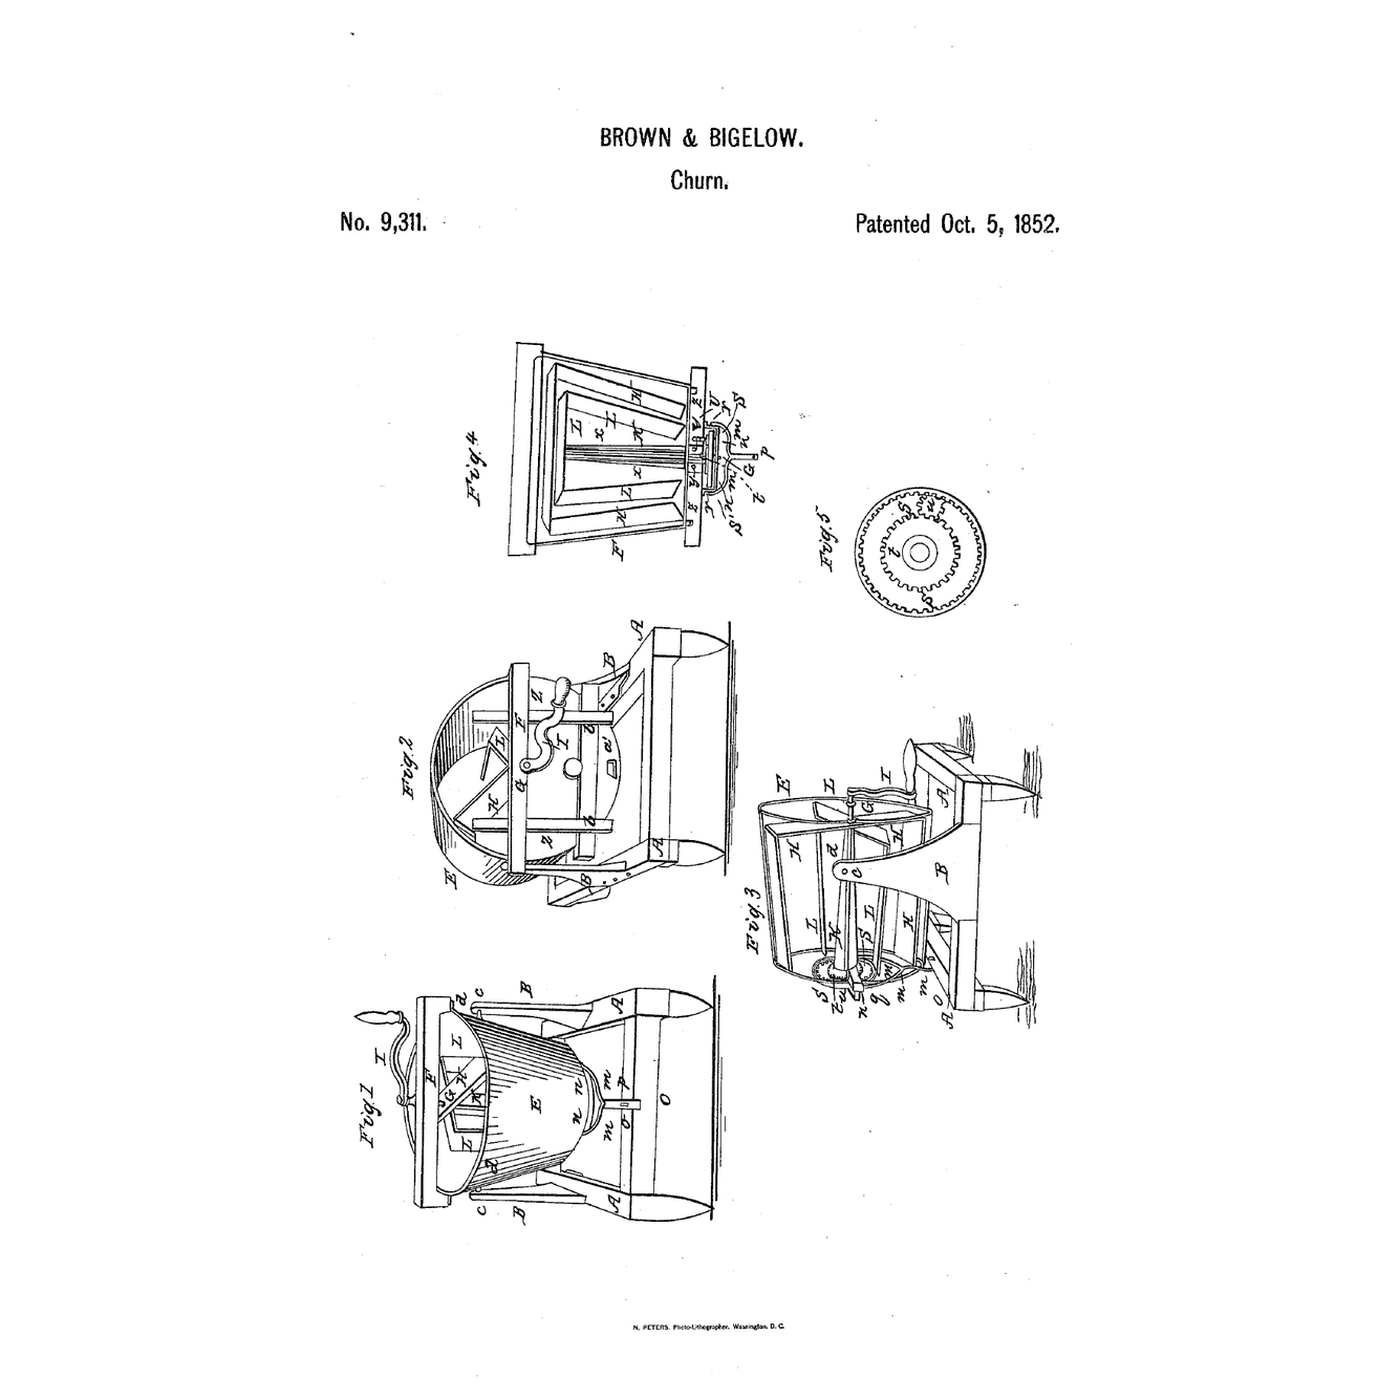
Lucian A. Brown and Hubbard Bigelow of Hartford, Connecticut, received US 9,311, dated 5 October 1852, assigned to Henry K. W. Welch. Their conical tub E swings on journals between two standards. The crank turns a fan H on the shaft G; a shell with inside gear on G's lower end turns, through a small pinion u, a spur gear t on a hollow shaft round G, which carries a second fan L the opposite way. A conical tube K, of tin or any other suitable material and watertight to the tub's bottom, keeps the cream from the hollow shaft. When the butter has come, the tub is tipped about 90 degrees: the buttermilk runs out at an aperture in the cover and the turning fans knead, work and roll the butter.
This rung works out the gear train, then prints the gears, inner fan and conical tube, builds the tub and frame, and makes and works butter.
Advanced
About 6 hours, plus printing
Instructions
1
1
The gear train
The gear train
Loading Jupyter Notebook...
2
2
Gears driving more than one beater before it
Gears driving more than one beater before it
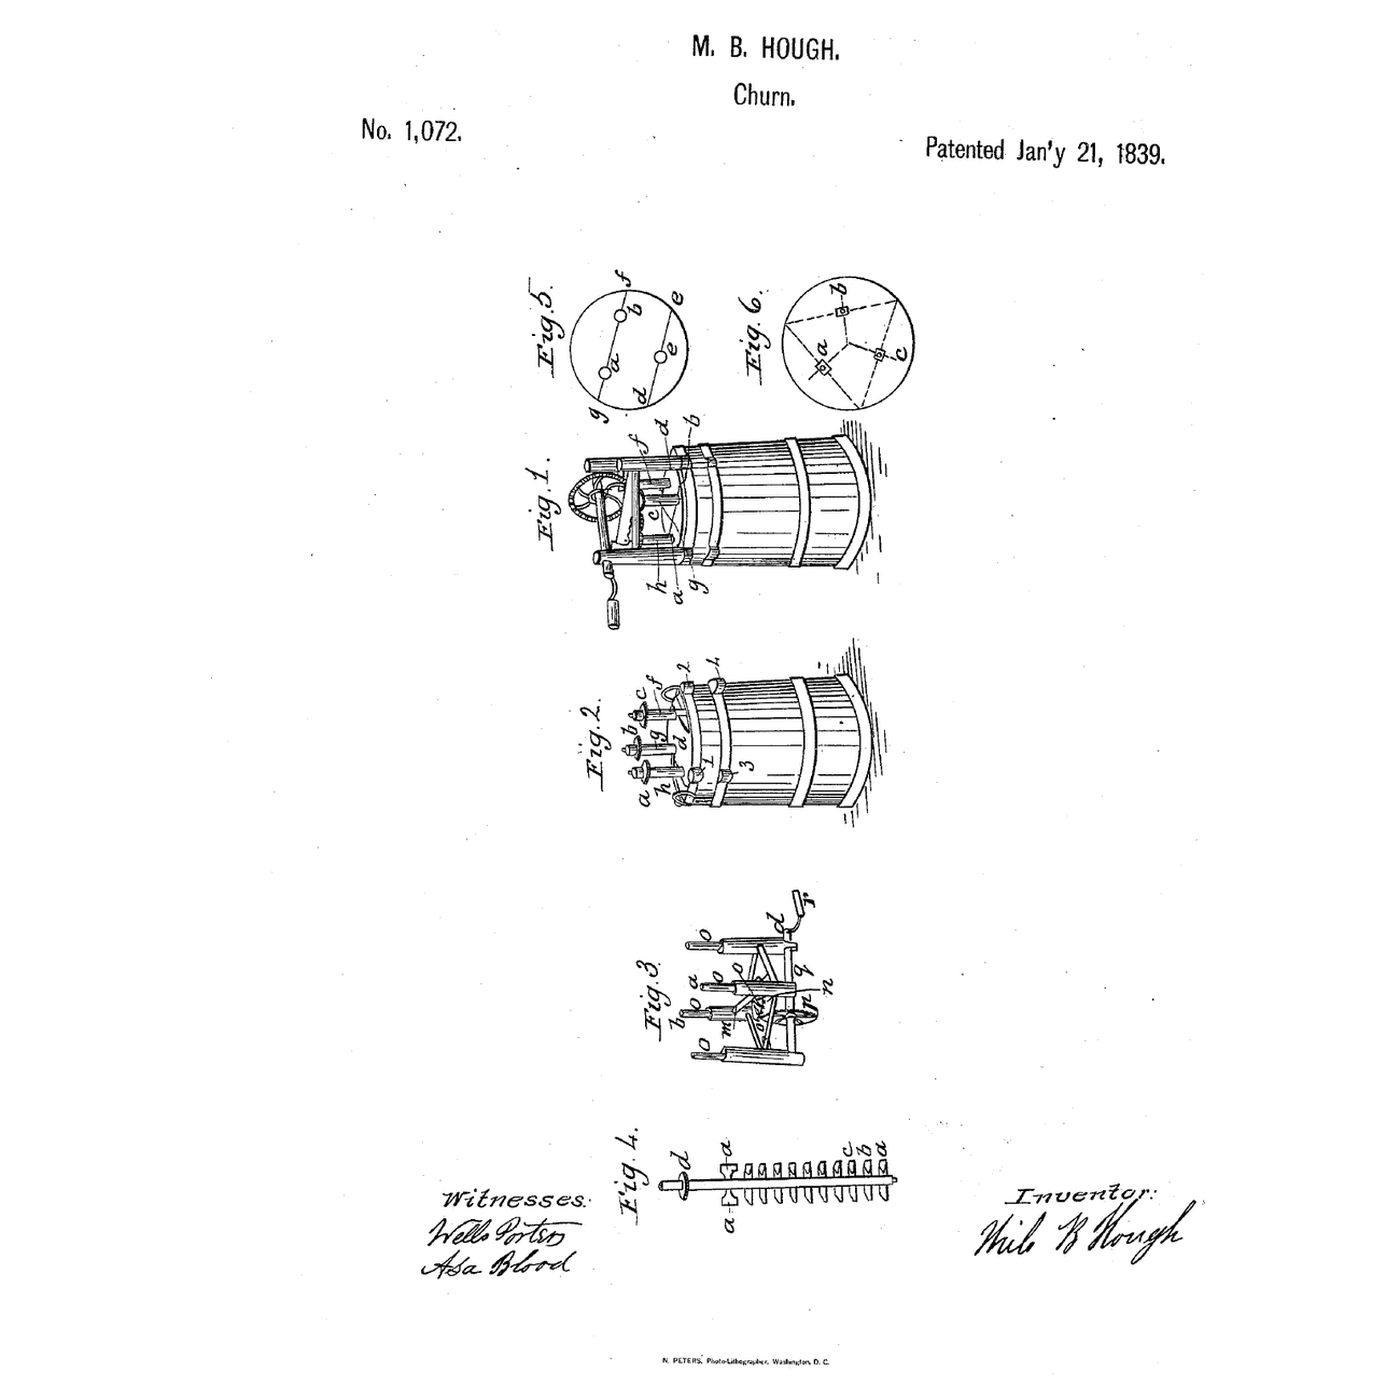
The embedded blueprint drives several beaters from one crank through gears. Brown and Bigelow use an inside gear and a pinion to turn two fans opposite ways on one axis.
3
3
Read US 9,311
Read US 9,311
"In this horizontal position of the tub E we continue the rotation of the crank I, as in the operation of churning, and the butter thus becomes kneaded, worked and rolled, as the beater H in its revolutions scrapes the butter from the inside of the tub, while the beater L, revolving in the opposite direction, in close proximity to and inside of the other, will strike the butter forced over the beater H by the accumulation by scraping off the butter on the side of the tub, while the buttermilk and water, extracted from the butter by this process, runs down over the now inclined bottom of the tub E, and escapes by the aperture a' of the cover Z, Z, Z, into any receptacle placed under the aperture to receive it."
4
4
Print the parts
Print the parts
Print the shell gear S with 72 inside teeth (/uploads/blueprints/tilting-tub-counter-fan-churn-shell-gear.stl), the 12-tooth stud pinion u (/uploads/blueprints/tilting-tub-counter-fan-churn-stud-pinion.stl), the 48-tooth spur gear t printed in one with the hollow shaft x (/uploads/blueprints/tilting-tub-counter-fan-churn-spur-gear-and-hollow-shaft.stl), the inner fan L (/uploads/blueprints/tilting-tub-counter-fan-churn-inner-fan.stl) and the conical tube K (/uploads/blueprints/tilting-tub-counter-fan-churn-conical-tube.stl). Print in PETG at 0.2 mm layers, 30 % infill, 4 walls; wash before first use.
Materials for this step:
 PETG Filament1 piece
Tools needed:
 FDM 3D Printer
5
5
Tub, tube and frame
Tub, tube and frame
Use a tapered food-grade container about 250 mm across the top. Drill a 20 mm hole in the centre of its bottom and seal the conical tube's flange round it inside with food-safe silicone. Bolt a short carriage bolt through each side at mid-height as the journals d, with washers and silicone, and hang the tub by them in holes near the tops of two pine standards on a pine base. Screw a pine cross bar under the bottom (his q q) with a 4 mm screw standing down from it 37.5 mm off centre as the stud V, and a pine bridge below it (his n n) with a step hole for the shaft.
Materials for this step:
 Food-Grade Storage Container1 piece
 Silicone Sealant1 piece
 Carriage Bolt1 piece
 Flat Washer1 piece
 Pine Board1 piece
 Machine Screws1 piece
 Hex Nut1 piece
 #8 x 1" Wood Screw1 piece
Tools needed:
 Hole Saw Kit
 Cordless Drill
 Drill Bit Set
 Hand Saw
 Screwdriver Set
 Adjustable Spanner
6
6
Shafts, fans and crank
Shafts, fans and crank
Pass the hollow shaft up through the conical tube from below so the spur gear sits under the bottom, and glue the inner fan on its top just above the tube. Run a 10 mm stainless rod as the shaft G down through it, fix the shell gear on its foot with a set screw so the pinion on the stud meshes with both gears, and rest its end in the bridge's step. Bolt a pine bar F across the mouth as G's upper bearing; under it fix two hardwood blades reaching close to the tub's side as fan H, and above it a crank. A pine fork pivoted on the bridge, its handle pinned to the frame, holds the tub upright. Cut the container's lid in two, with a hole near the rim of one half as the aperture a'.
Materials for this step:
 Mild Steel Rod1 piece
 Hardwood Dowels1 piecePine Board1 piece
 Two-Part Epoxy1 pieceMachine Screws1 piece#8 x 1" Wood Screw1 piece
Tools needed:
 HacksawCordless DrillDrill Bit SetScrewdriver Set
 Coping Saw
7
7
The build in 3D
The build in 3D
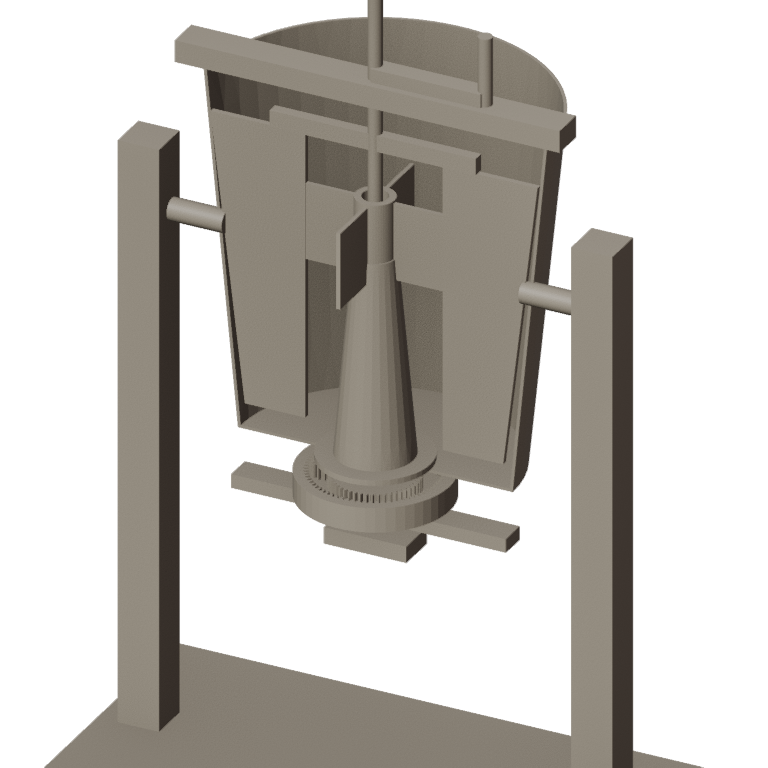
FreeCAD model of this build, not of the patent: the conical tub cut away on its journals between the standards, the outer fan H, the conical tube K with the inner fan L on the hollow shaft above it, and under the bottom the shell gear, stud pinion and spur gear between the cross bar and bridge.
8
8
Churn, tip and work
Churn, tip and work
Let the heavy cream stand until it reaches about 15 °C, checked with the thermometer. Pour in 2 litres, fit both cover halves and crank steadily; time until the butter comes. Set a jug under the aperture, free the fork and tip the tub about 90 degrees onto its side, aperture down; crank on so the fans knead the butter while the buttermilk runs out. Stand it up, add cold water, churn a little, tip and drain again until the water runs clear; work in a pinch of salt the same way and weigh the butter.
Materials for this step:
 Heavy Cream2000 ml
 Coarse Sea Salt1 piece
 Water1 piece
Tools needed:
 Leave-In Probe Thermometer
 Stopwatch
 Digital Kitchen Scale
 Stainless Steel Mixing Bowl (Large)
9
9
Gears that jam, a tub that leaks
Gears that jam, a tub that leaks
Tilting-tub counter-fan churn troubleshooting.
Flow
Loading...
10
10
History and honest limits
History and honest limits
**Lucian A. Brown and Hubbard Bigelow** of Hartford, Connecticut, assignors to Henry K. W. Welch, received US 9,311, dated 5 October 1852; they signed the specification on 12 April 1852. They wrote that a cover is needed to stop the cream spattering, though the figure does not show it, and that working the butter in the tub saves lifting and the buttermilk. The ratio of 2 to 3, they wrote, was "a fact only learned by experiments, and corroborated by their repetition." They claimed the combination of the tub E and its appendages with the frame and standards, or any other frame adapted to use the tub in a vertical and a horizontal position.
**Honest limits.** A container, pine and printed parts stand in for theirs; the gear sizes are ours. FDM prints hold food in their layer lines, so wash well and replace when worn. Your times and weights are the result.
Materials
15- 1 piecePlaceholder
- 1 piecePlaceholder
- 1 piecePlaceholder
- 1 piecePlaceholder
- 1 piecePlaceholder
- 1 piecePlaceholder
- 2 piecesPlaceholder
- 1 piecePlaceholder
- 2 piecesPlaceholder
- 1 piecePlaceholder
- 1 piecePlaceholder
- 1 piecePlaceholder
- 2000 mlPlaceholder
- 1 piecePlaceholder
- 1 piecePlaceholder
Tools Required
13- Placeholder
- Placeholder
- 1 vendor sell this, none ship to you yetPlaceholder
- Placeholder
- Placeholder
- Placeholder
- Placeholder
- Placeholder
- Placeholder
- Placeholder
- Placeholder
- Placeholder
- Placeholder
Design Files
1Related Blueprints
These blueprints share knowledge with this one — techniques, materials, or principles that connect them in the learning graph.


CC0 Public Domain
This blueprint is released under CC0. You are free to copy, modify, distribute, and use this work for any purpose, without asking permission.
Support the Maker by purchasing products through their Blueprint where they earn a Maker Commission set by Vendors, or create a new iteration of this Blueprint and include it as a connection in your own Blueprint to share revenue.