Collaboration
ART
BEAUTY & WELLNESS
CRAFT
CULTURE & HISTORY
ENTERTAINMENT
ENVIRONMENT
FOOD & DRINKS
REVERSE ENGINEERING
SCIENCES
SPORTS
TECHNOLOGY
WEARABLES
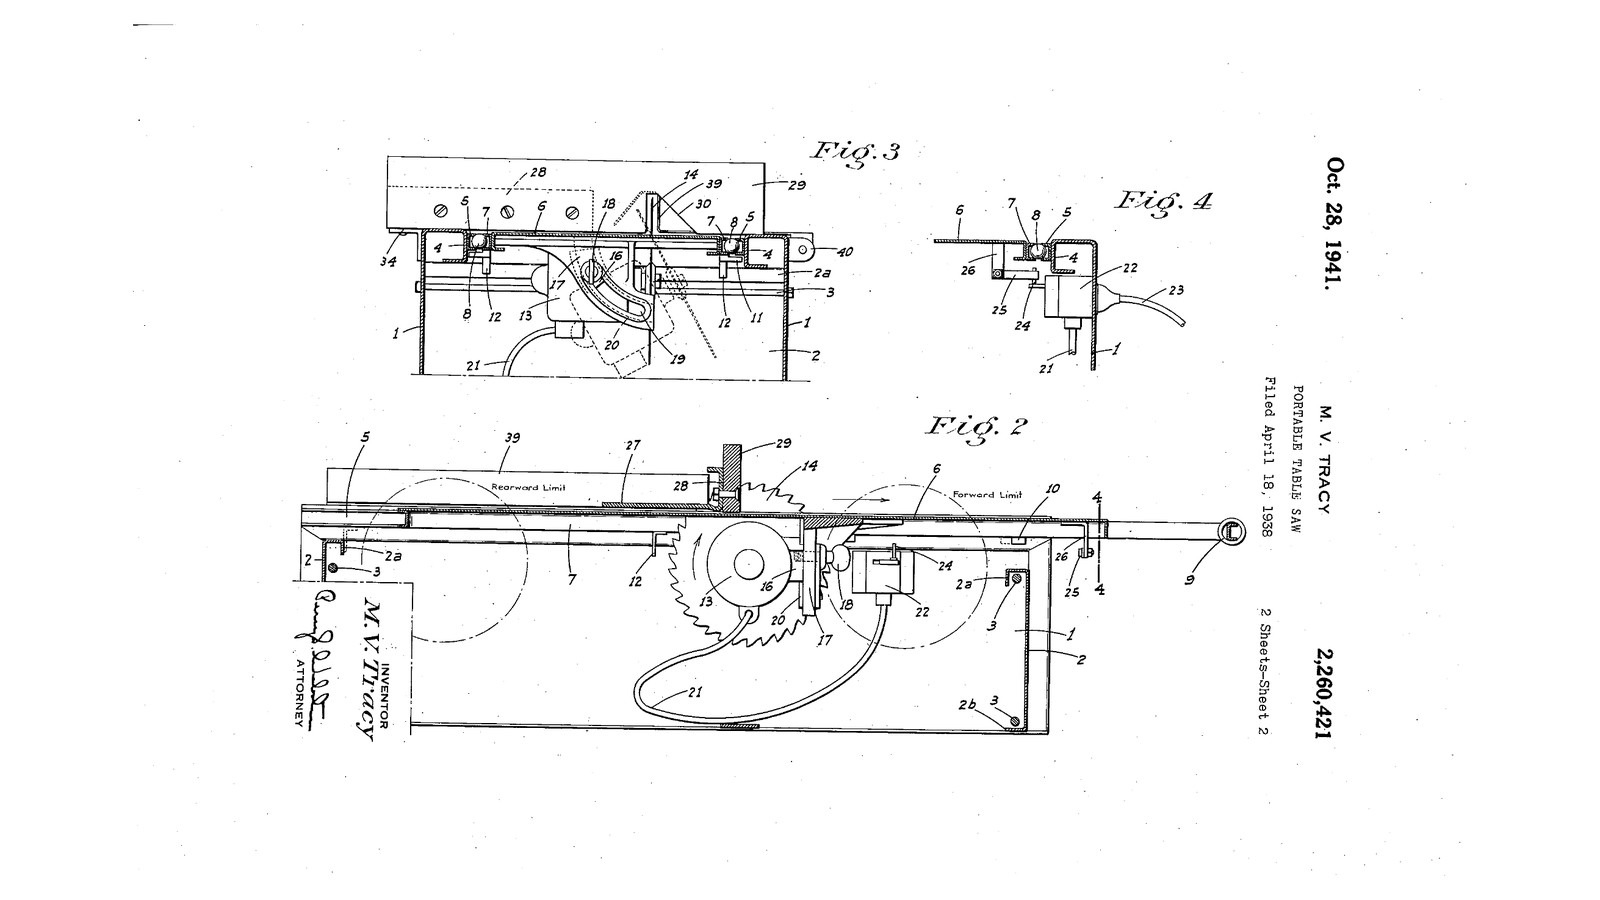


Sliding-Table Saw That Switches Itself: A Hand Saw Under a Table on Balls, Turned On and Off by the Stroke (Tracy, 1941)
Mearl V. Tracy of Sacramento received US 2,260,421, dated 28 October 1941, for a light table saw to take onto a building job. An ordinary electric hand saw hangs under a table that slides on steel balls in channels. The work is held against a fixed fence and the table carries the saw through it. A springy finger on the table trips a snap switch, starting the saw just before it reaches the work and stopping it as the table comes back. One fence on a graduated plate serves as rip fence and mitre gauge.
The patent gives no sizes; every size here is ours, and our box is plywood where his is sheet metal.
Intermediate
About 3 days
Instructions
1
1
Where the switch must trip
Where the switch must trip
Loading Jupyter Notebook...
2
2
Read US 2,260,421
Read US 2,260,421
"The finger 25 is so disposed as to engage trigger 24 and close the switch when the table is advanced and just before the saw reaches the work under which the table slides, and to reengage the trigger and open the switch as the table retracts and approaches a fully retracted position."
3
3
The box frame
The box frame
Make an open-topped box of 18 mm plywood 900 mm long, 450 wide and 300 high, the end panels 2 standing 40 mm lower than the sides 1, glued and screwed. Bolt a steel channel section 5 along the inside top of each side, its open face inwards, as his channels on the beams 4.
Materials for this step:
 Plywood Sheet1 piece
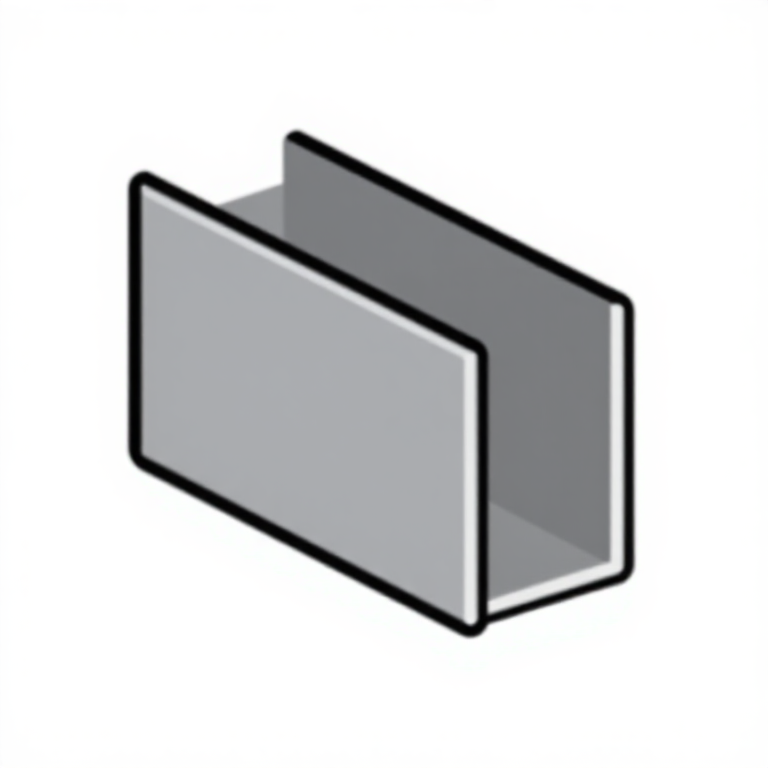 Steel Channel Section2 pieces
 Hex Bolt Assortment8 pieces
 Hex Nut8 pieces
 Wood Screws30 pieces
 Wood Glue1 piece
Tools needed:
 Jigsaw
 Cordless Drill
 Drill Bit Set
 Bar Clamp
 Combination Square
 Tape Measure
 Hacksaw
 Adjustable Spanner
4
4
The sliding table
The sliding table
Cut the table 6 from 18 mm plywood 600 x 400 mm with a saw slot 15 down its middle, and bolt a steel channel section 7 along each side edge, its open face outwards opposite the box's channel, reaching 100 mm past the table's front for the handle. Lay 10 mm steel balls 8 between each pair of opposed channels, three a side, spaced along, and slide the table in so it runs level with the box's top. Fit a hardwood handle 9 across the angles' front ends, and stops 10, 11 and 12 to limit the stroke to 450 mm.
Materials for this step:
Plywood Sheet1 pieceSteel Channel Section2 pieces Ball Bearings1 piece
 Hardwood Board1 pieceHex Bolt Assortment8 piecesHex Nut8 piecesWood Screws12 pieces
Tools needed:
JigsawCordless DrillDrill Bit SetHacksaw File SetAdjustable SpannerCombination Square
5
5
Hang the saw under the table
Hang the saw under the table
Bolt the circular saw by its own base plate under the table, the blade up through the slot, the saw's depth set so the blade stands 10 mm above the thickest work. For angle cuts use the saw's own bevel adjustment, which does what his arcuate bracket 17 did. Tape or lock the saw's trigger on, so the new switch alone controls it.
Materials for this step:
 Circular Saw1 pieceHex Bolt Assortment4 pieces
Tools needed:
Cordless DrillDrill Bit SetAdjustable SpannerCombination Square6
6
The self-acting switch
The self-acting switch
Screw a lever microswitch rated for the saw's current inside one side panel, its lever 24 pointing up into the path of the table, with an outlet for the saw's plug and a supply cord through the panel, as his switch box 22 and socket; have it wired by an electrician. Bend a finger 25 of spring steel and screw it on a bracket 26 under the table, set so that, as the table goes forward, it flips the lever on 60 mm into the stroke, and as the table comes back it flips it off 40 mm before the end. Check it with the saw unplugged: you should hear the click each way.
Materials for this step:
 Microswitch (Lever Actuated)1 piece
 Spring Steel Strip1 piece
 Mild Steel Flat Bar1 pieceWood Screws6 pieces
Tools needed:
 Tin Snips
 Bench ViseCordless DrillDrill Bit Set
 Screwdriver Set
7
7
Rip fence and mitre gauge
Rip fence and mitre gauge
Cut a half-round steel plate 27 to lie over the front of the box beside the saw, turn its straight edge up as a flange 28 and bolt a hardwood fence 29 to it, notched 30 for the blade. Pivot a link 31 on top of the plate and a link 32 under it at the centre of its arc; pivot a third link 33 on 31's end; take 32 and 33 back to a flange on the side of the box. Mark the plate in degrees and drill rows of holes along the arcs, and set the fence with a pin through link 31 into a hole, clamped by two wing-nut clamps 35, 36.
Materials for this step:
 Mild Steel Sheet1 pieceHardwood Board1 pieceMild Steel Flat Bar2 pieces
 Mild Steel Round Bar1 pieceHex Bolt Assortment6 pieces
 Wing Nut2 pieces
Tools needed:
Tin SnipsHacksawBench Vise Drill PressDrill Bit Set
 Protractor
 Scriber
 Center PunchFile Set
8
8
Cut
Cut
With the table fully back, hold a board against the fence with one hand and push the handle with the other. The saw starts by itself before the blade reaches the board, cuts through, and stops as you bring the table back.
Tools needed:
 Safety Glasses
 Hearing Protection (Ear Defenders, SNR 30 dB)
9
9
Troubleshooting
Troubleshooting
Sliding table saw troubleshooting.
Flow
Loading...
10
10
History and honest limits
History and honest limits
**Mearl V. Tracy** of Sacramento, California, assignor of one-half to Marion M. Tracy, US 2,260,421, dated 28 October 1941, filed 18 April 1938. His one claim is the switch: a snap switch with a trigger moved one way or the other by "a resilient finger mounted on the table" that then passes and leaves the trigger, near but before each end of the stroke. He removed the hand saw's shoe and fixed its mounting block on an arcuately slotted bracket; modern saws differ, so we mount it by its base plate and use its own bevel adjustment. His box is sheet metal with the channels on bent beams; ours is plywood with steel channel sections. He gives no sizes; every size here is ours.
Materials
15- 1 piecePlaceholder
- 2 piecesPlaceholder
- 26 piecesPlaceholder
- 16 piecesPlaceholder
- 48 piecesPlaceholder
- 1 piecePlaceholder
- 1 piecePlaceholder
- 1 piecePlaceholder
- 1 piecePlaceholder
- 1 piecePlaceholder
- 1 piecePlaceholder
- 2 piecesPlaceholder
- 1 piecePlaceholder
- 1 piecePlaceholder
- 2 piecesPlaceholder
Tools Required
18- 1 vendor sell this, none ship to you yetPlaceholder
- 1 vendor sell this, none ship to you yetPlaceholder
- Placeholder
- Placeholder
- Placeholder
- 1 vendor sell this, none ship to you yetPlaceholder
- Placeholder
- Placeholder
- Placeholder
- Placeholder
- Placeholder
- Placeholder
- Placeholder
- Placeholder
- Placeholder
- Placeholder
- Placeholder
This blueprint makes

Related Blueprints
These blueprints share knowledge with this one — techniques, materials, or principles that connect them in the learning graph.
CC0 Public Domain
This blueprint is released under CC0. You are free to copy, modify, distribute, and use this work for any purpose, without asking permission.
Support the Maker by purchasing products through their Blueprint where they earn a Maker Commission set by Vendors, or create a new iteration of this Blueprint and include it as a connection in your own Blueprint to share revenue.