ART
BEAUTY & WELLNESS
CRAFT
CULTURE & HISTORY
ENTERTAINMENT
ENVIRONMENT
FOOD & DRINKS
REVERSE ENGINEERING
SCIENCES
SPORTS
TECHNOLOGY
WEARABLES
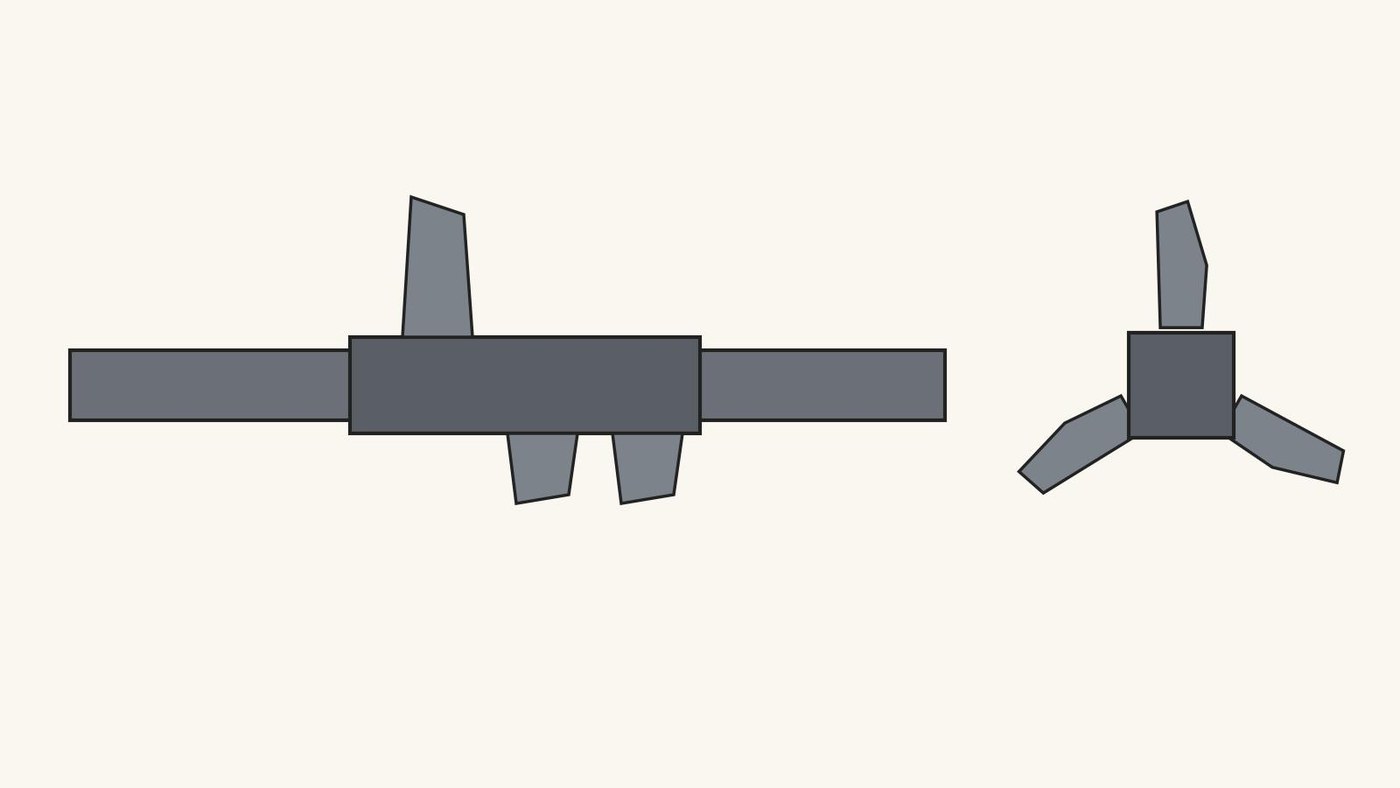


Iron Axle and Cams for a Trip Hammer, Forged from Wrought Iron
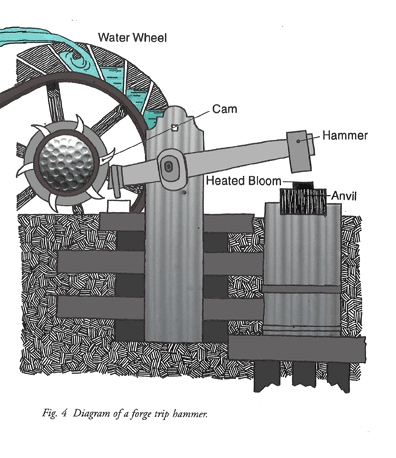
A trip hammer is raised by a cam and drops under its own weight. The cams are lugs on a revolving shaft turned by the water wheel; each one lifts the helve once a turn. Forge a wrought-iron axle with a squared middle and three curved cams that slide on and are wedged tight.
The picture: our diagram, side and end view.
Advanced
Three days with a striker
Instructions
1
1
Weld up the axle
Weld up the axle
Bind wrought-iron bars into a faggot as long as the shaft, bring it to a welding heat, sprinkle with sand and weld it solid with a striker, a heat at a time along its length.
Materials for this step:
 Wrought Iron Bar25 kg
 Wrought Iron Rod1 m
Tools needed:
 Blacksmith Forge
 Charcoal
 Fine Sand
 Sledgehammer
 Blacksmith Hammer
 Blacksmith Tongs
 Anvil
Anvil Welding Gloves
 Safety Glasses
 Leather Apron
2
2
Shape the axle
Shape the axle
Leave the middle square for the cams and draw both ends round for the journals. Flatter the square true and file the journals smooth.
Tools needed:
Blacksmith Forge FlatterSledgehammerBlacksmith TongsAnvil
 Metal FileWelding GlovesSafety GlassesLeather Apron
3
3
Forge the cams
Forge the cams
For each cam, forge a thick curved lug on a boss. Punch the boss and drift it square to slide over the axle's square.
Materials for this step:
Wrought Iron Bar6 kgTools needed:
Blacksmith Forge Hot Punch
 Drift
Drift Hot Cut HardySledgehammerBlacksmith HammerBlacksmith TongsAnvilWelding GlovesSafety GlassesLeather Apron
4
4
Fit and wedge
Fit and wedge
Slide the three cams onto the square at equal turns round the shaft, each lined up with the helve's tail. Drive iron wedges beside each boss until tight.
Materials for this step:
Wrought Iron Rod0.5 mTools needed:
Blacksmith HammerMetal FileAnvilWelding GlovesSafety GlassesLeather Apron5
5
Blows per minute
Blows per minute
Loading Jupyter Notebook...
Materials
2- 25 kgPlaceholder
- Placeholder
Tools Required
15- Placeholder
- Placeholder
- Placeholder
- Placeholder
- Placeholder
- Placeholder
- Placeholder
- Placeholder
- Placeholder
- Placeholder
- Placeholder
- Placeholder
- Placeholder
- Placeholder
- Placeholder
This blueprint makes

Related Blueprints
These blueprints share knowledge with this one — techniques, materials, or principles that connect them in the learning graph.
CC0 Public Domain
This blueprint is released under CC0. You are free to copy, modify, distribute, and use this work for any purpose, without asking permission.
Support the Maker by purchasing products through their Blueprint where they earn a Maker Commission set by Vendors, or create a new iteration of this Blueprint and include it as a connection in your own Blueprint to share revenue.