ART
BEAUTY & WELLNESS
CRAFT
CULTURE & HISTORY
ENTERTAINMENT
ENVIRONMENT
FOOD & DRINKS
REVERSE ENGINEERING
SCIENCES
SPORTS
TECHNOLOGY
WEARABLES
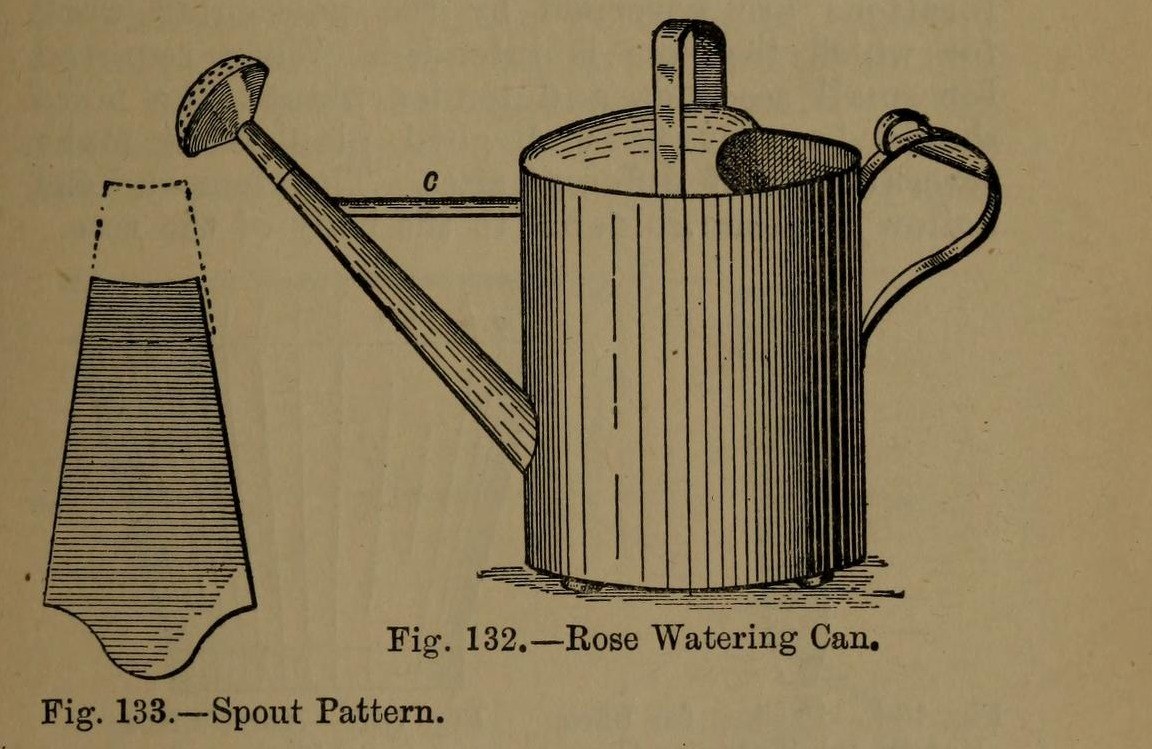


Watering Can: the Tinplate Rose Watering-Can (Hasluck, 1907)
A tinsmith's garden watering can: a round body from one sheet 2 ft 1 in x 8 1/2 in, a two-piece spout with a perforated rose, a hollowed top with a cross handle, and a back handle with a thumb ring. Tinplate or galvanised iron.
Variable: the rose. Its pattern diameter is the rose diameter x 4 / 3; finer holes for seedlings.
Source: Paul N. Hasluck, Tinplate Work (1907), pp. 54-57. Unknown: solder. Picture: Figs. 132-135 of the book.
Intermediate
Unknown
Instructions
1
1
Make the body and bottom
Make the body and bottom
Cut a sheet 2 ft 1 in by 8 1/2 in. Wire one edge, sink it in the crease iron, round it and groove the seam; solder the seam inside. Cut the spout hole opposite the seam, 2 1/2 in from the bottom. Edge the bottom to fit, beat it up and solder it from inside.
Materials for this step:
 Tinplate Sheet1 body, bottom
 Iron Wire1 edge
 Tin-Lead Solder1 piece
Tools needed:
 Tin Snips
 Stake
 Wooden Mallet
 Electric Soldering Iron
 Flux
2
2
Make and fit the spout
Make and fit the spout
Cut the spout in two pieces (Fig. 133), bend them to shape and solder the seams. Solder the larger piece into the body. Make it longer for plants out of reach, with an elbow for plants up high. Make the stay: a taper strip as long as the gap between can and spout, bent to a half-round section and soldered in.
Materials for this step:
Tinplate Sheet1 spout, stayTin-Lead Solder1 pieceTools needed:
Tin SnipsStakeElectric Soldering IronFlux3
3
Make the rose
Make the rose
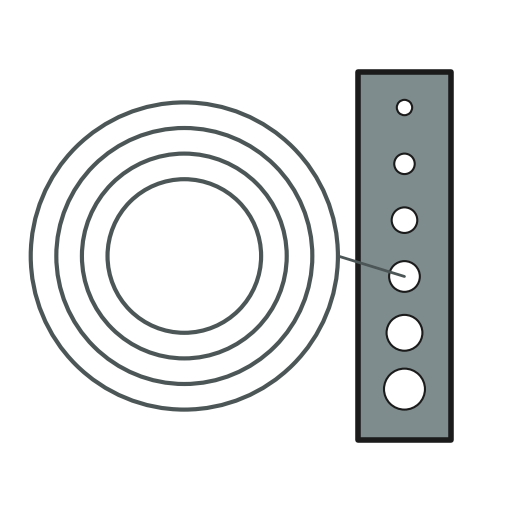
Set out the rose body (Fig. 135): its diameter is the rose diameter x 4 / 3, so a 3 in rose needs a 4 in pattern, with lines a b at right angles. Bend it over a funnel stake and solder the seam. Hollow a disc for the front, with edges for capping on. Inside the hollow, mark circles and pierce them at intervals with a bradawl over a hard wood block; very fine for seedlings. Solder front and stem to the rose body. Several roses of different sizes are useful.
Materials for this step:
Tinplate Sheet1 roseTin-Lead Solder1 pieceTools needed:
 DividersTin SnipsStake
 Planishing Hammer
 Awl
 Hardwood BlockElectric Soldering IronFlux
4
4
Fit the top and handles
Fit the top and handles
Hollow the top (Fig. 134), fit it to the body, wire its inner arc and solder it on. Cross handle: a strip about 1 3/4 in wide, wired with No. 12 B.W.G., bent to shape; cut two holes in the top with a small sharp chisel and solder the ends inside and on top. Back handle (Fig. 136): wire and bend it, solder a small boss under its upper part, and solder it opposite the spout with a thumb ring at the top. Solder three small hollowed studs under the bottom.
Materials for this step:
Tinplate Sheet1 top, handles, studsIron Wire1 No. 12 B.W.G.Tin-Lead Solder1 pieceTools needed:
Tin SnipsPlanishing Hammer Steel ChiselElectric Soldering IronFlux
5
5
Clean and paint
Clean and paint
Clean with turpentine and whiting. Give two good coats of paint: red inside and green outside suit it.
Materials for this step:
 Oil Paint2 coats
Tools needed:
 Turpentine
 Calcium Carbonate - Whiting
Materials
4- 1 top, handles, studsPlaceholder
- 1 No. 12 B.W.G.Placeholder
- 4 piecesPlaceholder
- 2 coatsPlaceholder
Tools Required
12- Placeholder
- Placeholder
- Placeholder
- Placeholder
- Placeholder
- Placeholder
- Placeholder
- Placeholder
- Placeholder
- Placeholder
- Placeholder
- Placeholder
Connected Blueprint Materials



This blueprint makes

CC0 Public Domain
This blueprint is released under CC0. You are free to copy, modify, distribute, and use this work for any purpose, without asking permission.
Support the Maker by purchasing products through their Blueprint where they earn a Maker Commission set by Vendors, or create a new iteration of this Blueprint and include it as a connection in your own Blueprint to share revenue.