
Collaboration
ART
BEAUTY & WELLNESS
CRAFT
CULTURE & HISTORY
ENTERTAINMENT
ENVIRONMENT
FOOD & DRINKS
REVERSE ENGINEERING
SCIENCES
SPORTS
TECHNOLOGY
WEARABLES
Easter Egg Dyeing Stand: a Crank-Turned Rubber Roller Spins the Egg Under the Brush (Young, 1943)
Woody

Created by

Woody

13. November 2026NO
0
0
0
0
0

Easter Egg Dyeing Stand: a Crank-Turned Rubber Roller Spins the Egg Under the Brush (Young, 1943)

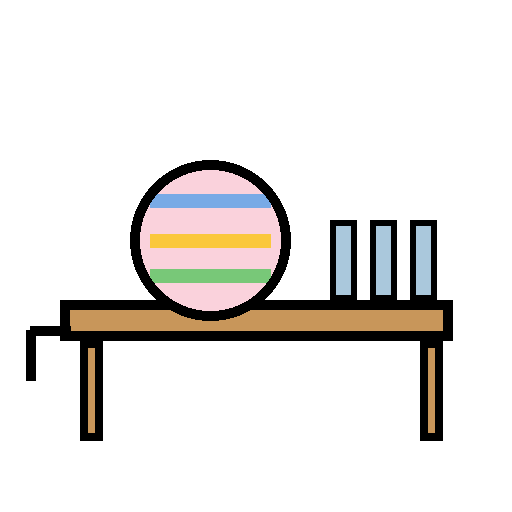
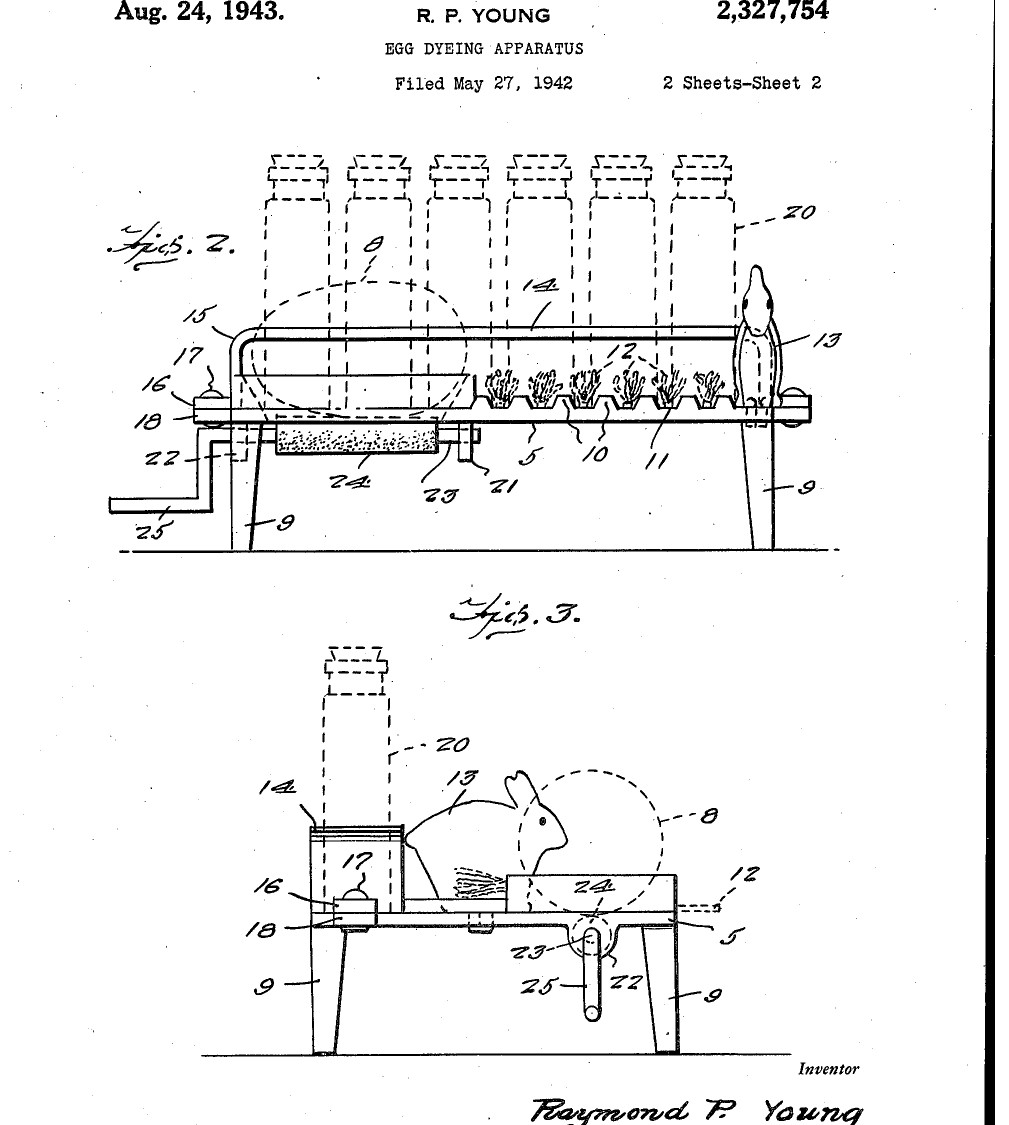
Raymond P. Young of Wrightsville, Pennsylvania, received US 2,327,754, dated 24 August 1943, for a little table for dyeing Easter eggs. The egg sits in an oval opening on a rubber roller turned by a crank; hold a dye brush against it and the colour goes on evenly all round. Grooves hold the brushes, a rack holds the dye bottles, and a rabbit stands at one end. We make it from plywood and dowel. All sizes are ours.
Beginner
About 4 hours

Instructions

1

Opening and roll

Loading Jupyter Notebook...
2

Read US 2,327,754

"If a dye containing brush is held against the object 8, application of the dye to the object 8 will take place uniformly and in a convenient manner."
3

Cut the platform

Cut a platform of 12 mm plywood about 300 x 180 mm (ours). Near one corner cut an oval opening 70 x 40 mm with a coping saw, his opening 6. Glue a strip of thin plywood or a ring of dowel round it to make the rise 7, so the egg cannot roll off.

Materials for this step:

Plywood SheetPlywood Sheet1 piece
Wood GlueWood Glue1 piece

Tools needed:

PencilPencil
Hand SawHand Saw
Hand DrillHand Drill
Coping SawCoping Saw
SandpaperSandpaper
4

Make the brush grooves

Glue short dowels across the top of the platform beside the opening, a little apart, so the gaps between them (his ribs 10 and grooves 11) hold the brushes.

Materials for this step:

Hardwood DowelsHardwood Dowels1 piece
Wood GlueWood Glue1 piece

Tools needed:

Hand SawHand Saw
SandpaperSandpaper
5

Fit the legs

Drill the corners and glue in four dowel legs, his legs 9, long enough to clear the crank below (ours).

Materials for this step:

Hardwood DowelsHardwood Dowels1 piece
Wood GlueWood Glue1 piece

Tools needed:

Hand DrillHand Drill
Hand SawHand Saw
6

Make the roller

Slide rubber tubing over a steel rod for the roll 24 (his roll is rubber, "or any other suitable material"). Bend the rod's long end twice at right angles in the vice to make the crank handle 25.

Materials for this step:

Rubber TubingRubber Tubing1 piece
Mild Steel RodMild Steel Rod1 piece

Tools needed:

Bench ViseBench Vise
HacksawHacksaw
7

Hang the roller

Cut two bearing brackets from flat bar (ours, his bearings 21 and 22), drill each for the rod at the depth the notebook gives, bend them to hang below the platform and screw them on either side of the opening, so the roll sits under the opening as his Fig. 4. The egg should rest on the roll inside the rise and turn when the crank turns.

Materials for this step:

Mild Steel Flat BarMild Steel Flat Bar1 piece
Wood ScrewsWood Screws1 piece

Tools needed:

HacksawHacksaw

Drill PressDrill Press
Drill Bit SetDrill Bit Set
Bench ViseBench Vise
Screwdriver SetScrewdriver Set
8

Make the bottle rack

Bend a strip of flat bar (his rack bar 14, "preferably strap iron") down and out at each end, drill a row of holes in it to hold the dye bottles, and screw its ends to the back edge of the platform.

Materials for this step:

Mild Steel Flat BarMild Steel Flat Bar1 piece
Wood ScrewsWood Screws1 piece

Tools needed:

HacksawHacksaw
Drill PressDrill Press
Drill Bit SetDrill Bit Set
Bench ViseBench Vise
Screwdriver SetScrewdriver Set
9

Add the rabbit

Cut a rabbit from plywood with the coping saw, sand it and glue it upright at the far end, his figure 13.

Materials for this step:

Plywood SheetPlywood Sheet1 piece
Wood GlueWood Glue1 piece

Tools needed:

Coping SawCoping Saw
SandpaperSandpaper
10

Dye an egg

Fill the bottles with food colouring (ours) and put them in the rack. Set a hard-boiled egg in the opening on the roll, turn the crank, and hold a dye-filled brush against the egg: the colour goes on in an even band. Move the brush across to stripe it.

Materials for this step:

EggEgg1 piece
Food ColouringFood Colouring1 piece
Glass Bottles with CapsGlass Bottles with Caps1 piece

Tools needed:

Paintbrush SetPaintbrush Set
11

Troubleshooting

Egg dyeing stand troubleshooting.

Flow

Loading...
12

History and honest limits

**Raymond P. Young** of Wrightsville, Pennsylvania, US 2,327,754, dated 24 August 1943, filed 27 May 1942. He claimed "dyeing apparatus comprising a platform having an opening therein, a rotatable roller mounted at the underside of the platform and partly protruding into said opening, means for rotating the roller, and an upstanding article confining wall on the platform surrounding said opening". He gives no sizes or dye: the plywood, dowels, all sizes, the bracket bearings, the rubber tube on a rod, and food colouring are ours.

Materials

10

Tools Required

11

Related Blueprints

These blueprints share knowledge with this one โ€” techniques, materials, or principles that connect them in the learning graph.
CC0 Public Domain

This blueprint is released under CC0. You are free to copy, modify, distribute, and use this work for any purpose, without asking permission.

Support the Maker by purchasing products through their Blueprint where they earn a Maker Commission set by Vendors, or create a new iteration of this Blueprint and include it as a connection in your own Blueprint to share revenue.

Discussion

(0)

Log in to join the discussion

Loading comments...