ARTE
BELEZA E BEM-ESTAR
ARTESANATO
CULTURA E HISTÓRIA
ENTRETENIMENTO
MEIO AMBIENTE
COMIDA E BEBIDAS
ENGENHARIA REVERSA
CIÊNCIAS
ESPORTES
TECNOLOGIA
TECNOLOGIA VESTÍVEL
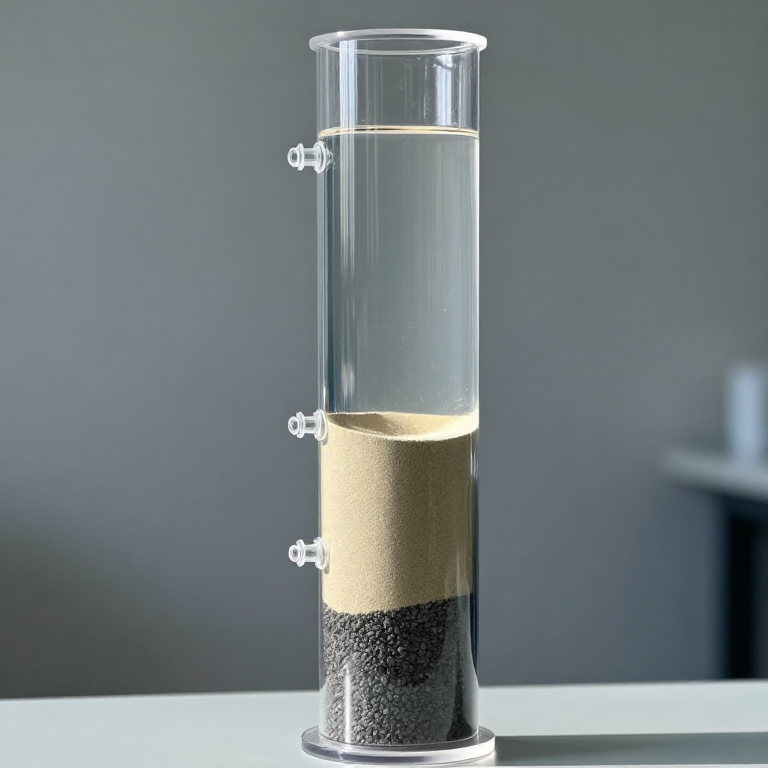


The Rapid Gravity Filter
A slow sand filter needs about a hundred times the land area of a rapid gravity filter for the same output. In a growing city that is not a detail, it is the whole argument, and by the end of the nineteenth century American waterworks were building rapid filters as fast as they could.
The early ones did not work. Running water through sand fifty times faster does not give you fifty times the output of clean water — it gives you dirty water, because at that speed nothing has time to be strained out and there is no mat to do biological work. Several cities installed them and got outbreaks.
What rescued the idea was a piece of process thinking rather than a piece of equipment: George Fuller's studies at Louisville in the 1890s established that a rapid filter is not a filter at all in the sense a slow sand filter is. It is the second half of a two-stage process. Coagulate first so the fine material becomes floc, and the filter's job becomes catching floc — which it can do, quickly, in the depth of the bed rather than on its surface.
So this blueprint only works if you have done the previous one. That dependency is real, it is the reason the two are adjacent here, and it is the single most common way a rapid filter fails today.
The other half of the subject is backwashing, which is where the operating risk lives.
Avançado
7 hours
Instruções
1
1
Build a filter column with an underdrain that distributes
Build a filter column with an underdrain that distributes
Build a vertical column from clear pipe, at least a hundred millimetres across and tall enough for a bed of six hundred millimetres plus the same again of freeboard above it. The freeboard is not spare space — it is where the bed goes during backwash, and a column without it will flush your media down the drain the first time you wash it.
Grade the media coarser than slow sand: an effective size around zero point six millimetres. You want the floc to penetrate into the depth of the bed rather than blind the surface, because surface blinding is what limits the run.
The underdrain is the part that decides whether backwash works. During filtration it just has to collect water; during backwash it has to distribute it evenly across the entire area, and any unevenness produces a jet that fluidises one patch violently while the rest of the bed sits still. Build a manifold with many small holes rather than a few large ones — the pressure drop across the holes should be large compared to the variation along the manifold, which is what forces even distribution. Cover it with graded gravel layers to support the sand.
Fit clear standpipes tapped into the column at three depths so you can read the head loss profile through the bed. Watching where in the bed the head is being lost tells you whether you are filtering in depth as intended or blinding at the surface.
Materiais para este passo:
 Tubo de PVC transparente4 metre
 Tubo acrílico (transparente)2 metre
 Areia15 kilogram
 Gravilha grossa8 kilogram
 Sortido de acessórios para tubo de PVC1 conjunto
Ferramentas necessárias:
 Serra de arco para metais
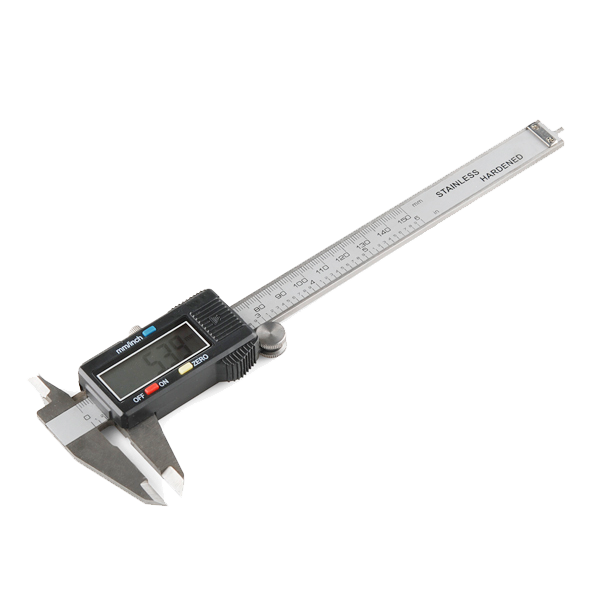 Digital Calipers - 152.4 mm
 Conjunto de peneiras (malha graduada)
2
2
Two ways a run ends, and the one you must not lose
Two ways a run ends, and the one you must not lose
A carregar o notebook Jupyter…
Ferramentas necessárias:
 Computador de secretária
3
3
The backwash sequence, and filter-to-waste
The backwash sequence, and filter-to-waste
Espaço de trabalho Blockly
Loading Blockly workspace...
Ferramentas necessárias:
Computador de secretária4
4
Run it coagulated, and run it raw
Run it coagulated, and run it raw
This is the comparison the whole blueprint exists for, and it takes one afternoon.
Prepare a raw water with clay to a turbidity you can measure. Split it. Coagulate half at the optimum dose you found in the jar test blueprint and let it floc; leave the other half raw.
Run the coagulated water through the filter at about eight metres per hour and record filtered turbidity and head loss every fifteen minutes. Then wash the filter, run it to waste until it settles, and repeat with the uncoagulated water at exactly the same rate.
The coagulated run should give you filtered turbidity far below the raw feed and a head loss that climbs steadily. The uncoagulated run will give you filtered water barely better than what went in, and a head loss that climbs slowly because very little is being retained. Plot the two side by side.
That pair of curves is Fuller's result reproduced on a bench, and it is the reason to build this blueprint after the coagulation one rather than before.
While the coagulated run proceeds, read your three standpipes. Early in the run the head should be lost fairly evenly through the depth. As the run goes on, watch the loss concentrate towards the top — that is the bed blinding at the surface, and if it happens quickly your media is too fine for the floc you are making.
Materiais para este passo:
 Caulino em pó1 kilogram
 Alúmen (alúmen de potássio)250 gram
 Água destilada20 litros
Ferramentas necessárias:
 Turbidímetro
 Cronómetro
 Medidor de pH digital portátil
5
5
Wash it, prove filter-to-waste, then read the limit
Wash it, prove filter-to-waste, then read the limit
Run the backwash sequence from step 3 and watch the bed through the clear wall. You are looking for the whole bed lifting and boiling gently, not a channel erupting in one place. If you see channelling, the underdrain is distributing unevenly and no amount of extra wash water will fix it.
Measure the expansion by marking the settled bed level and the fluidised level. Get it into the twenty to fifty percent window and note the rise rate that achieves it.
Then prove the filter-to-waste point, because it is the one result here that could actually protect somebody. Immediately after the wash, put the filter back into service and sample the filtrate every thirty seconds for the first ten minutes. Plot it. You should see a distinct spike of turbidity — often several times the worst reading of the entire preceding run — decaying over some minutes. Measure how long yours takes to settle below your limit. That duration is your filter-to-waste period, it is a property of your filter, and it is the number a works would put in its operating procedure.
Where this stops, and it is the same sharp edge as before. You have built a real rapid gravity filter and demonstrated the two things that make one safe: coagulation before it, and filter-to-waste after washing. It still does not disinfect. Rapid filtration is a physical barrier that removes particles and the organisms travelling on them, and it is always followed by disinfection with a verified residual, in every treatment works in the world, precisely because the barrier can fail silently in the ways this blueprint has shown you.
Build it, run it, and use it as a filter for process water, a pond, or a rainwater system. If it is ever to produce drinking water, it is one stage of a train, the train ends in disinfection, and the residual is measured every time.
Materiais para este passo:
Areia5 kilogramÁgua destilada20 litrosFerramentas necessárias:
TurbidímetroCronómetro Balde
BaldeMateriais
8- 4 metreReferência
- 2 metreReferência
- 20 kilogramReferência
- 8 kilogramReferência
- 1 conjuntoReferência
- 1 kilogramReferência
- 250 gramReferência
- 20 litrosReferência
Ferramentas necessárias
8- Referência
- Digital Calipers - 152.4 mm10% de comissãoR$73.18
- Referência
- Referência
- Referência
- Referência
- Referência
- Referência
Blueprints relacionados
Estes blueprints compartilham conhecimento — técnicas, materiais ou princípios

CC0 Domínio Público
Este blueprint é liberado sob CC0. Você é livre para copiar, modificar, distribuir e usar este trabalho para qualquer finalidade, sem pedir permissão.
Apoie o Maker comprando produtos através do Blueprint, onde ele ganha uma Comissão Maker definida pelos vendedores, ou crie uma nova versão deste Blueprint e inclua-o como conexão no seu próprio Blueprint para compartilhar receita.