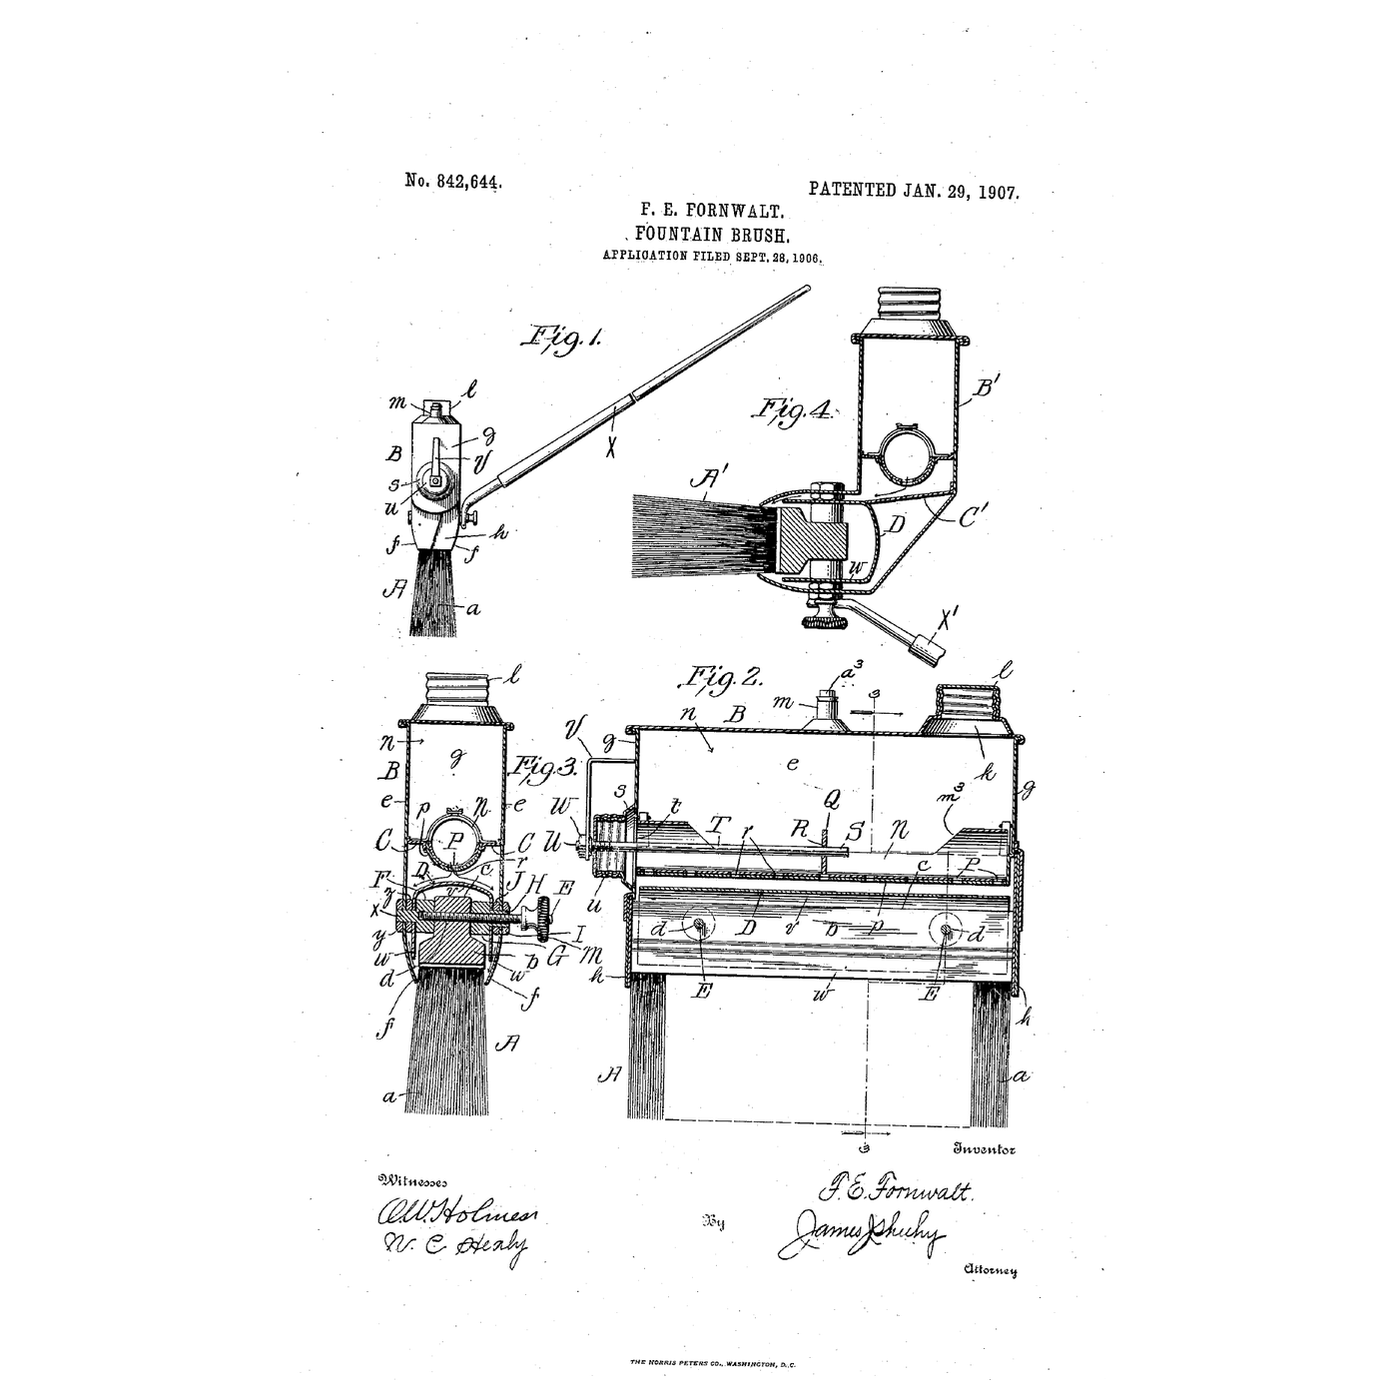

The Hooded Fountain Paint Brush: A Dome Shares the Paint Between Both Sides
Instruções
Paint the brush needs
Paint the brush needs
A turned perforated tube before it
A turned perforated tube before it
Read US 842,644
Read US 842,644
Fold the tank
Fold the tank
Materiais para este passo:
 Chapa de alumínio1 peça
 Rebites cegos1 peça
 Vedante de silicone1 peça
Ferramentas necessárias:
 Tesoura de chapa
 Alicate de bico chato
 Torno de bancada
 Kit de rebitadora
 Berbequim sem fios
 Jogo de brocas
 Conjunto de serras-copo
 Luvas de trabalho em couro
Drill the floor
Drill the floor
Ferramentas necessárias:
Berbequim sem fiosJogo de brocas Marcador permanente
 Régua
RéguaMake the turning valve
Make the turning valve
Materiais para este passo:
 Tubo de cobre de 10 mm1 peça
Ferramentas necessárias:
 Serra de arco para metaisBerbequim sem fiosJogo de brocas
 Limas (lima de mão)Torno de bancada
Fold the hood
Fold the hood
Materiais para este passo:
Chapa de alumínio1 peçaRebites cegos1 peçaFerramentas necessárias:
Torno de bancadaKit de rebitadoraClamp on the brush
Clamp on the brush
Materiais para este passo:
 Conjunto de pincéis1 peça
 Sortido de parafusos sextavados1 peça
 Porca sextavada1 peça
 Anilha plana1 peçaRebites cegos1 peça
Ferramentas necessárias:
Berbequim sem fiosJogo de brocas Chave inglesa ajustável
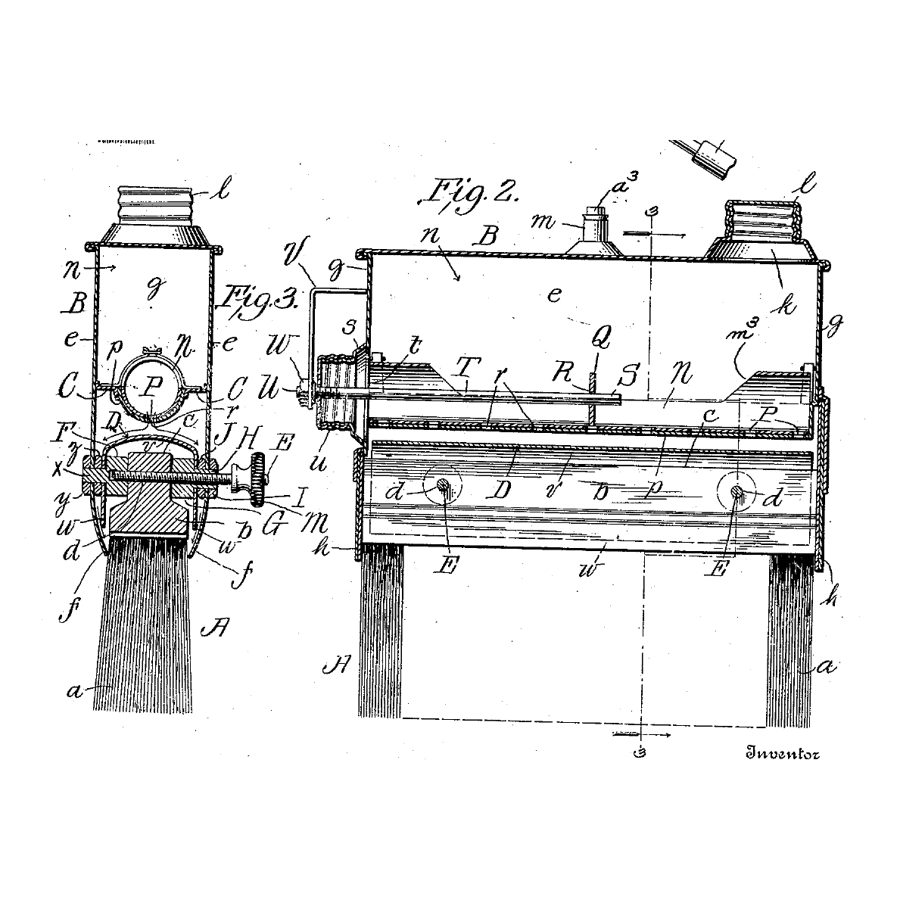
The patent drawing
The patent drawing
Paint and weigh
Paint and weigh
Materiais para este passo:
 Conjunto de tintas acrílicas1 peça
 Água1 peça
 Placa de contraplacado1 peça
Ferramentas necessárias:
 Balança digital de cozinha
 Fita métrica
 Cronómetro
A brush that clogs, floods or paints one side
A brush that clogs, floods or paints one side
Flow
History and honest limits
History and honest limits
Materiais
11- 1 peçaReferência
- 3 peçasReferência
- 1 peçaReferência
- 1 peçaReferência
- 1 peçaReferência
- Referência
- 1 peçaReferência
- 1 peçaReferência
- Referência
- 1 peçaReferência
- 1 peçaReferência
Ferramentas necessárias
16- Referência
- Referência
- Referência
- Referência
- 1 vendor sell this, none ship to you yetReferência
- Referência
- Referência
- Referência
- Referência
- Referência
- Referência
- Referência
- Referência
- Referência
- 1 vendor sell this, none ship to you yetReferência
- Referência
Blueprints relacionados
Estes blueprints compartilham conhecimento — técnicas, materiais ou princípios
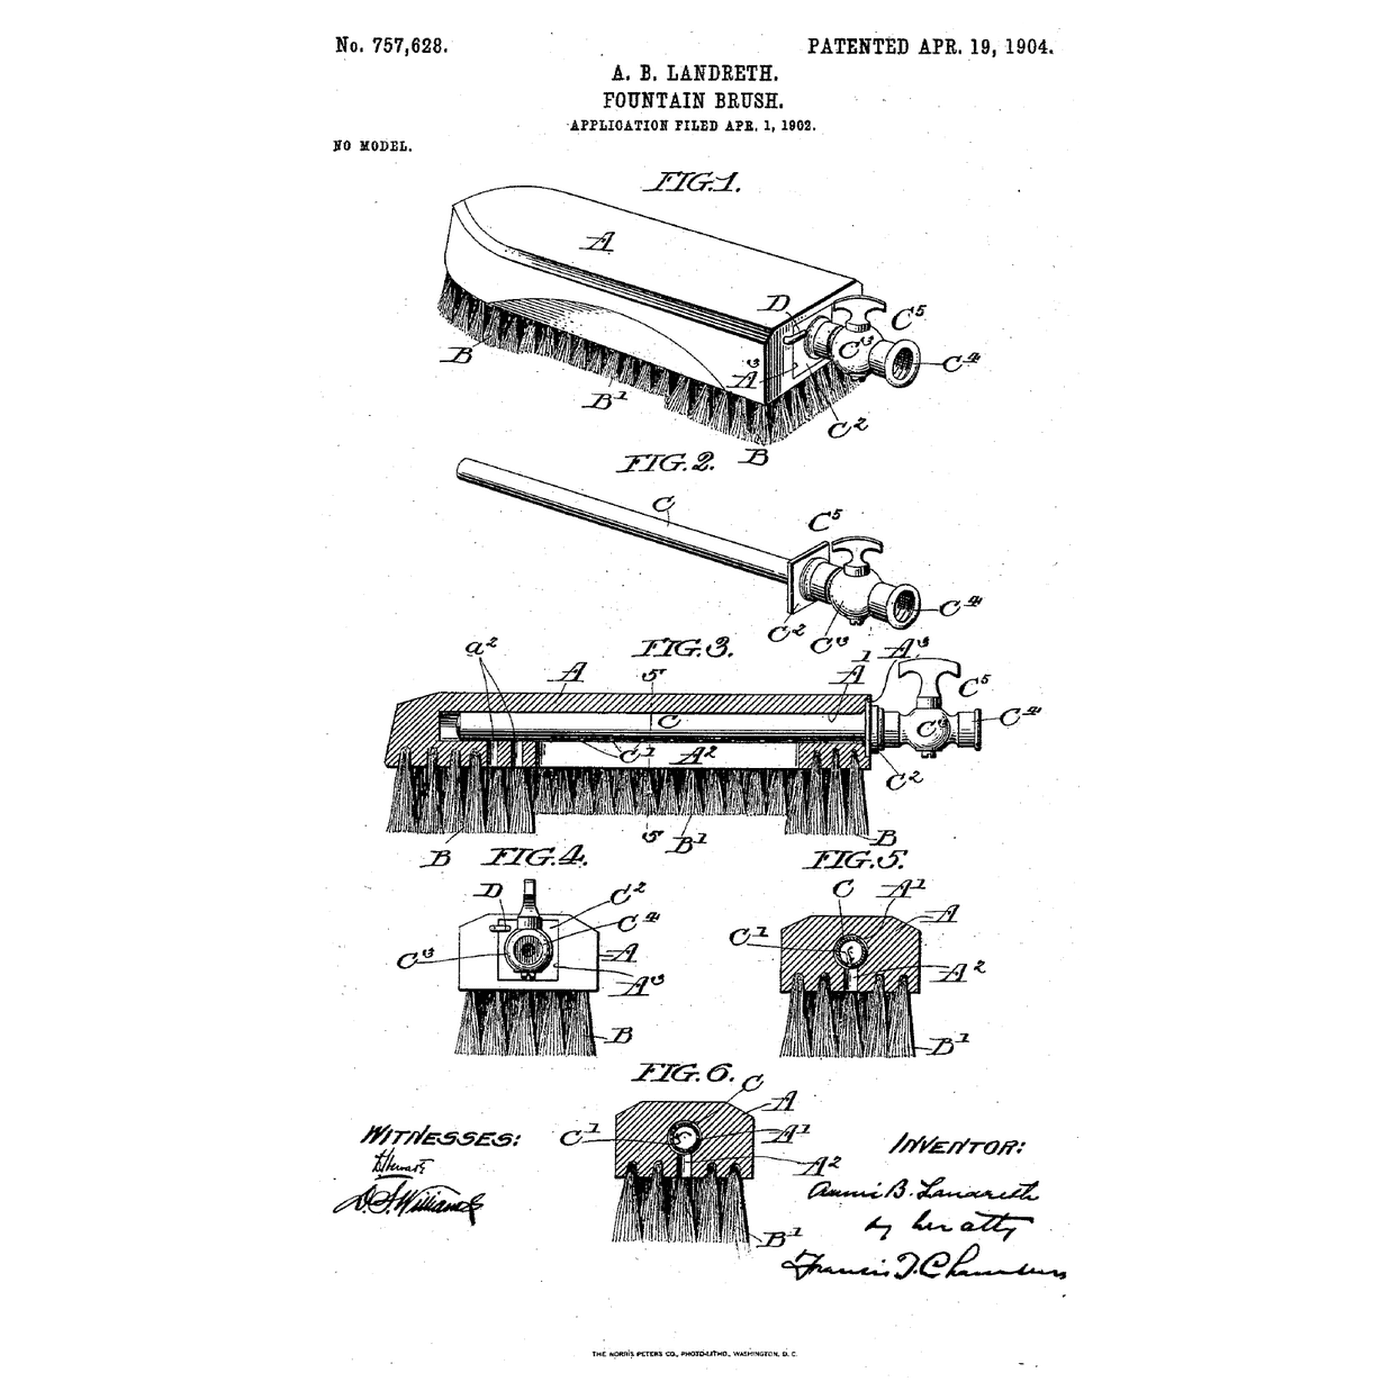
The Tube-in-the-Back Fountain Brush: Turn the Tube and the Jets Become a Soak
por YourGrandma
Mecânica
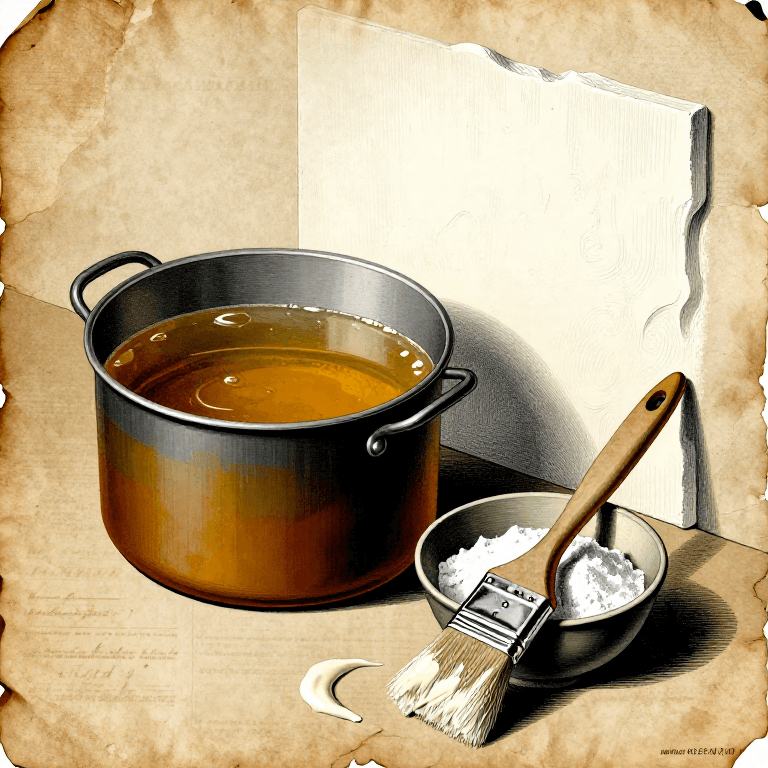
Making Hide Glue Distemper — The Traditional Ceiling and Wall Paint of Europe
por Charlie
ARTE
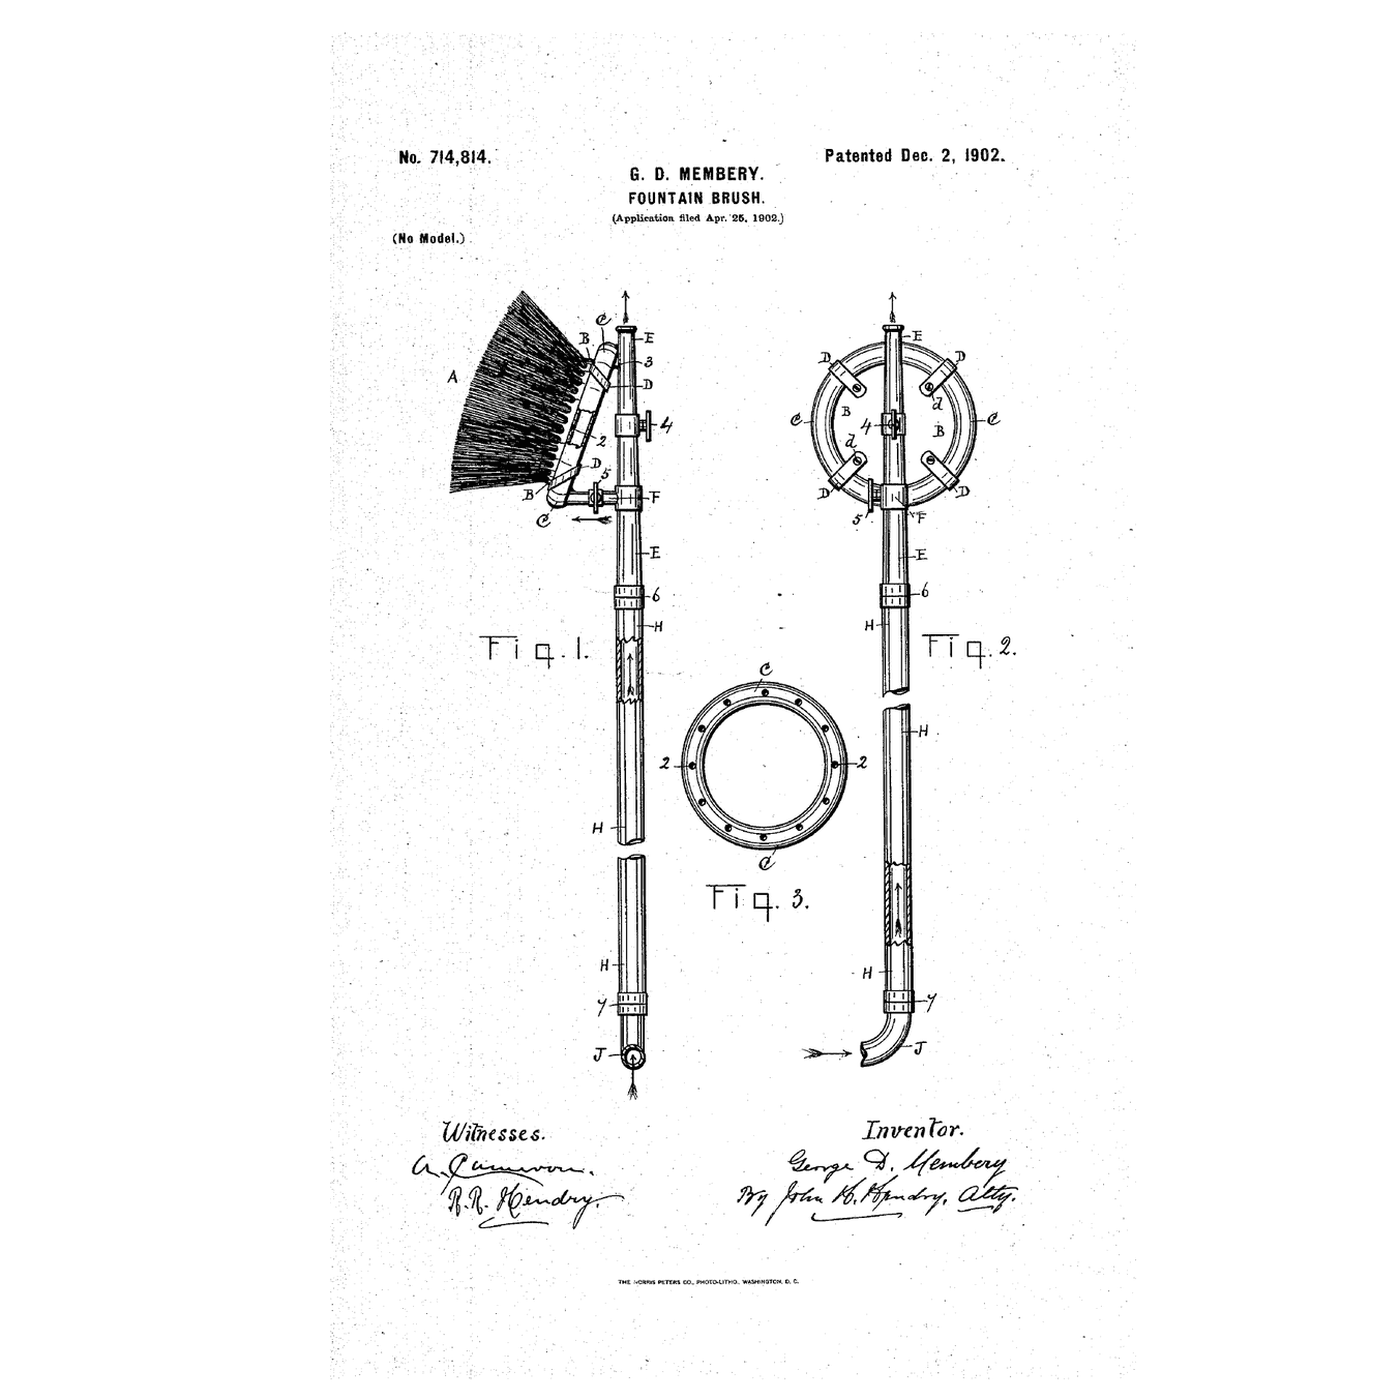
The Long-Handled Fountain Brush: A Ring of Holes Wets the Bristles From the Ground
por Martin
Mecânica
CC0 Domínio Público
Este blueprint é liberado sob CC0. Você é livre para copiar, modificar, distribuir e usar este trabalho para qualquer finalidade, sem pedir permissão.
Apoie o Maker comprando produtos através do Blueprint, onde ele ganha uma Comissão Maker definida pelos vendedores, ou crie uma nova versão deste Blueprint e inclua-o como conexão no seu próprio Blueprint para compartilhar receita.