
KUNST
SCHÖNHEIT & WELLNESS
HANDWERK
KULTUR & GESCHICHTE
UNTERHALTUNG
UMFELD
ESSEN & GETRÄNKE
REVERSE ENGINEERING
WISSENSCHAFTEN
SPORT
TECHNOLOGIE
WEARABLES
Partition Air-Tube Plunger Churn: Cream Rushing Through Branch Tubes Draws Air Down
Emma

Erstellt von

Emma

6. Oktober 2026SE
33
0
0
0
0

Partition Air-Tube Plunger Churn: Cream Rushing Through Branch Tubes Draws Air Down

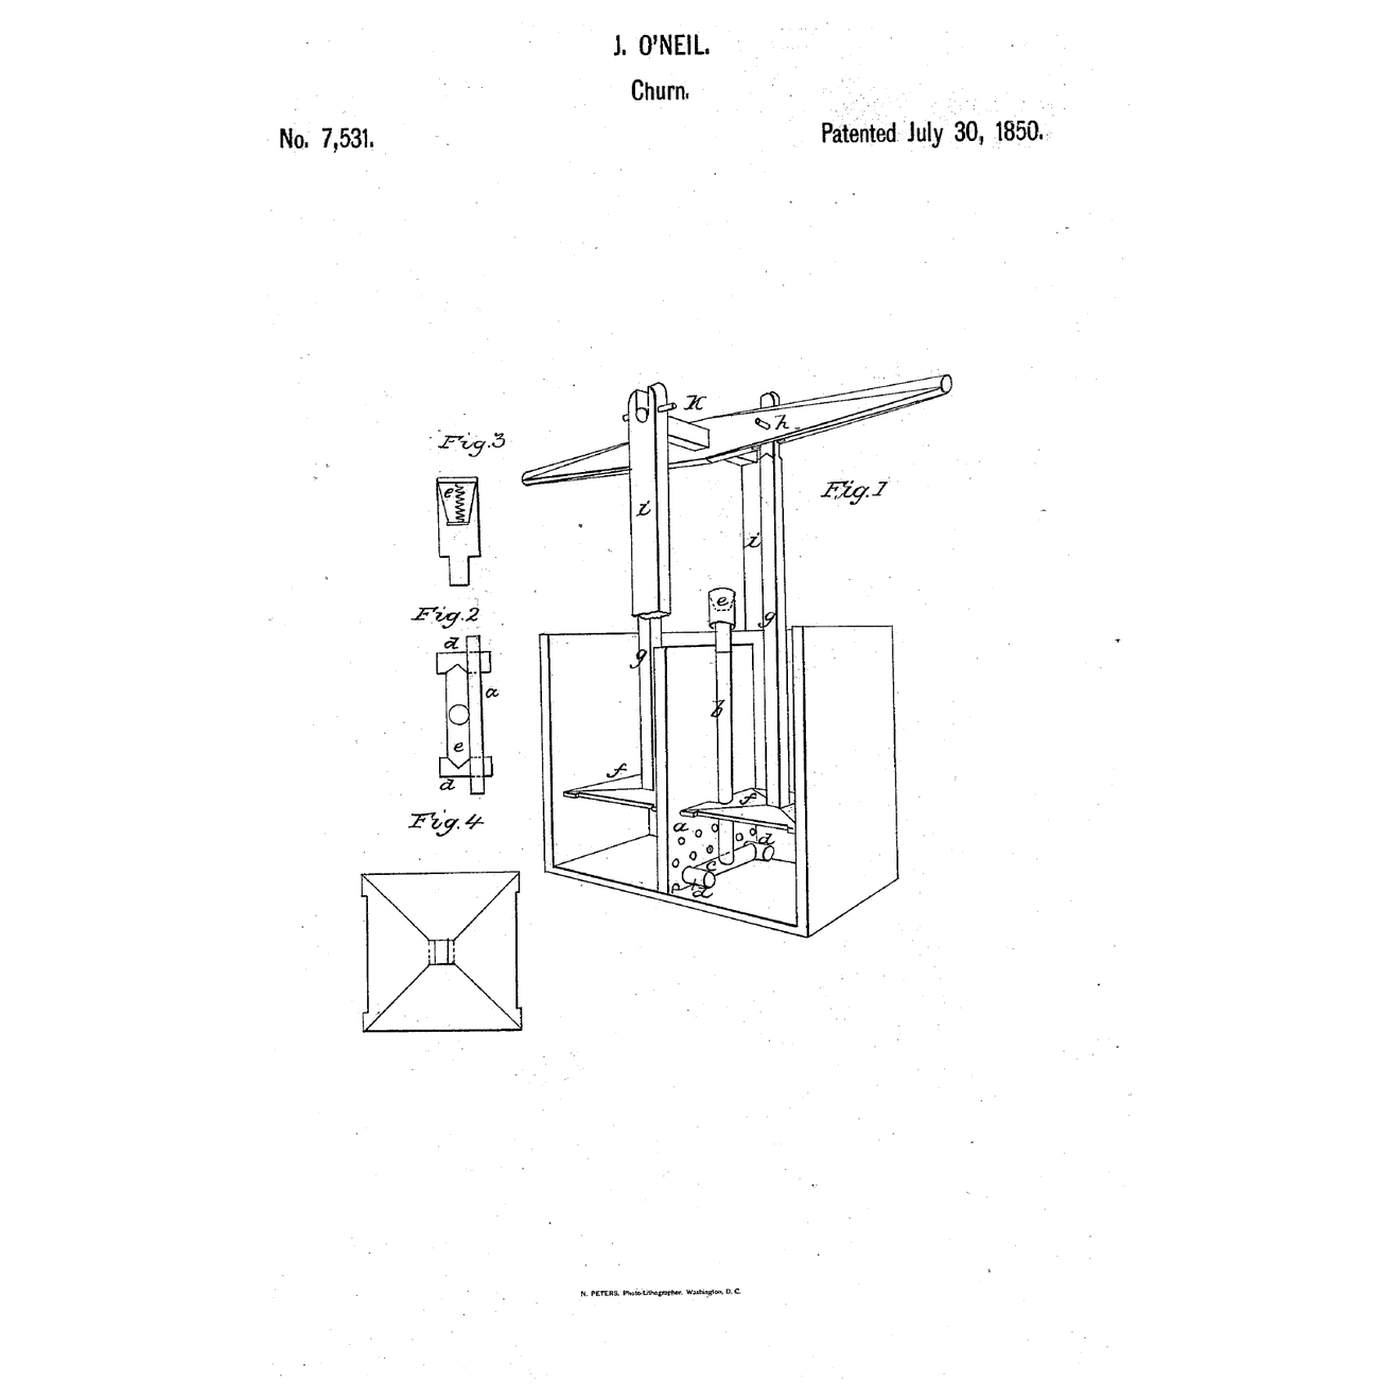
O'Neil used the rush of the cream itself to draw air into it. John O'Neil of Xenia, Ohio, received US 7,531, dated 30 July 1850, for an atmospheric churn: a box divided by a movable partition with its lower edge perforated; an air tube down the partition with a bowl at its top, in the lid, holding a spring-closed hinged valve; a horizontal tube at its foot and branch tubes through the partition's lower edge, which "serve the double purpose of breaking the cream as it passes through and of communicating the current of atmosphere to the opposite apartment." Two plungers on a rocking lever, one cut to pass over the air tube, work oppositely. This rung estimates the suction, then prints the partition with its tubes, the valve bowl and the plungers, builds the box and lever, and makes butter.
Erfahren
About 5 hours, plus printing

Anweisungen

1

The suction

Jupyter-Notebook wird geladen …
2

Two plungers forcing cream through holes before it

The embedded blueprint throws cream between three chambers. O'Neil uses two, and lets the cream's rush through branch tubes draw air down an air tube.
3

Read US 7,531

"The depression of one, and the same time the elevation of the other causes the cream to be violently rushed through the horizontal tubes d, d, and the holes in the partition from one apartment to the other alternately. The passage of the cream through the tubes d, d, causes a suction of the atmosphere down the pipe b, through the horizontal part of the tube c, to d, d, and thence to the body of cream in each apartment."
4

Print the parts

Print the partition with its air tube, foot tube and branches in one piece, with supports. Blow through the tube's top to check air comes out of both branches. Print the valve bowl, one plunger and one notched plunger. Print in PETG at 0.2 mm layers, 30 % infill, 4 walls; wash before first use.

Materialien für diesen Schritt:

PETG-FilamentPETG-Filament1 Stück

Benötigte Werkzeuge:

FDM-3D-DruckerFDM-3D-Drucker
5

Print the partition with its air tube, foot tube and branches

The partition with its air tube, foot tube and branches, printed as step 4 describes.
DesigndateiSTLCC0 - Free
6

Print the valve bowl

The valve bowl, printed as step 4 describes.
DesigndateiSTLCC0 - Free
7

Print the plunger

The plunger, printed as step 4 describes.
DesigndateiSTLCC0 - Free
8

Print the notched plunger

The notched plunger, printed as step 4 describes.
DesigndateiSTLCC0 - Free
9

Box, partition and valve

Take a food-safe box about 220 × 120 × 180 mm and fit two plywood strips inside the long sides at the middle as grooves, so the partition slides in and out. Drill the lid over the air tube's top and seat the bowl's spigot onto the tube through it. Hinge a small leather flap on the bowl's seat with a light spring, as his, so air passes down but cream cannot rise.

Materialien für diesen Schritt:

Vorratsbehälter in LebensmittelqualitätVorratsbehälter in Lebensmittelqualität1 Stück

SperrholzplatteSperrholzplatte1 Stück
LederstreifenLederstreifen1 Stück
SilikondichtmasseSilikondichtmasse1 Stück

Benötigte Werkzeuge:

Laubsäge (Schweifsäge)Laubsäge (Schweifsäge)
AkkubohrschrauberAkkubohrschrauber
BohrersatzBohrersatz
10

Plungers and lever

Glue a 12 mm hardwood dowel rod in each plunger, the notched one on the side of the air tube. Screw a pine standard to each side of the box at the middle, pass a dowel axle through them and a pine lever, and join each rod to the lever on a loose screw.

Materialien für diesen Schritt:

HartholzdübelHartholzdübel1 Stück
KiefernbrettKiefernbrett1 Stück
MaschinenschraubenMaschinenschrauben1 Stück
SechskantmutterSechskantmutter1 Stück
HolzleimHolzleim1 Stück
Holzschraube #8 x 1"Holzschraube #8 x 1"1 Stück

Benötigte Werkzeuge:

HandsägeHandsäge
AkkubohrschrauberAkkubohrschrauber
BohrersatzBohrersatz
Schraubendreher-SatzSchraubendreher-Satz
11

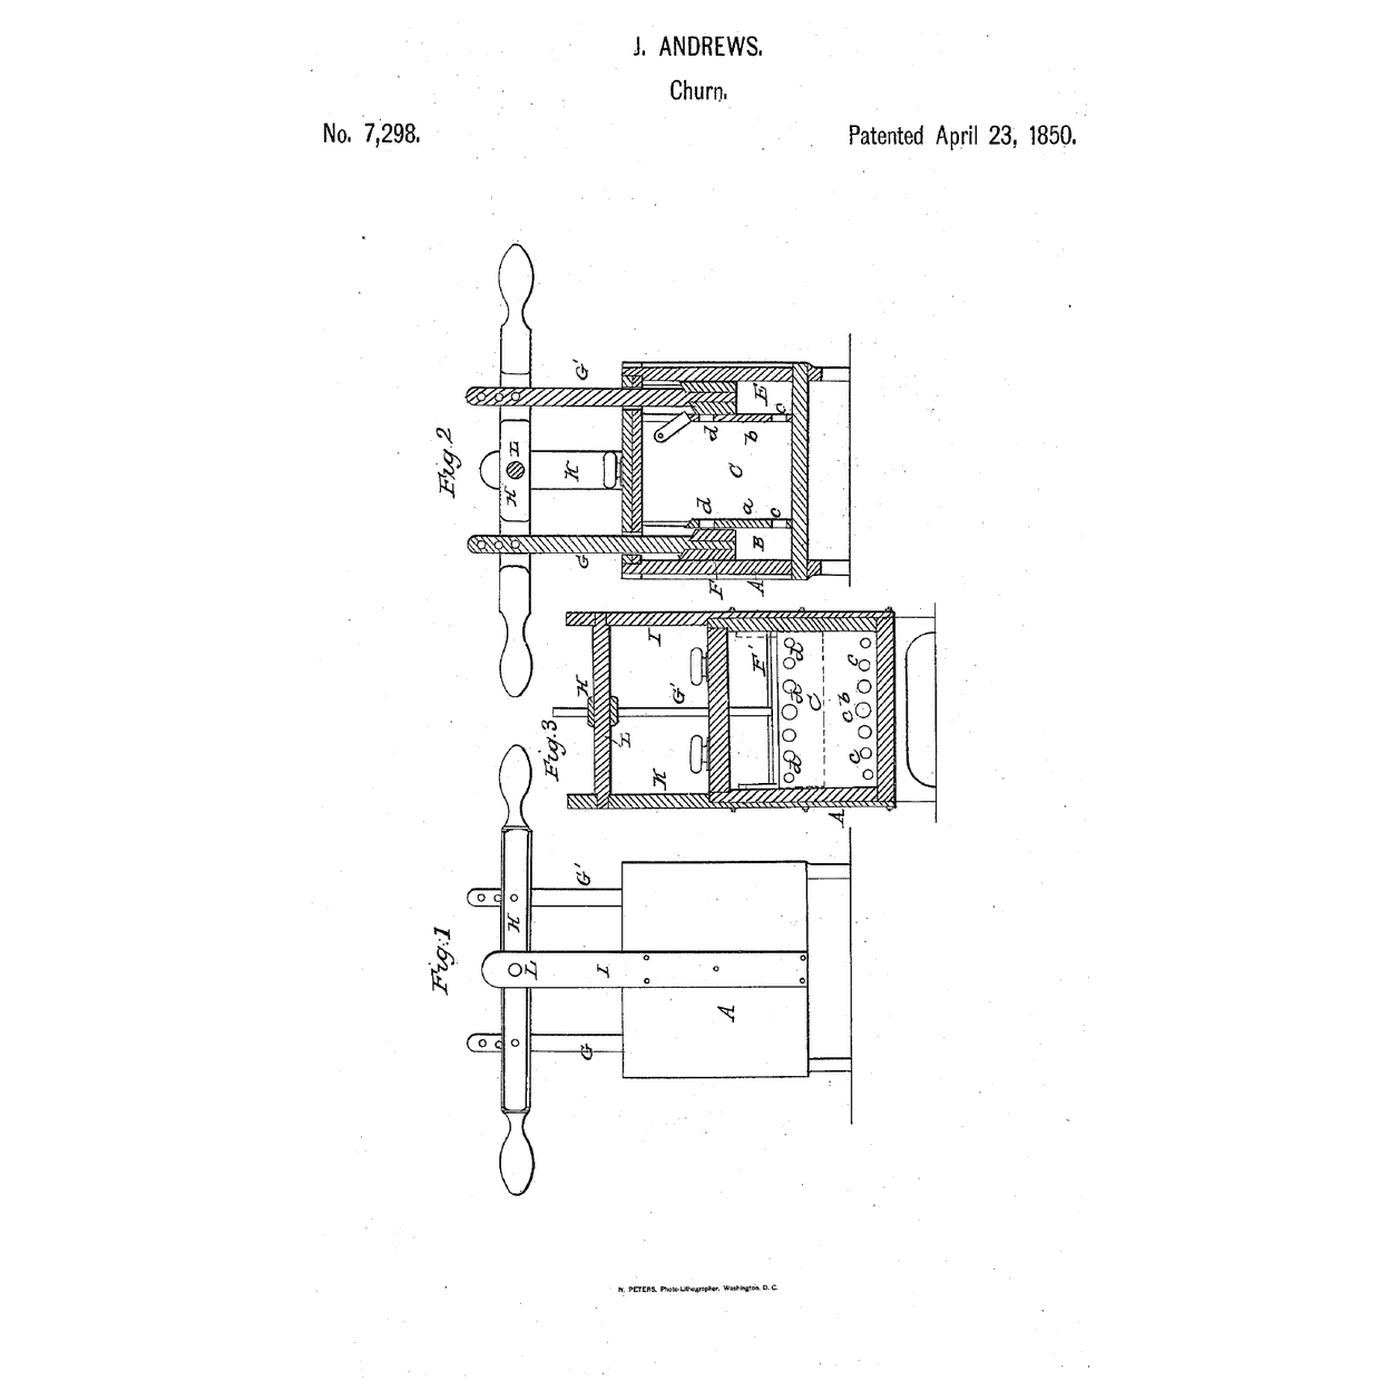
The patent drawing

US 7,531 drawing sheet, public domain (expired patent).
Schritt 11 - Image 1
12

Rock and make butter

Let the heavy cream stand until it reaches about 15 °C, checked with the thermometer. Pour in 1.5 litres. Rock the lever briskly; bubbles should come from the branch tubes. Time until the butter comes. Pour off the buttermilk, add cold water, churn a little and pour off again until it runs clear; work in a pinch of salt and weigh the butter.

Materialien für diesen Schritt:

SchlagsahneSchlagsahne1500 ml
Grobes MeersalzGrobes Meersalz1 Stück
WasserWasser1 Stück

Benötigte Werkzeuge:

Einsteck-FühlerthermometerEinsteck-Fühlerthermometer
StoppuhrStoppuhr
Digitale KüchenwaageDigitale Küchenwaage
Große Rührschüssel aus EdelstahlGroße Rührschüssel aus Edelstahl
13

No air, cream in the bowl

Partition air-tube churn troubleshooting.

Flow

Loading...
14

History and honest limits

**John O'Neil** of Xenia, Greene County, Ohio, received US 7,531, dated 30 July 1850. His plungers had parts of two sides cut away, leaving about 1½ inches at each corner, "for the purpose of gathering the butter above the dasher." He claimed the construction of the air tubes in combination with the plungers and partition. **Honest limits.** Printed parts and a food-safe box stand in for his; the notebook's pressure drop is a rough estimate. FDM prints hold food in their layer lines, so wash well and replace when worn. Your times and weights are the result.

Materialien

14

Benötigte Werkzeuge

10

Designdateien

4

Dieser Bauplan stellt her

CC0 Gemeinfrei

Dieser Blueprint ist unter CC0 veröffentlicht. Sie dürfen dieses Werk für jeden Zweck frei kopieren, ändern, verbreiten und verwenden, ohne um Erlaubnis zu fragen.

Unterstützen Sie den Maker, indem Sie Produkte über seinen Blueprint kaufen, wo er eine Maker-Provision von Anbietern festgelegt, verdient. Oder erstellen Sie eine neue Iteration dieses Blueprints und verbinden Sie ihn in Ihrem eigenen Blueprint, um Einnahmen zu teilen.

Diskussion

(0)

Anmelden um an der Diskussion teilzunehmen

Kommentare werden geladen...