Współpraca
SZTUKA
Piękno i dobre samopoczucie
RZEMIOSŁO
KULTURA I HISTORIA
ROZRYWKA
ŚRODOWISKO
JEDZENIE I NAPOJE
INŻYNIERIA ODWROTNA
NAUKI
LEKKOATLETYKA
TECHNOLOGIA
URZĄDZENIA DO NOSZENIA
Sealed Screw-Axis Drum Churn: The Dasher's Axis Screws Into It Through a Pipe in the Side, a Sprung Washer Keeps It Tight
Buttercup

Autor

Buttercup

11. listopad 2026IE
10
0
0
0
0

Sealed Screw-Axis Drum Churn: The Dasher's Axis Screws Into It Through a Pipe in the Side, a Sprung Washer Keeps It Tight

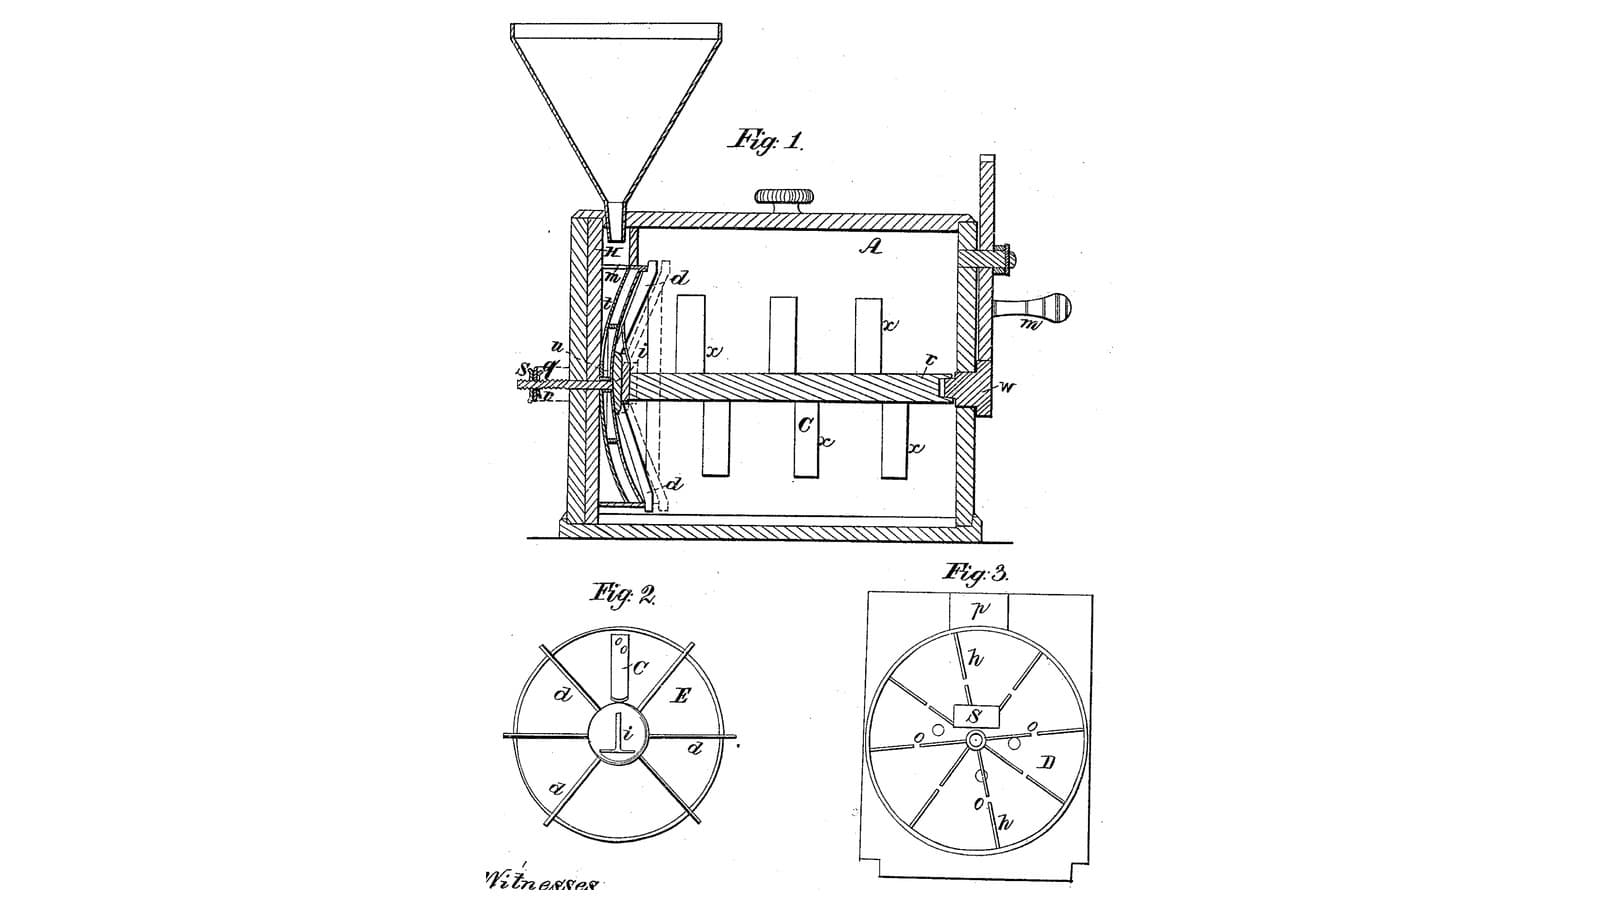
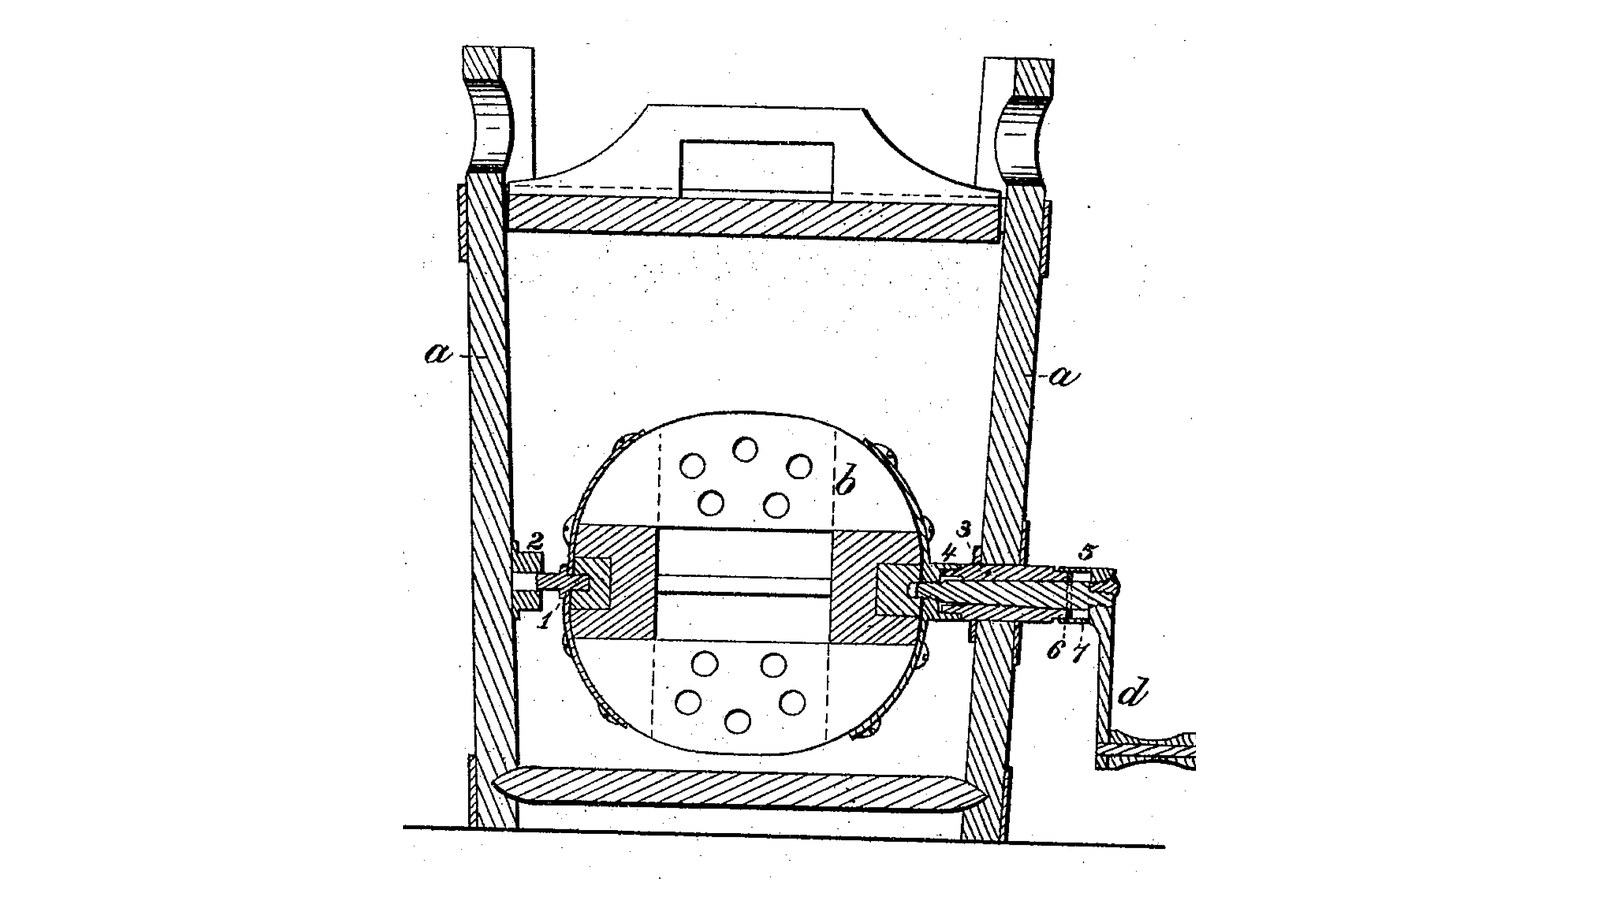
Peter Dunwald of Corning, New York, received US 31,447, dated 19 February 1861, for the shaft of a churn whose perforated dasher turns on a horizontal axis. The axis passes through a pipe set in the churn's side and screws into a socket on the dasher, drawing the dasher tight against the pipe's inner end; at the outer end a washer, pressed by an india-rubber spring inside a cup on the crank, seals the pipe. Unscrew the crank and the dasher comes out for cleaning. The patent gives no sizes; every size here is ours.
Średniozaawansowany
About 2 days

Instrukcje

1

Two seals from one screw

Wczytywanie notatnika Jupyter…
2

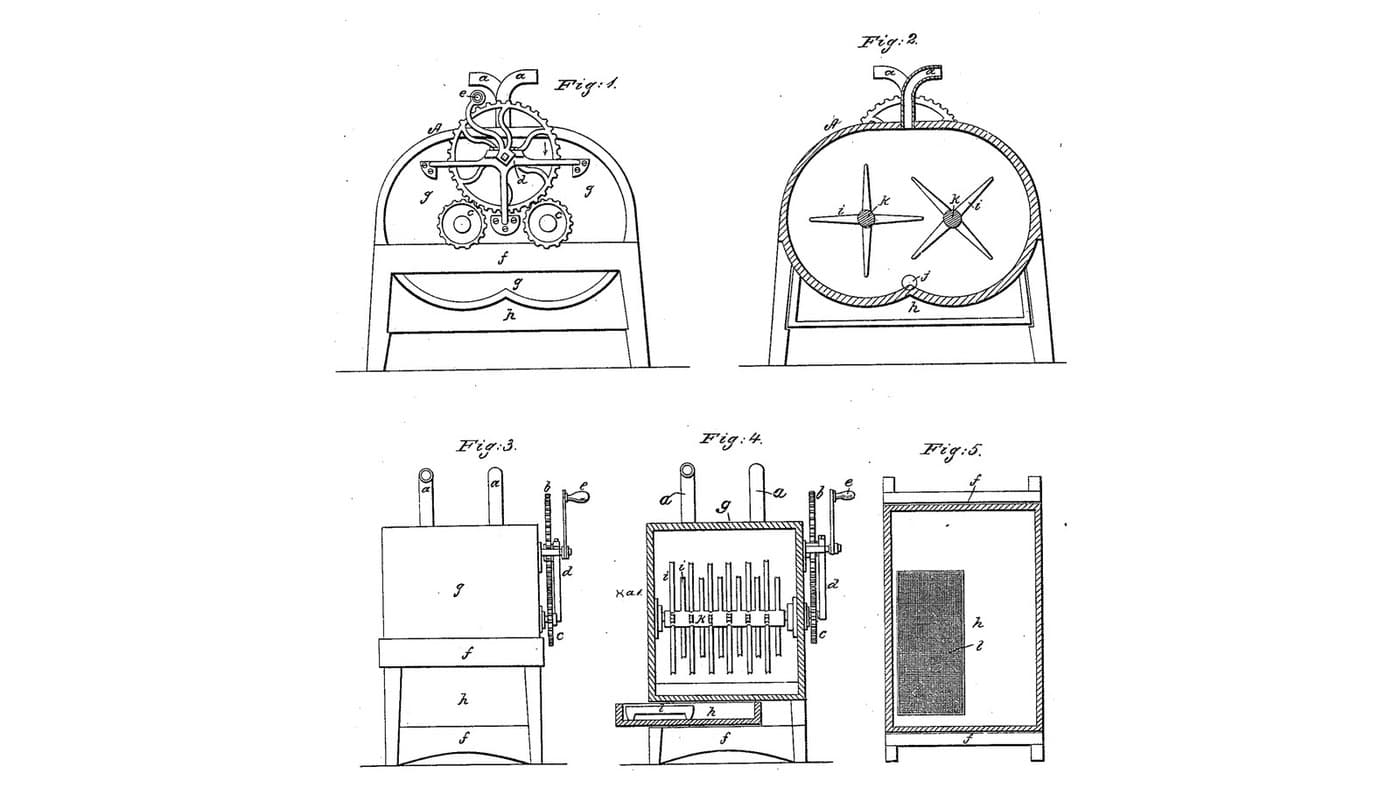
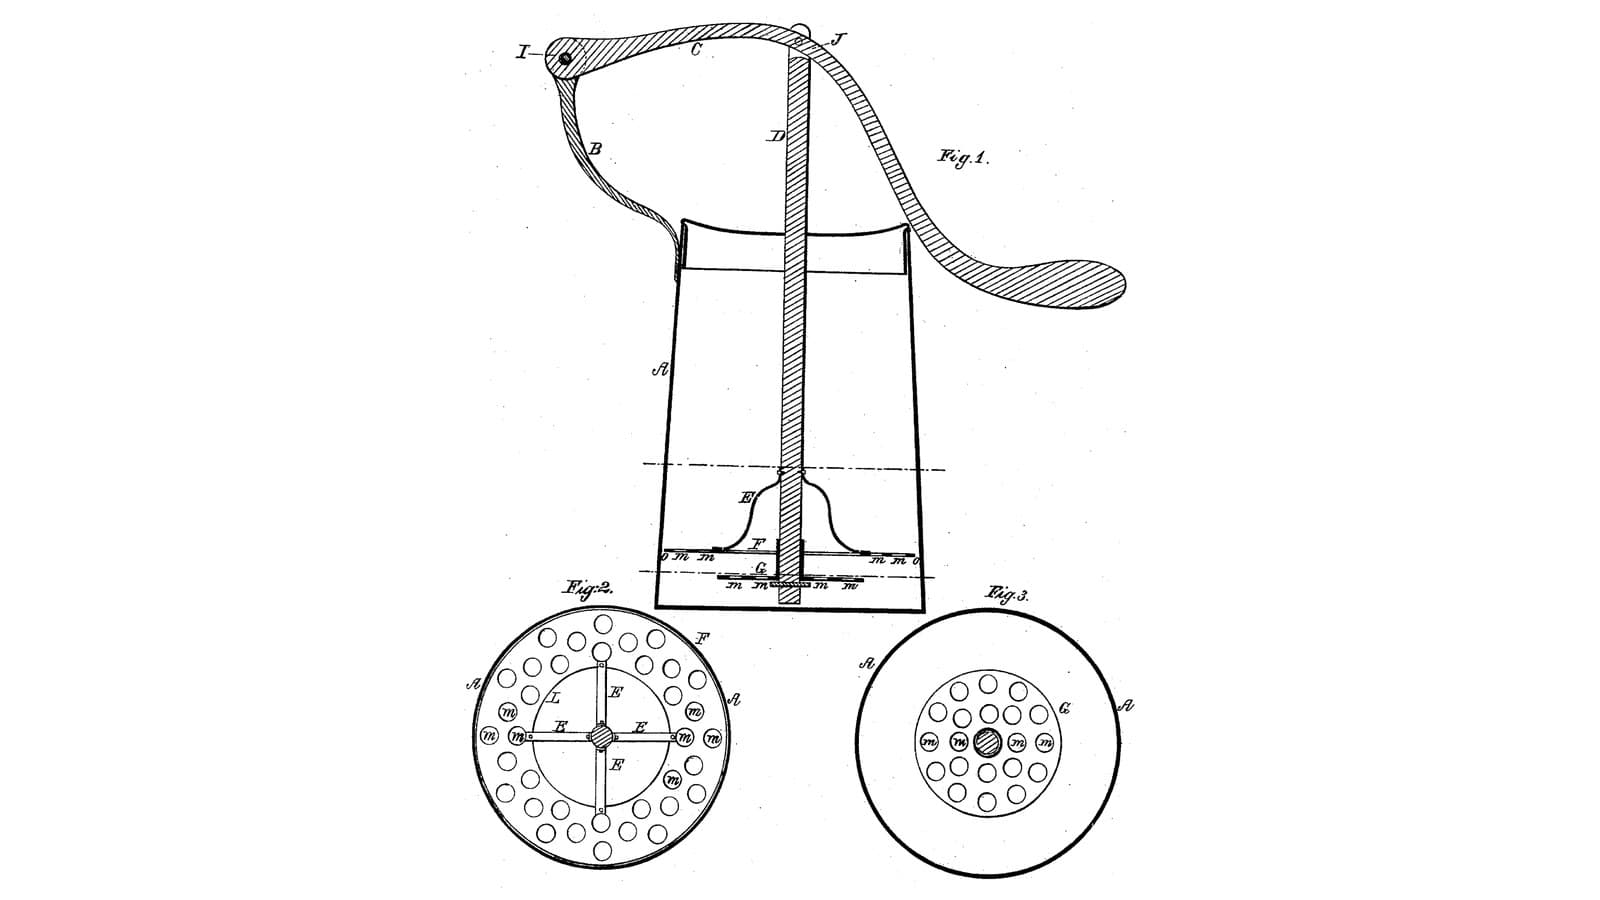
A dasher on a horizontal shaft through the end, two months before

Pike's shaft runs through the end of a box and is set by thumb screws. Dunwald's screws into the dasher and seals itself.
3

Read US 31,447

"By this construction the act of screwing the axis c, into the part 4 draws the dasher tight against the inner end of the pipe 3, and the washer 6, sets with the spring pressure against the other end, keeping the axis water or milk tight. By unscrewing the axis c, the dasher can be removed when required."
4

Print the pipe collars (two)

A collar 40 mm across and 7 thick with a 20.1 mm bore, one each side of the bucket's wall round the pipe 3. Print two. PETG, 0.2 mm layers, 30 % infill, 4 walls.
Plik projektowySTLCC0 - Free
5

Print the eye 2

The eye on the inside of the far wall: 40 mm across, 13 thick, with a 12.6 mm hole for the centre 1. PETG, 0.2 mm layers, 30 % infill, 4 walls.
Plik projektowySTLCC0 - Free
6

Body a, pipe 3 and eye 2

Use a 20-litre food-grade bucket as the body a. Bore a 20.4 mm hole through one side, 170 mm above the inside floor, and a 12.6 mm hole opposite. Cut a 20 mm stainless tube with a 14 mm bore, 52 mm long, push it through the first hole between the two printed collars so 35 mm stands inside, and seal it all with silicone. Screw the eye 2 inside over the opposite hole with silicone, and seal the hole outside. Cut an HDPE lid to the top.

Materiały do tego kroku:

Wiadro 20-litroweWiadro 20-litrowe1 sztuka
Rura ze stali nierdzewnejRura ze stali nierdzewnej1 sztuka
Filament PETGFilament PETG1 sztuka
Uszczelniacz silikonowyUszczelniacz silikonowy1 sztuka
Wkręty do drewnaWkręty do drewna4 sztuk
Płyta HDPEPłyta HDPE1 sztuka

Potrzebne narzędzia:

Drukarka 3D z filamentem (FDM)Drukarka 3D z filamentem (FDM)
Zestaw wierteł łopatkowychZestaw wierteł łopatkowych
Wiertarko-wkrętarka akumulatorowaWiertarko-wkrętarka akumulatorowa
Zestaw wiertełZestaw wierteł
Piła do metaluPiła do metalu
Pilniki (pilnik ręczny)Pilniki (pilnik ręczny)
Zestaw wkrętakówZestaw wkrętaków
WyrzynarkaWyrzynarka
KompasKompas
7

Print the socket 4

The socket on the dasher's hub: 22 mm across and 30 long with a flange, a 21 mm recess 5.5 deep for the pipe's end, and a hexagon pocket for an M12 nut behind it. PETG, 0.2 mm layers, 30 % infill, 4 walls.
Plik projektowySTLCC0 - Free
8

Dasher b with socket 4 and centre 1

Turn two hardwood ends 180 mm across and 20 thick, each with a boss 70 mm across and 20 long on its inner face and a hub 50 mm across standing out 10 mm (pipe side) or 8 mm (far side). Bore eight 15 mm holes through each end on a 120 mm circle. Roll a sheet of stainless 164 mm wide into a drum 180 mm across, drill three rings of twelve 15 mm holes in it, and rivet it round the ends. Bore the pipe-side hub 22 mm, 30 deep, and glue in the socket 4 with an M12 nut pressed into its pocket. Drive a 12 mm stainless pin 40 mm long into the far hub as the centre 1.

Materiały do tego kroku:

Deska z drewna liściastegoDeska z drewna liściastego1 sztuka
Blacha ze stali nierdzewnejBlacha ze stali nierdzewnej1 sztuka
Nity jednostronneNity jednostronne24 sztuk
Nakrętka sześciokątnaNakrętka sześciokątna1 sztuka
Klej do drewnaKlej do drewna1 sztuka
Pręt ze stali nierdzewnejPręt ze stali nierdzewnej1 sztuka

Potrzebne narzędzia:

Tokarka do drewnaTokarka do drewna
Wiertarko-wkrętarka akumulatorowaWiertarko-wkrętarka akumulatorowa
Zestaw wiertełZestaw wierteł
Zestaw wierteł łopatkowychZestaw wierteł łopatkowych
Nożyce do blachyNożyce do blachy
Zestaw nitownicy jednostronnejZestaw nitownicy jednostronnej
Piła do metaluPiła do metalu
9

Print the cylinder 5

The small cylinder on the handle: 32 mm across and 22 long, a 21 mm bore 19 deep for the pipe's end, washer and rubber spring, and a 12.1 mm hole for the axis. PETG, 0.2 mm layers, 30 % infill, 4 walls.
Plik projektowySTLCC0 - Free
10

Axis c, washer 6, spring 7 and handle d

Cut a 12 mm stainless rod 93 mm long for the axis c. Thread its inner 15 mm M12 with the die, and turn it down to 10 mm for 8 mm where the washer sits, 24 to 32 mm from its outer end. Cut a stainless washer 6 to 20.6 mm across with a 10.2 mm hole, and a rubber washer 7 13 mm long (squeezed to 11), 20.6 across with a 13 mm hole, from natural rubber sheet. Cut a crank d of mild steel flat bar, 100 mm throw, with a hardwood handle, and bolt the cylinder 5 to it. To assemble: set the dasher in the bucket with its centre in the eye, push the axis through the pipe and screw it into the socket until the dasher is drawn up to the pipe's end; slide on the washer and rubber over the axis's narrow part, then the cylinder and crank, and pin the crank to the axis's end.

Materiały do tego kroku:

Pręt ze stali nierdzewnejPręt ze stali nierdzewnej1 sztuka
Podkładka płaskaPodkładka płaska1 sztuka
Płyta z kauczuku naturalnegoPłyta z kauczuku naturalnego1 sztuka
Płaskownik ze stali miękkiejPłaskownik ze stali miękkiej1 sztuka
Kołki z twardego drewnaKołki z twardego drewna1 sztuka
ZawleczkaZawleczka1 sztuka
Filament PETGFilament PETG1 sztuka

Potrzebne narzędzia:

Drukarka 3D z filamentem (FDM)Drukarka 3D z filamentem (FDM)

Zestaw do gwintowaniaZestaw do gwintowania
Tokarka do metaluTokarka do metalu
Piła do metaluPiła do metalu
Pilniki (pilnik ręczny)Pilniki (pilnik ręczny)
Imadło warsztatoweImadło warsztatowe
Wiertarko-wkrętarka akumulatorowaWiertarko-wkrętarka akumulatorowa
Zestaw wiertełZestaw wierteł
Zestaw wkrętakówZestaw wkrętaków
11

The build in 3D

FreeCAD model of this build, the bucket cut open: the pipe through the wall in its collars, the drum dasher with its socket and centre in the eye, the axis screwed into the socket, the washer, rubber spring, cylinder and crank.
Plik projektowyBLENDCC0 - Free
12

Churn

Pour about 8 litres of heavy cream at about 15 °C, checked with the thermometer, into the bucket, so it stands below the pipe, and put on the lid. Turn the crank steadily, timing it. When the butter comes, take off the lid, pull the pin and the crank, unscrew the axis and lift the dasher out. Take out the butter, pour the buttermilk into a bowl, wash the butter in cold water until it runs clear, salt and weigh it.

Materiały do tego kroku:

Śmietanka kremówkaŚmietanka kremówka8 l
Sól morska gruboziarnistaSól morska gruboziarnista1 sztuka
WodaWoda1 sztuka

Potrzebne narzędzia:

Termometr z sondą pozostawianą w potrawieTermometr z sondą pozostawianą w potrawie

StoperStoper
Cyfrowa waga kuchennaCyfrowa waga kuchenna
Duża misa ze stali nierdzewnejDuża misa ze stali nierdzewnej
13

Troubleshooting

Screw-axis churn troubleshooting.

Flow

Loading...
14

History and honest limits

**Peter Dunwald** of Corning, Steuben County, New York, US 31,447, 19 February 1861, "Churn". He claimed "the axis c, provided with the washer 6, kept to the end of the pipe 3, by a spring 7, said axis c, screwing into the socket 4, on the dasher b", and did not claim the revolving dasher on a horizontal shaft. His one figure is printed turned on its side. He does not give the dasher's form beyond "perforated as usual"; ours is a riveted drum, his drawing shows a rounded one. The patent gives no sizes; every size here is ours.

Materiały

20

Wymagane narzędzia

19

Pliki projektowe

5

CC0 Domena publiczna

Ten plan jest udostępniany na licencji CC0. Możesz go swobodnie kopiować, modyfikować, rozpowszechniać i wykorzystywać do dowolnych celów, bez konieczności uzyskiwania zgody.

Wesprzyj Makera kupując produkty przez jego plan, za co zarabia Prowizja Makera ustalony przez sprzedawców, lub stwórz nową iterację tego planu i dołącz go jako połączenie w swoim własnym planie, aby dzielić się przychodami.

Dyskusja

(0)

Zaloguj się aby dołączyć do dyskusji

Ładowanie komentarzy...