Współpraca
SZTUKA
Piękno i dobre samopoczucie
RZEMIOSŁO
KULTURA I HISTORIA
ROZRYWKA
ŚRODOWISKO
JEDZENIE I NAPOJE
INŻYNIERIA ODWROTNA
NAUKI
LEKKOATLETYKA
TECHNOLOGIA
URZĄDZENIA DO NOSZENIA
Hooked Breaker-Frame Churn: Breakers Held Still From the Lid, Then Hooked to the Dasher to Gather
Buttercup

Autor

Buttercup

10. listopad 2026IE
4
0
0
0
0

Hooked Breaker-Frame Churn: Breakers Held Still From the Lid, Then Hooked to the Dasher to Gather

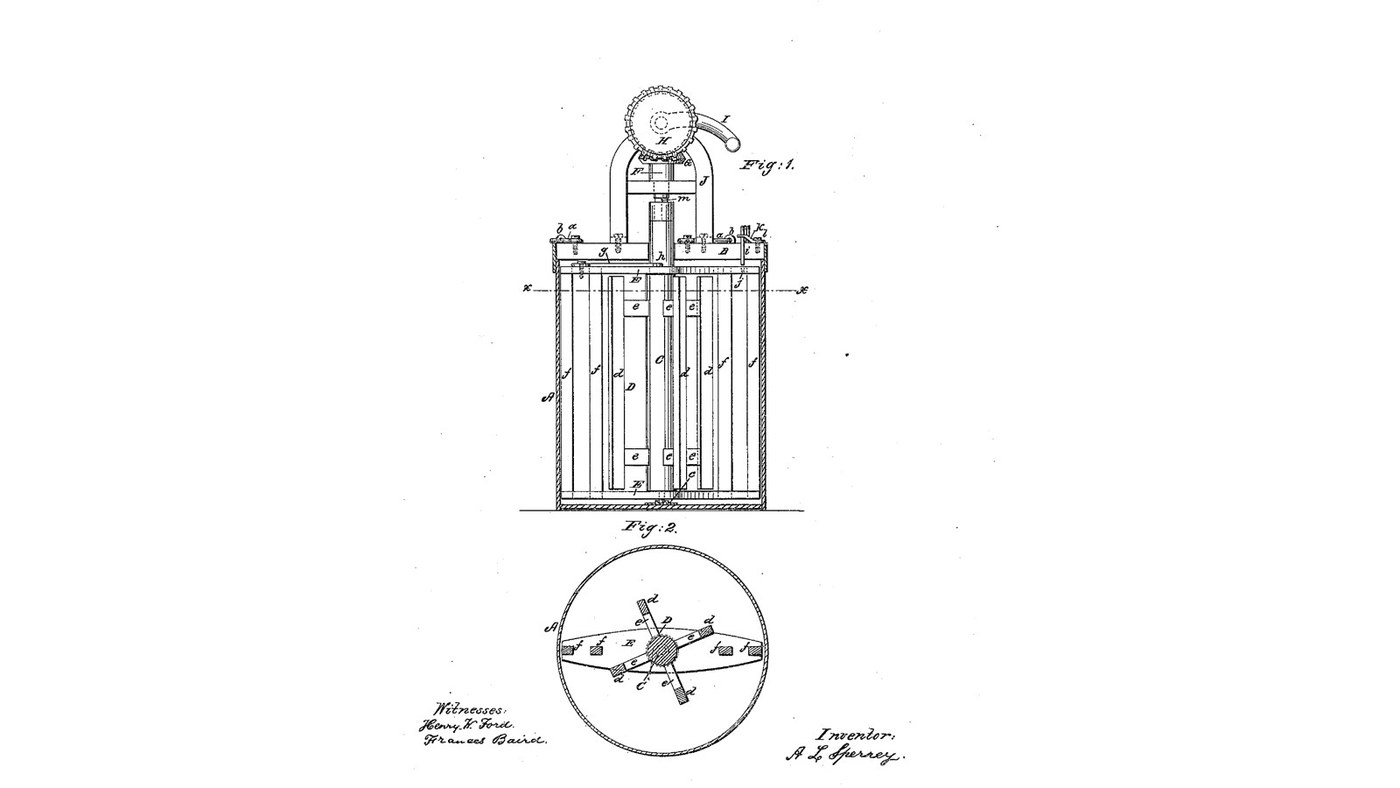
A. L. Sperry of Auburn, Indiana, received US 25,285, dated 30 August 1859, for a dasher churn whose breakers can stand still or turn with the dasher, both worked from the top. A spring hook pressed through the lid and held by a button stops the breaker frame while the four-paddle dasher churns. After the butter comes, a hook on the frame is pushed into the dasher's shaft and the button is turned back, so the whole sweep turns together and gathers the butter as the crank goes back and forth. Sperry gives no sizes; every size here is ours.
Średniozaawansowany
About 2 days, plus printing

Instrukcje

1

Paddles past the breakers

Wczytywanie notatnika Jupyter…
2

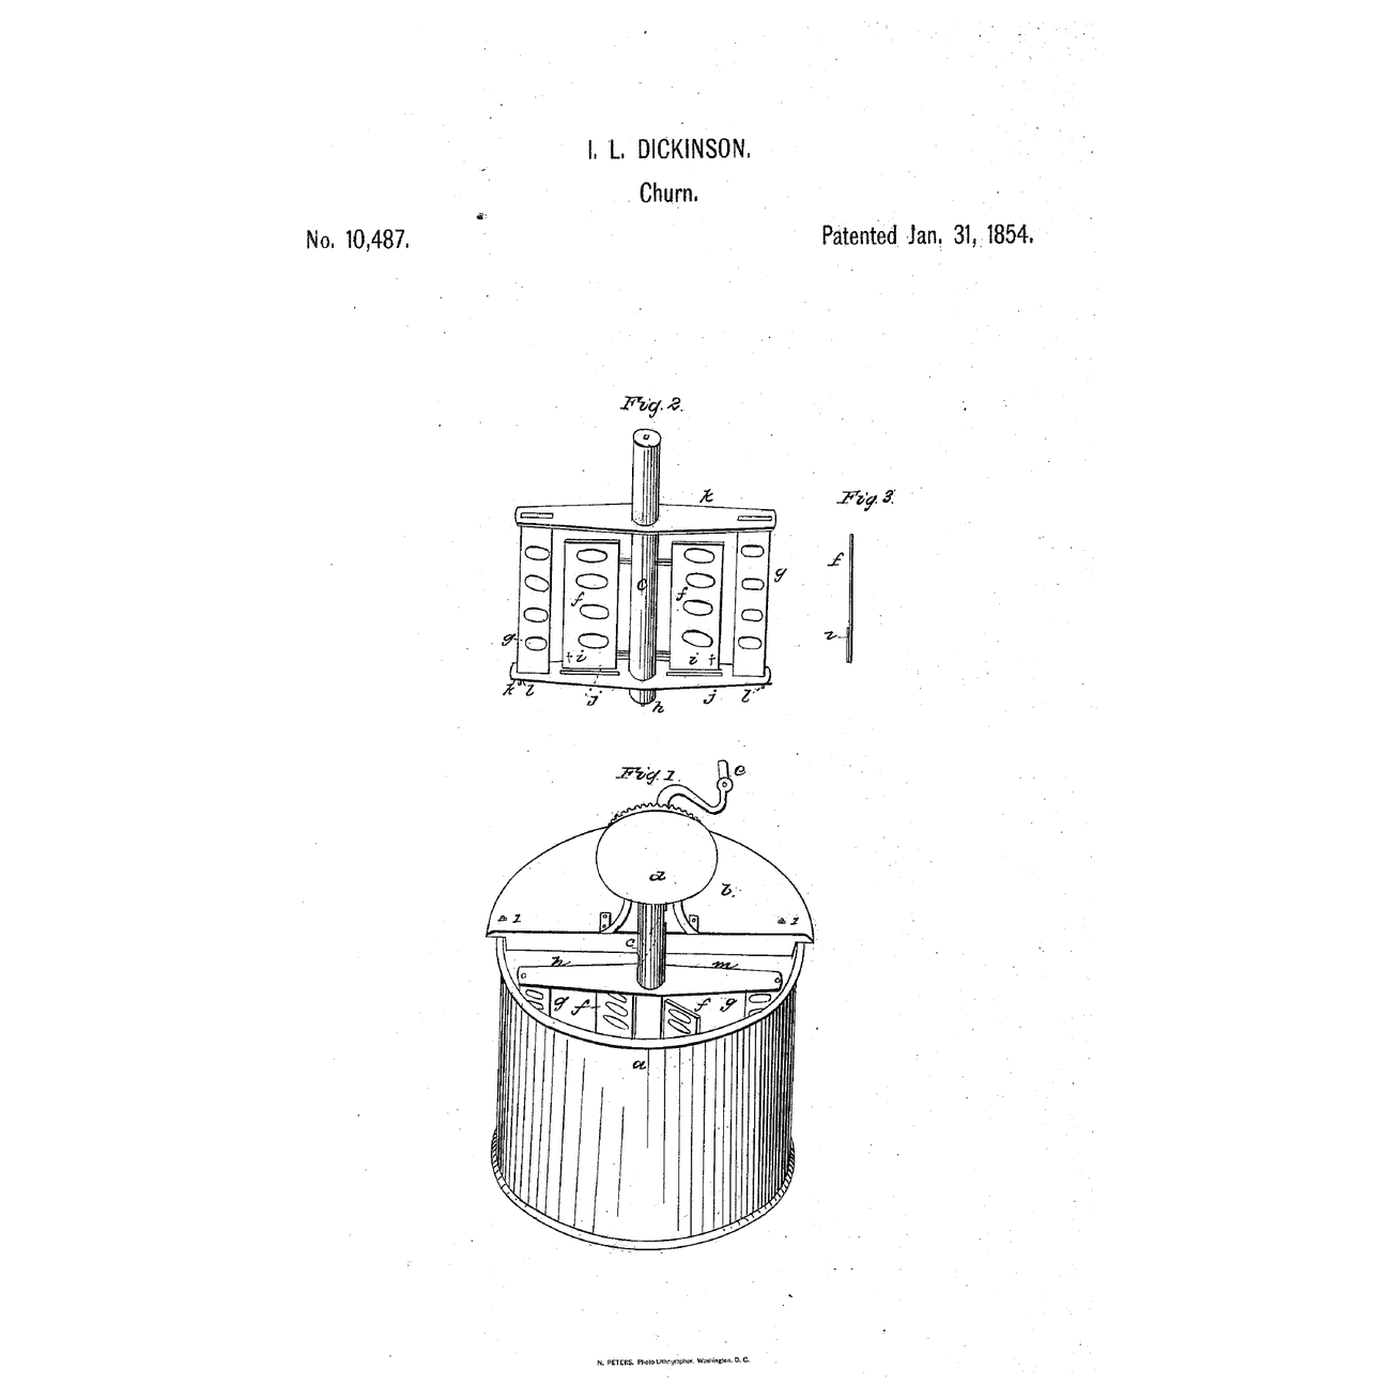
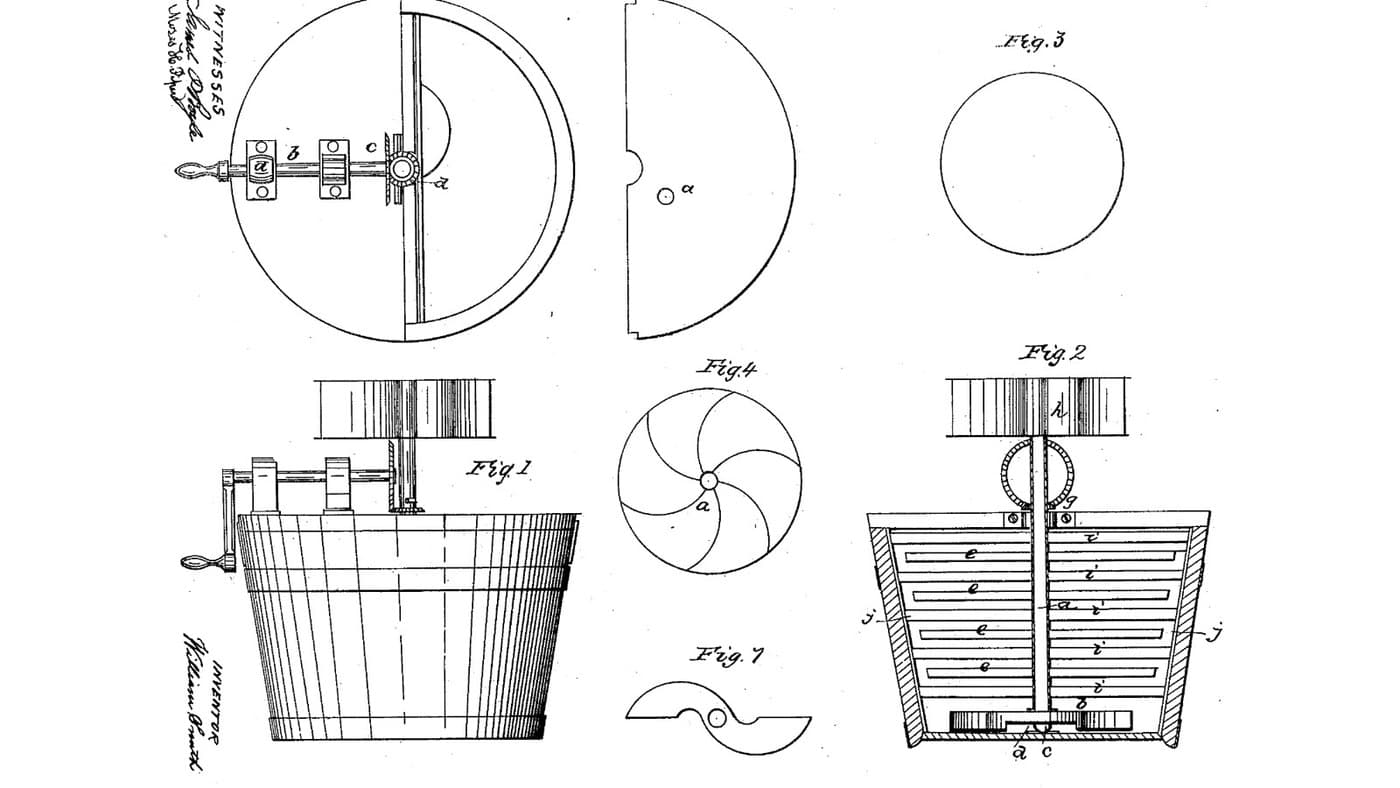
Dickinson's churn, which Sperry names

Dickinson's breakers were freed and caught by pins and spring catches at the bottom of the churn. Sperry moved both to the top.
3

Read US 25,285

"In order to break the cream, the breakers are arrested by depressing the spring hook i, and the dasher is rotated independent from the breaker frame, the hook g, being disconnected from the hole h, in the dasher shaft. After the butter has been separated from the milk, the hook g is pressed into the hole h, in the shaft, thereby connecting the breaker frame and the dasher, and the button k, is turned back, releasing the spring hook i".
4

Print the socket c

The 60 mm cup with a cone recess for the shaft's point, an M6 nut trap underneath and an O-ring groove. PETG, 0.2 mm layers, 40 % infill, 4 walls.
Plik projektowySTLCC0 - Free
5

Print the wheel G

The 12-tooth spur pinion (module 2) for shaft F, bored 12.4 mm and cross-drilled for a pin. PETG, 0.2 mm layers, 40 % infill, 4 walls.
Plik projektowySTLCC0 - Free
6

Print the wheel H

The 36-tooth crown wheel (module 2) for the crank shaft n, bored 12.4 mm and cross-drilled for a pin. Print it teeth up. PETG, 0.2 mm layers, 40 % infill, 4 walls.
Plik projektowySTLCC0 - Free
7

Socket c in the tub's floor

Drill a 6.5 mm hole in the middle of the bucket's floor. Push an M6 nut into the cup's trap, lay an O-ring in its groove and bolt the cup over the hole from underneath with a stainless M6 x 16 bolt and a washer. Fill the bucket with water to check it does not leak, then empty it.

Materiały do tego kroku:

Wiadro 20-litroweWiadro 20-litrowe1 sztuka
Zestaw śrub sześciokątnychZestaw śrub sześciokątnych1 sztuka
Nakrętka sześciokątnaNakrętka sześciokątna1 sztuka
Podkładka płaskaPodkładka płaska1 sztuka
O-ringO-ring1 sztuka
Filament PETGFilament PETG1 sztuka

Potrzebne narzędzia:

Drukarka 3D z filamentem (FDM)Drukarka 3D z filamentem (FDM)
Wiertarko-wkrętarka akumulatorowaWiertarko-wkrętarka akumulatorowa
Zestaw wiertełZestaw wierteł
Klucz nastawnyKlucz nastawny
WodaWoda
8

Shaft C and dasher D

Cut a 32 mm hardwood dowel 357 mm long. Whittle 14 mm of its foot to a point that sits in the cup and chisel a 16.4 mm square socket 15 mm deep in its top. Bore a 9 mm hole h across it 20 mm below the top. Mortise two hardwood arms 16 x 24 mm through it at 70 and 300 mm above the floor's level, at right angles, so they reach 88 mm from the middle, and screw four hardwood paddles 30 x 12 mm, 270 mm long, upright across their ends.

Materiały do tego kroku:

Kołki z twardego drewnaKołki z twardego drewna1 sztuka
Deska z drewna liściastegoDeska z drewna liściastego1 sztuka
Klej do drewnaKlej do drewna1 sztuka
Wkręty do drewnaWkręty do drewna16 sztuk

Potrzebne narzędzia:

Piła ręcznaPiła ręczna
DłutaDłuta
Wiertarko-wkrętarka akumulatorowaWiertarko-wkrętarka akumulatorowa
Zestaw wierteł łopatkowychZestaw wierteł łopatkowych


Zestaw wiertełZestaw wierteł
Kątownik stolarskiKątownik stolarski
Miara zwijanaMiara zwijana
9

Breaker frame E and hook g

Cut two hardwood bars 60 x 15 mm, rounded at the ends to fit inside the bucket at 30 and 332 mm up, and bore each 35 mm in the middle so they turn loosely on the shaft. Join them with four hardwood breakers 20 x 20 mm, two each side, their middles 102 and 124 mm from the shaft. Bore an 8 mm hole j in the top bar 115 mm from the middle. Bend a hook g from 6 mm stainless rod and pivot it on the top bar so it swings into hole h.

Materiały do tego kroku:

Deska z drewna liściastegoDeska z drewna liściastego1 sztuka
Klej do drewnaKlej do drewna1 sztuka
Wkręty do drewnaWkręty do drewna8 sztuk
Pręt ze stali nierdzewnejPręt ze stali nierdzewnej1 sztuka
Zestaw śrub sześciokątnychZestaw śrub sześciokątnych1 sztuka
Nakrętka samohamowna z wkładką nylonowąNakrętka samohamowna z wkładką nylonową1 sztuka

Potrzebne narzędzia:

Piła ręcznaPiła ręczna

WyrzynarkaWyrzynarka
Wiertarko-wkrętarka akumulatorowaWiertarko-wkrętarka akumulatorowa
Zestaw wierteł łopatkowychZestaw wierteł łopatkowych

Zestaw wiertełZestaw wierteł
Imadło warsztatoweImadło warsztatowe
Piła do metaluPiła do metalu
Pilniki (pilnik ręczny)Pilniki (pilnik ręczny)
10

Lid B, framing J, gearing and spring hook i

Cut a 320 mm disc of 12 mm plywood, saw it in half and notch both halves for a 34 mm hole in the middle. Screw a hardwood block 80 x 56 x 30 mm on the front half over the middle, bored 13 mm, and two bearing blocks 44 x 30 mm, 114 mm tall, bored 12.6 mm through 94 mm up. Shape a 16 mm square pin m on the end of a 12 mm stainless shaft F, drop it through the block into C's socket and pin the wheel G on it above the block. Slide the crank shaft n through the bearing blocks, pin the wheel H on its inner end meshing with G, and fit a crank and handle. Drill a 9 mm hole through the lid over hole j, rivet a spring-steel strip with a 7 mm pin over it so the pin can be pressed into j, and pivot a hardwood button k beside it to hold it down. Fit hooks and eyes to hold the lid halves to the bucket.

Materiały do tego kroku:

Płyta sklejkowaPłyta sklejkowa1 sztuka
Deska z drewna liściastegoDeska z drewna liściastego1 sztuka
Pręt ze stali nierdzewnejPręt ze stali nierdzewnej1 sztuka
Taśma ze stali sprężynowejTaśma ze stali sprężynowej1 sztuka
Drut ze stali nierdzewnejDrut ze stali nierdzewnej1 sztuka
HaftkaHaftka4 sztuk
Zestaw śrub sześciokątnychZestaw śrub sześciokątnych2 sztuk
Wkręty do drewnaWkręty do drewna12 sztuk
Filament PETGFilament PETG1 sztuka

Potrzebne narzędzia:

Drukarka 3D z filamentem (FDM)Drukarka 3D z filamentem (FDM)
WyrzynarkaWyrzynarka
Wiertarko-wkrętarka akumulatorowaWiertarko-wkrętarka akumulatorowa
Zestaw wierteł łopatkowychZestaw wierteł łopatkowych
Zestaw wiertełZestaw wierteł
Piła do metaluPiła do metalu
Pilniki (pilnik ręczny)Pilniki (pilnik ręczny)
Nożyce do blachyNożyce do blachy
Szczypce okrągłeSzczypce okrągłe
Zestaw wkrętakówZestaw wkrętaków
Klucz nastawnyKlucz nastawny
11

The build in 3D

FreeCAD model of this build, cut open: the cup in the floor, the dasher's four paddles inside the breaker frame, hook g into hole h, the spring hook i and button k on the lid, the framing with shaft F, wheels G and H and the crank. The dasher was turned alone and with the frame through 16 angles.
Plik projektowyBLENDCC0 - Free
12

Churn, then gather

Pour about 8 litres of heavy cream at about 15 °C into the bucket, checked with the thermometer. With hook g out of hole h, press the spring hook i into hole j and turn the button over it. Turn the crank steadily, timing it. When the butter comes, take off the back half of the lid, push hook g into h, turn the button back to free the spring hook, and turn the crank back and forth to gather the butter. Lift it out, wash it in cold water until it runs clear, work in a pinch of salt and weigh it.

Materiały do tego kroku:

Śmietanka kremówkaŚmietanka kremówka8 l
Sól morska gruboziarnistaSól morska gruboziarnista1 sztuka
WodaWoda1 sztuka

Potrzebne narzędzia:

Termometr z sondą pozostawianą w potrawieTermometr z sondą pozostawianą w potrawie

StoperStoper
Cyfrowa waga kuchennaCyfrowa waga kuchenna
Duża misa ze stali nierdzewnejDuża misa ze stali nierdzewnej
13

Troubleshooting

Hooked breaker-frame churn troubleshooting.

Flow

Loading...
14

History and honest limits

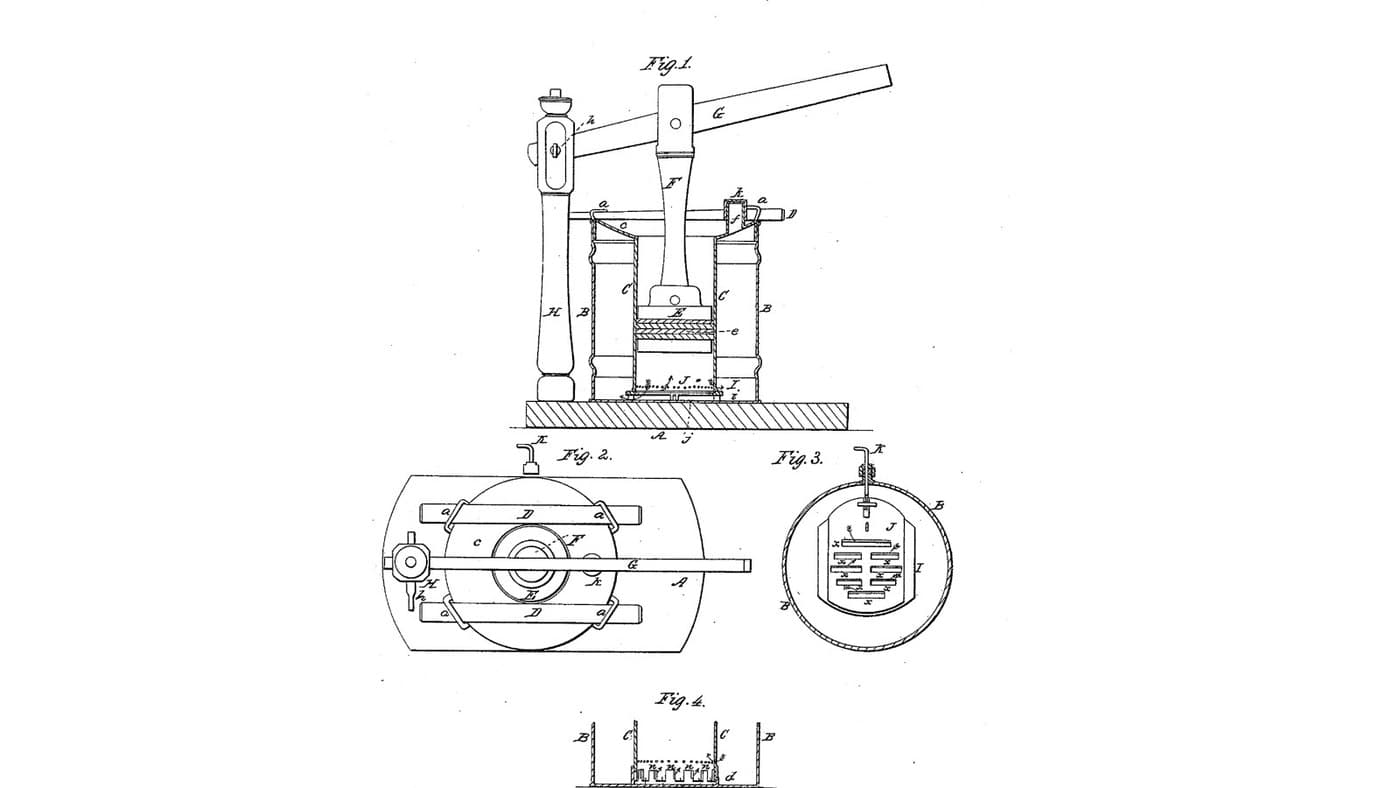
**A. L. Sperry** of Auburn, Indiana, US 25,285, 30 August 1859, "Churn". He claimed the arrangement of the hook i and button k with the dasher D and breaker frame E. He named Dickinson's churn of 31 January 1854 and T. B. Harper's of 27 April 1858 and disclaimed what they claimed. He gives no sizes, so every size here is ours. He calls his wheels G and H two similar bevel wheels; his Fig. 1 draws a large wheel and a small one, and we use a printed crown wheel and pinion in their place.

Materiały

19

Wymagane narzędzia

21

Pliki projektowe

4

CC0 Domena publiczna

Ten plan jest udostępniany na licencji CC0. Możesz go swobodnie kopiować, modyfikować, rozpowszechniać i wykorzystywać do dowolnych celów, bez konieczności uzyskiwania zgody.

Wesprzyj Makera kupując produkty przez jego plan, za co zarabia Prowizja Makera ustalony przez sprzedawców, lub stwórz nową iterację tego planu i dołącz go jako połączenie w swoim własnym planie, aby dzielić się przychodami.

Dyskusja

(0)

Zaloguj się aby dołączyć do dyskusji

Ładowanie komentarzy...