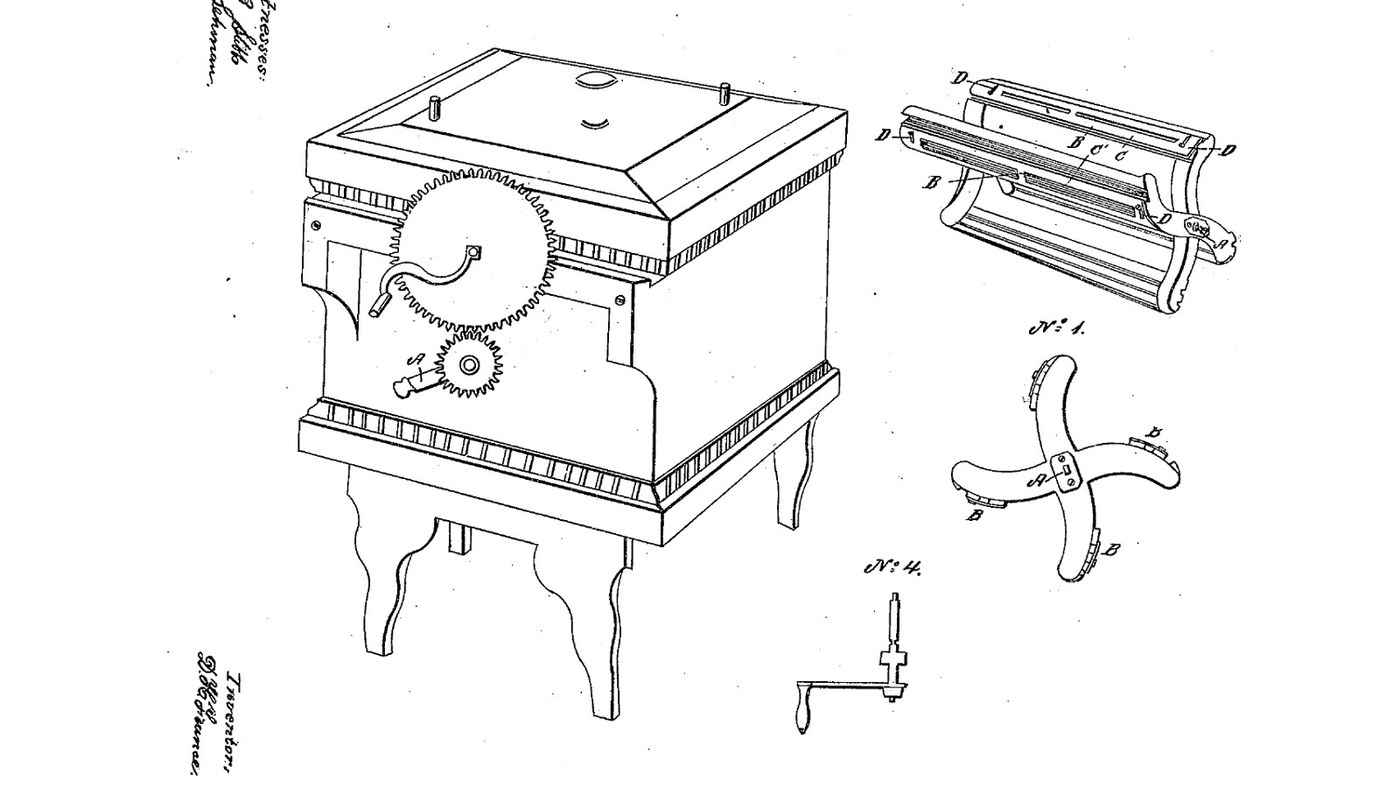

Sliding-Strip Cylinder Dash Churn: Strips on the Slats Open the Gaps One Way and Close Them the Other
Instructions
France's slats, and the wheels' three to one
France's slats, and the wheels' three to one
A turning dasher on crossed arms in a box, before it
A turning dasher on crossed arms in a box, before it
Read US 25,404
Read US 25,404
Print the large cog wheel
Print the large cog wheel
Print the small cog wheel
Print the small cog wheel
Box with legs and lid
Box with legs and lid
Materials for this step:
 Hardwood Board3 pieces
 Softwood Timber 70x70mm1 piece
 Wood Glue1 piece
 Wood Screws30 pieces
Tools needed:
 Table Saw
 Hand Saw
 Cordless Drill
 Spade Bit Set
 Bar Clamp
 Try Square
 Tape Measure
 Water
Dash: arms, hubs and slats
Dash: arms, hubs and slats
Materials for this step:
Hardwood Board1 pieceWood Glue1 pieceWood Screws24 piecesTools needed:
 JigsawTable SawCordless DrillSpade Bit Set
 Drill Bit SetTape Measure
Strips B with slots C and screws D
Strips B with slots C and screws D
Materials for this step:
 Stainless Steel Sheet1 piece
 Machine Screws8 pieces
 Flat Washer8 pieces
Tools needed:
 Tin Snips
 Files (Hand File)Cordless DrillDrill Bit Set
 Screwdriver Set
Shaft, cog wheels and crank
Shaft, cog wheels and crank
Materials for this step:
 Stainless Steel Rod2 piecesHardwood Board1 piece
 Hardwood Dowels1 piece
 Hex Bolt Assortment3 pieces
 Nylon Insert Lock Nut3 pieces
 PETG Filament1 piece
Tools needed:
 FDM 3D Printer
 HacksawCordless DrillDrill Bit Set
 Adjustable Spanner
The build in 3D
The build in 3D
Churn, then gather
Churn, then gather
Materials for this step:
 Heavy Cream6 l
 Coarse Sea Salt1 pieceWater1 piece
Tools needed:
 Leave-In Probe Thermometer
 Stopwatch
 Digital Kitchen Scale
 Stainless Steel Mixing Bowl (Large)
Troubleshooting
Troubleshooting
Flow
History and honest limits
History and honest limits
Materials
15- 3 piecesPlaceholder
- 1 piecePlaceholder
- 2 piecesPlaceholder
- 54 piecesPlaceholder
- 1 piecePlaceholder
- 8 piecesPlaceholder
- 8 piecesPlaceholder
- 2 piecesPlaceholder
- 1 piecePlaceholder
- 3 piecesPlaceholder
- 3 piecesPlaceholder
- 1 piecePlaceholder
- 6 lPlaceholder
- 1 piecePlaceholder
- 1 piecePlaceholder
Tools Required
20- 1 vendor sell this, none ship to you yetPlaceholder
- Placeholder
- 1 vendor sell this, none ship to you yetPlaceholder
- Placeholder
- Placeholder
- Placeholder
- 1 vendor sell this, none ship to you yetPlaceholder
- Placeholder
- 1 vendor sell this, none ship to you yetPlaceholder
- Placeholder
- Placeholder
- Placeholder
- Placeholder
- Placeholder
- Placeholder
- Placeholder
- Placeholder
- Placeholder
- Placeholder
- Placeholder
Design Files
3This blueprint makes


Related Blueprints
These blueprints share knowledge with this one — techniques, materials, or principles that connect them in the learning graph.
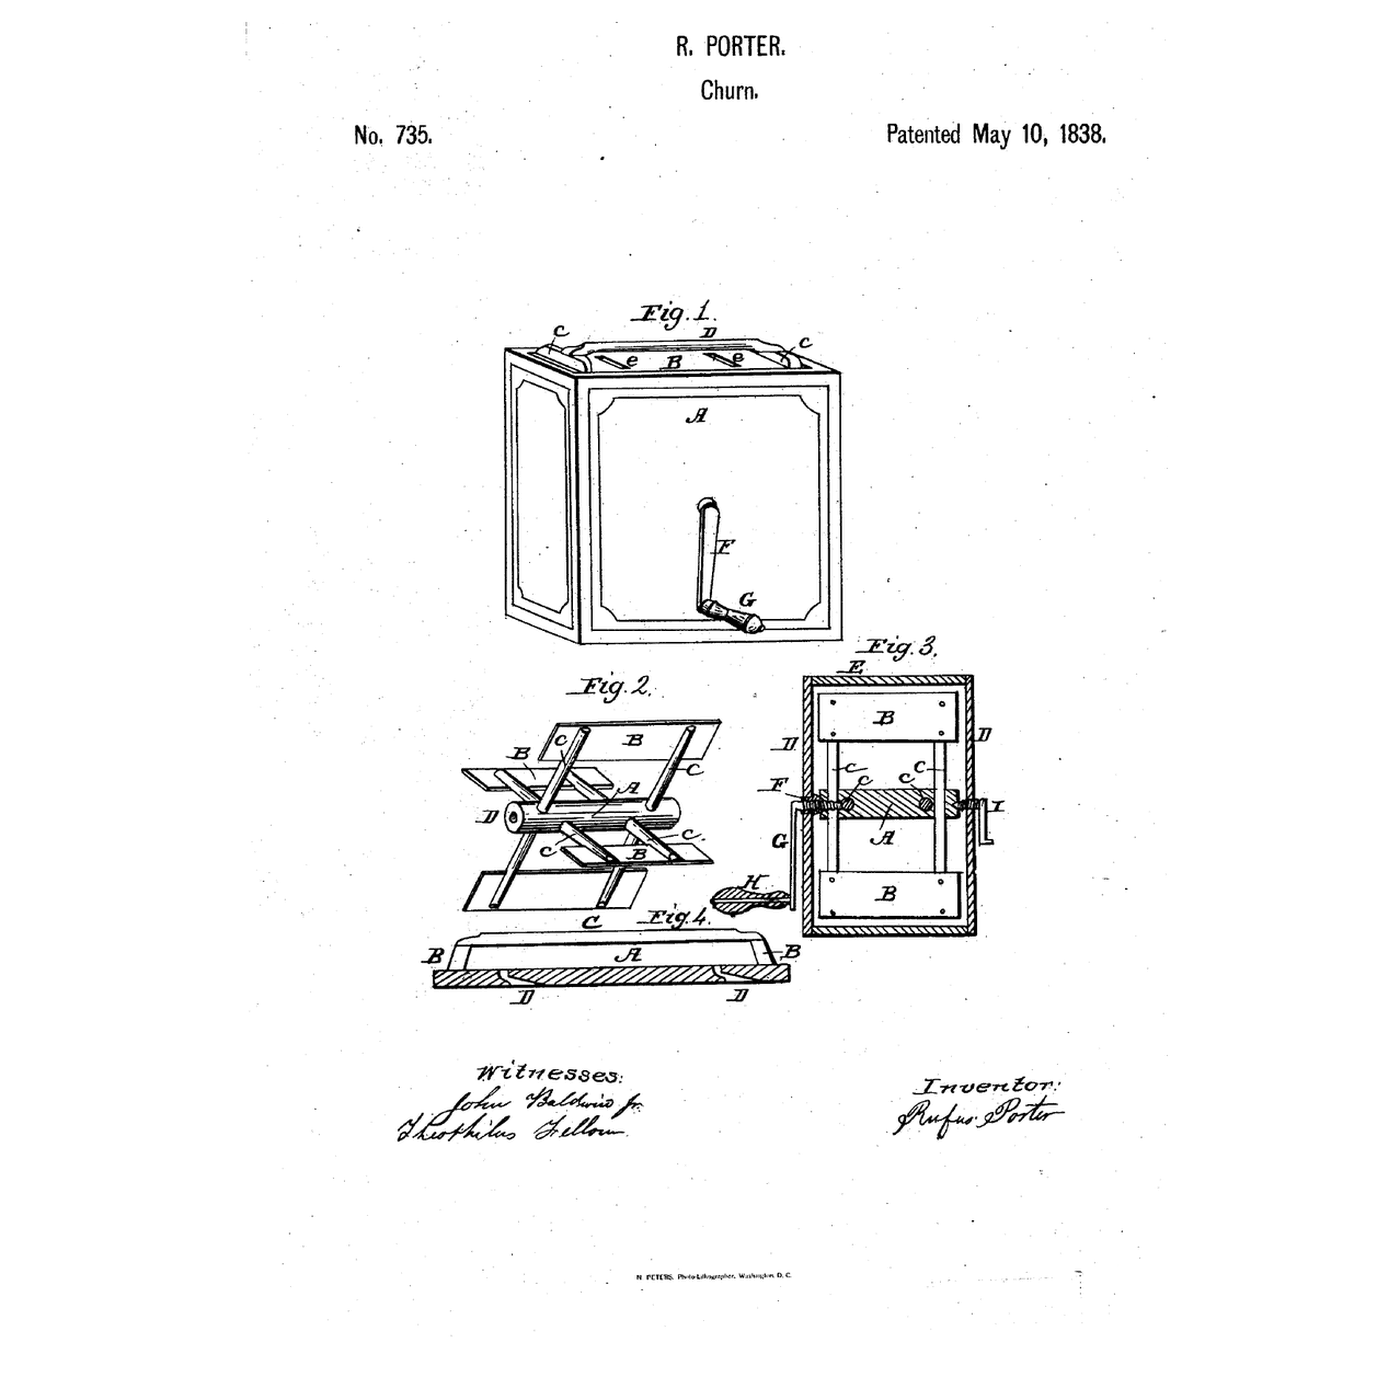
Rotary-Dasher Box Churn: Float Boards on Crossed Arms in a Curved Box
by Martin
FOOD & DRINKS
Hinged-Float Double-Dasher Churn: Floats That Close Going Down and Fall Open Coming Up
by Buttercup
Woodworking
Water-Chamber Box Churn: A Turning Box With a Dash-Frame You Lower to Free the Butter
by Buttercup
Woodworking

Churning Butter from Cream — The 5,000-Year-Old Fat Separation
by TheChef
CRAFT
CC0 Public Domain
This blueprint is released under CC0. You are free to copy, modify, distribute, and use this work for any purpose, without asking permission.
Support the Maker by purchasing products through their Blueprint where they earn a Maker Commission set by Vendors, or create a new iteration of this Blueprint and include it as a connection in your own Blueprint to share revenue.