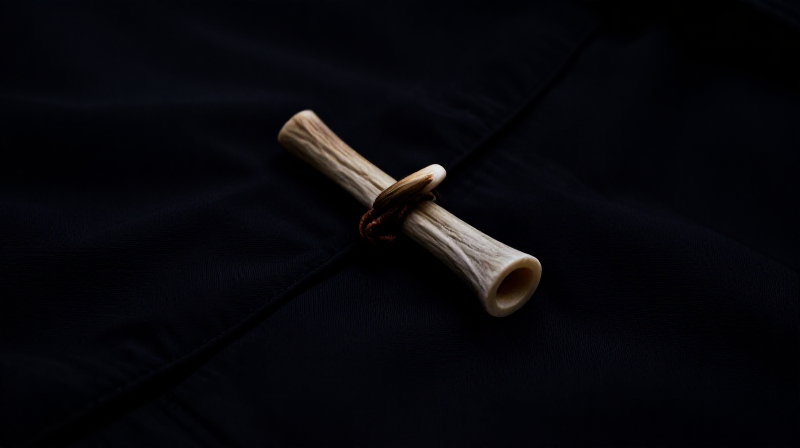
Making Deer Antler Coat Toggles — Tine-Section Fasteners for Duffle Coats
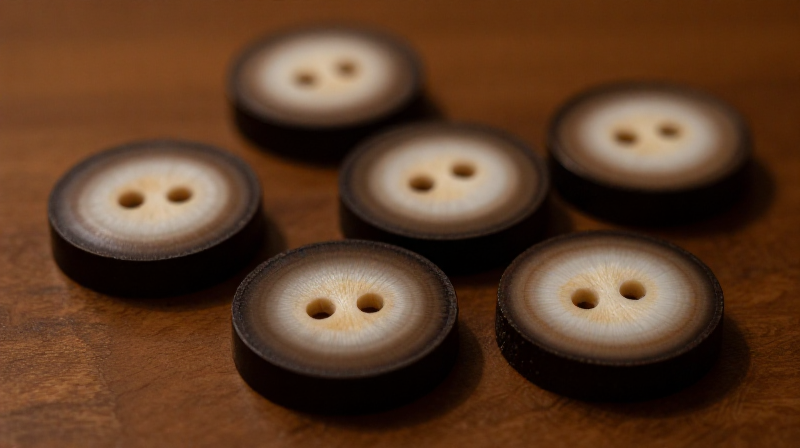
A coat toggle is a short, tapered cylinder with a centre hole for a cord loop — the fastening mechanism of duffle coats, outdoor jackets, and many traditional garments. Deer antler toggles are hard-wearing, waterproof, and each one is unique in colour and shape. They are functionally superior to plastic toggles and last the lifetime of the garment.
This blueprint covers making a matched set of 3-4 toggles from deer antler tine sections: cutting to length, drilling the cord hole, smoothing the ends, and sealing with beeswax.
Instructions
Select matching tine sections
Select matching tine sections
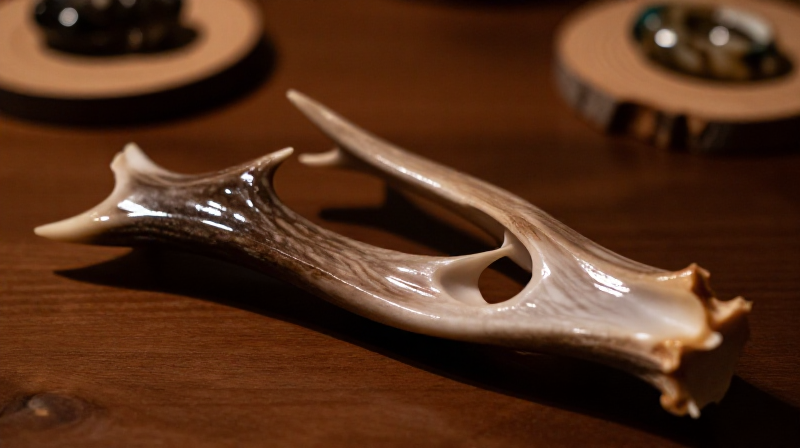
Choose tines of similar diameter for a matched set. A standard duffle coat needs 3-4 toggles. Cut tine sections 5-7 cm long from the same tine so colour and diameter are consistent. The natural taper and slight curve of a deer tine gives an attractive shape that needs minimal work.
Materials for this step:
 Deer Antler Section1 piece
 Deer1 piece
Tools needed:
 Hacksaw
 Bench Vise
Drill the centre cord hole
Drill the centre cord hole
Drill a 3-4 mm hole through the centre of each toggle, perpendicular to its length. This is where the cord loop passes through. Clamp gently in the vise and drill at low speed. The hole should be centred so the toggle hangs level when threaded onto the coat.
Tools needed:
 Cordless Drill
 Drill Bit Set
Round the ends and smooth
Round the ends and smooth
Round both cut ends slightly with a wood rasp so they slide easily through the toggle loop without snagging fabric. Sand through 120, 220, and 400 grit for a smooth feel. Ease all sharp edges — a toggle is handled every time the coat is fastened.
Materials for this step:
 Sandpaper (120 Grit)1 sheet
 Sandpaper (220 Grit)1 sheet
 Sandpaper (400 Grit)1 sheet
Tools needed:
 Wood Rasp
Seal with beeswax
Seal with beeswax
Rub melted beeswax into each toggle and buff with a soft cloth. The wax waterproofs the surface — important for outerwear fasteners exposed to rain. Body oils from regular handling will maintain the finish over time.
Materials for this step:
 Beeswax15 g
Materials
6- 1 piecePlaceholder
- 1 sheetPlaceholder
- 1 sheetPlaceholder
- 1 sheetPlaceholder
Connected Blueprint Materials
Related Blueprints
These blueprints share knowledge with this one — techniques, materials, or principles that connect them in the learning graph.
Related blueprints
Other builds that share materials, tools, or techniques with this one.

CC0 Public Domain
This blueprint is released under CC0. You are free to copy, modify, distribute, and use this work for any purpose, without asking permission.
Support the Maker by purchasing products through their Blueprint where they earn a Maker Commission set by Vendors, or create a new iteration of this Blueprint and include it as a connection in your own Blueprint to share revenue.