Collaboration
ART
BEAUTY & WELLNESS
CRAFT
CULTURE & HISTORY
ENTERTAINMENT
ENVIRONMENT
FOOD & DRINKS
REVERSE ENGINEERING
SCIENCES
SPORTS
TECHNOLOGY
WEARABLES
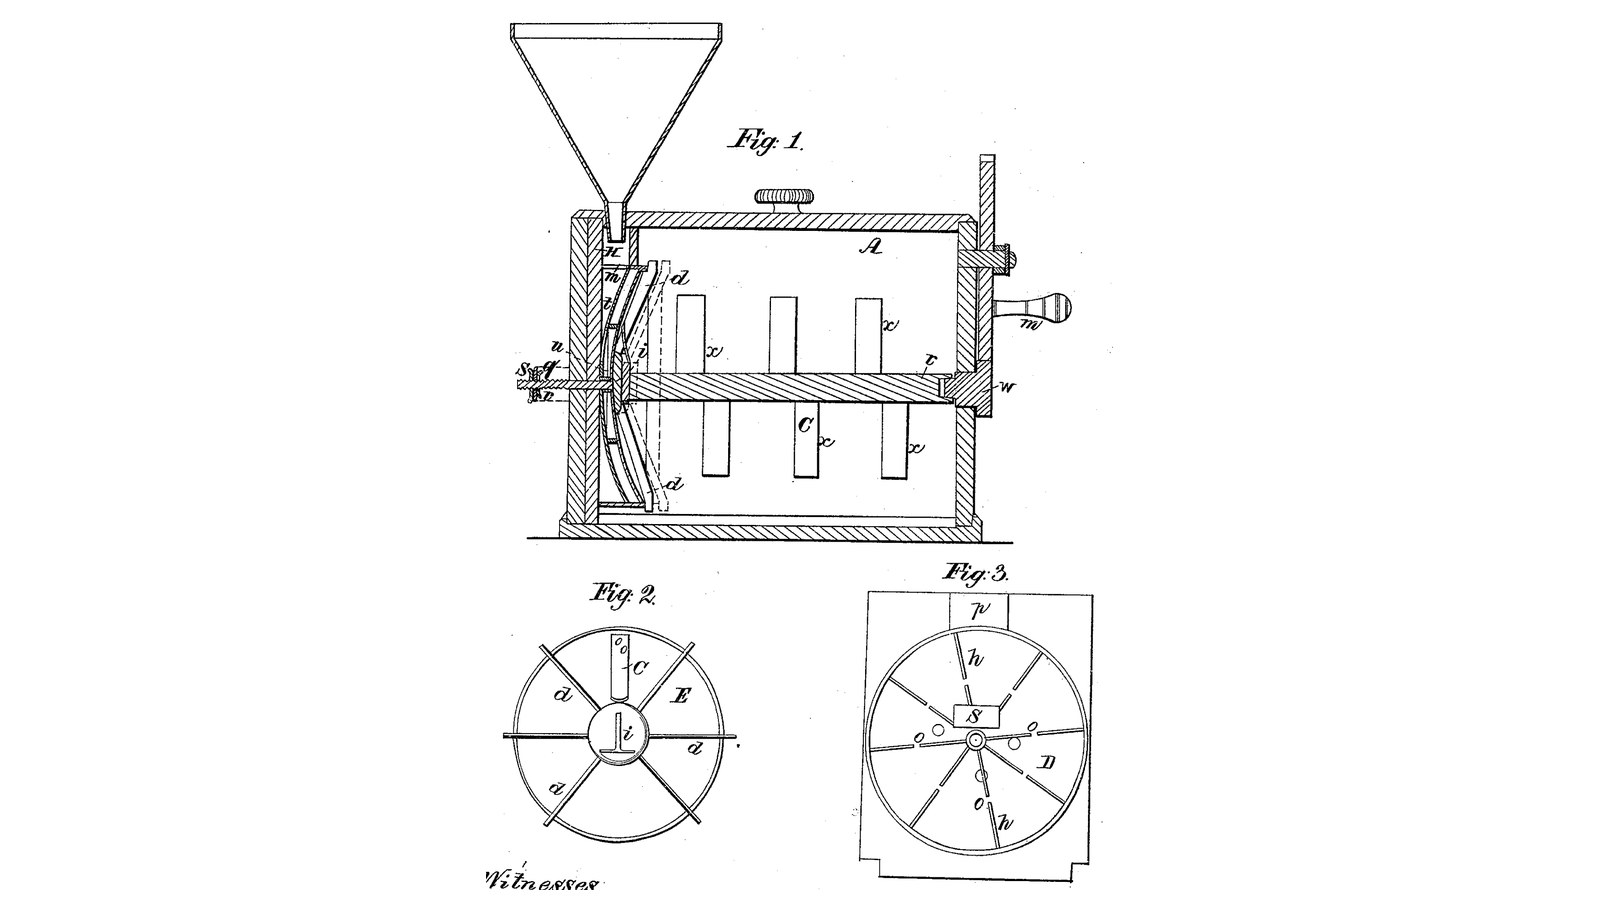

Adjustable-Dish Churn: Cream Is Poured Between a Fixed Ribbed Dish and a Turning One, Then Beaten by Wings and Dashers
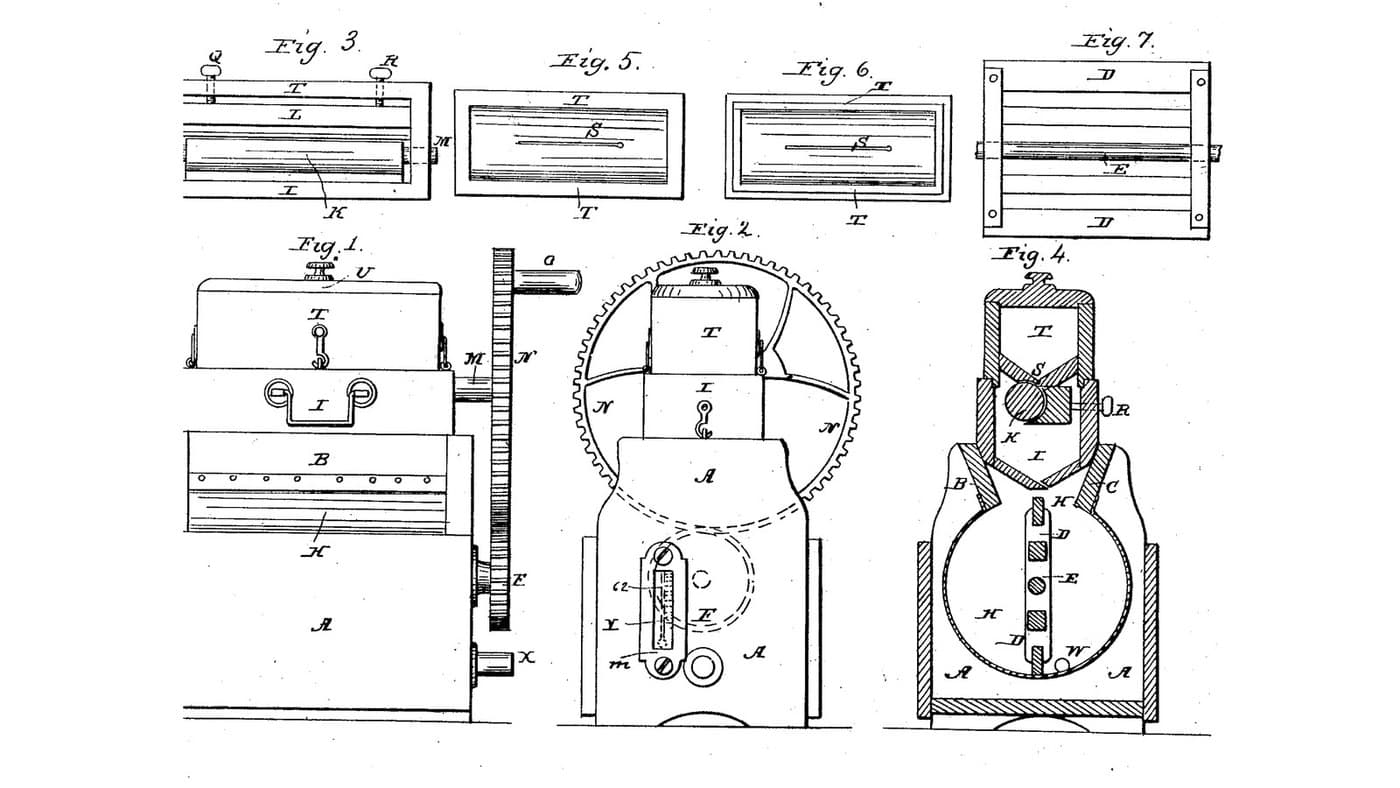
John Pike of Syracuse, New York, received US 30,930, dated 18 December 1860, for a box churn with a cranked shaft of dashers. At its far end a fixed concave dish with broken radial ribs faces a turning dish with ribs and a ring that runs through the breaks. Cream poured into a pan on top runs down a passage and through a slot between the two dishes, where it is beaten and partly ground, then flung out to wings and dashers in the box. Two thumb screws set the turning dish farther off for cream or closer for milk.
The fixed dish is the patent's eight inches across; every other size here is ours.
Advanced
About 3 days
Instructions
1
1
Setting the gap between the dishes
Setting the gap between the dishes
Loading Jupyter Notebook...
2
2
Cream worked between a fixed and a turning face, two years before
Cream worked between a fixed and a turning face, two years before
Brown forces cream out between corrugated rings. Pike pours it between a fixed and a turning ribbed dish whose gap he can set.
3
3
Read US 30,930
Read US 30,930
"By this arrangement the concavo-convex dish E can be adjusted to a greater or less distance from the concave dish D; fixing the two dishes farther apart when churning cream, shown by the red lines in Fig. 1, and close together when churning milk."
4
4
Box A, lid and conduit p
Box A, lid and conduit p
Glue up hardwood for a box A 400 mm long, 260 wide and 280 high inside: a fixed end 40 mm thick and 322 tall, a crank end 22 thick, sides and floor 22 thick, joints sealed with silicone sealant, and a loose lid with a knob covering all but the fixed end. Bore the fixed end 16 mm straight down from its top, 20 mm in from its outside face, to 82 mm above the shaft's centre (which is 140 mm above the floor), and bore 16 mm in from its inside face to meet it: the conduit p. Set a kitchen funnel in the top of it as the pan B. Bore the fixed end 12.8 mm at the shaft's centre for the rod u and the crank end 16.6 mm.
Materials for this step:
 Hardwood Board4 pieces
 Wood Glue1 piece
 Silicone Sealant1 piece
 Wood Screws30 pieces
 Kitchen Funnel1 piece
Tools needed:
 Table Saw
 Router
 Cordless Drill
 Drill Bit Set
 Spade Bit Set
 Bar Clamp
 Screwdriver Set
 Tape Measure
5
5
Print the fixed dish D
Print the fixed dish D
The fixed dish D: 203 mm across (the patent's eight inches), its face dished at 12 degrees, eight radial ribs h 6 mm high broken from 46 to 64 mm out, a rim flange m, a 12.8 mm centre opening e and a 20 x 25 mm slot f at the top. Needs a 220 mm bed. PETG, 0.2 mm layers, 30 % infill, 4 walls, printed on its back with supports.
6
6
Print the turning dish E
Print the turning dish E
The turning dish E: 180 mm across, 5 mm thick, dished at 12 degrees, six ribs 6 mm high on its convex face, a ring t 52 to 58 mm out standing 12 mm, a boss for the rod u, and the sawcalf tab i on its concave face. PETG, 0.2 mm layers, 30 % infill, 4 walls, printed on its back with supports.
7
7
Dishes D and E, wings d, rod u and thumb screws
Dishes D and E, wings d, rod u and thumb screws
Screw the dish D to the inside of the fixed end, its slot f over the conduit p, sealing round it. Cut six hardwood wings d 34 x 94 x 4 mm and screw them radially to the concave face of E so they reach 120 mm from the centre. Thread a 12 mm stainless rod u 120 mm long at one end for 70 mm and fix its plain end into E's boss with sealant and a cross pin. Pass it through D and the fixed end. Screw a mild steel flat bar plate q outside, bored 12.8 mm, and run a wing nut and washer on the thread either side of it: the thumb screws s and v.
Materials for this step:
 PETG Filament1 pieceSilicone Sealant1 pieceWood Screws18 piecesHardwood Board1 piece
 Stainless Steel Rod1 piece
 Mild Steel Flat Bar1 piece
 Wing Nut2 pieces
 Flat Washer2 pieces
Tools needed:
 FDM 3D Printer
 Hacksaw
 Files (Hand File)
 Bench ViseCordless DrillDrill Bit Set
 Adjustable SpannerScrewdriver Set
8
8
Shaft C, dashers x, cog shaft w and crank m
Shaft C, dashers x, cog shaft w and crank m
Cut a hardwood shaft C 32 mm square and 340 mm long. Saw a slot 7 x 22 mm, 15 deep, across one end to take the sawcalf tab, and chisel a 16.4 mm square socket 50 deep in the other, so C can slide 15 mm as E is set. Mortise six hardwood paddles x 25 x 6 mm through it, 40 mm apart, alternately up and down, reaching 110 mm from its centre. File the end of a 16 mm stainless cog shaft w 110 mm long square for 34 mm; pass it through a hardwood bearing block on the crank end into the socket and pin a crank m of mild steel flat bar, 120 mm throw, with a hardwood handle, on its outer end. Set C's slot over the tab and hold it with a split pin through both.
Materials for this step:
Hardwood Board1 pieceWood Glue1 pieceStainless Steel Rod1 pieceMild Steel Flat Bar1 piece Hardwood Dowels1 piece
 Split Pin2 piecesWood Screws4 pieces
Tools needed:
Table Saw Chisel Set - WoodCordless DrillDrill Bit SetHacksawFiles (Hand File)Bench Vise
9
9
The build in 3D
The build in 3D
FreeCAD model of this build, the near side cut away: the box with its bored fixed end and funnel, the fixed ribbed dish, the turning dish with its ring and wings, the rod with its thumb screws on the plate, the shaft with six paddles, and the cog shaft and crank.
10
10
Set the gap and churn
Set the gap and churn
For cream, set the turning dish's face 30 mm from the fixed dish's face with the thumb screws (closer, 15 mm, is Pike's setting for milk). Turn the crank briskly and, while it turns, pour about 8 litres of heavy cream at about 15 °C, checked with the thermometer, into the funnel, timing it. When the butter comes, lift the lid, pull the split pin and lift out the shaft C, take out the butter, drain the buttermilk into a bowl, wash the butter in cold water until it runs clear, salt and weigh it.
Materials for this step:
 Heavy Cream8 l
 Coarse Sea Salt1 piece
 Water1 piece
Tools needed:
 Leave-In Probe Thermometer
 Stopwatch
 Digital Kitchen Scale
 Stainless Steel Mixing Bowl (Large)Adjustable Spanner
11
11
Troubleshooting
Troubleshooting
Adjustable-dish churn troubleshooting.
Flow
Loading...
12
12
History and honest limits
History and honest limits
**John Pike** of Syracuse, Onondaga County, New York, US 30,930, 18 December 1860, "Churn". He claimed "the combination and arrangement of the adjustable convex dish D, concavo convex dish E, with the radial beaters on each as described, together with the wings d, d, shaft C, and dashers x, x". He wrote that the butter comes "ordinarily inside of two minutes with sweet milk and one minute with cream"; we have not tested that. His pan B was metal, his dish D adjustable on a slide H and his shaft held to E by a spring c; ours is a kitchen funnel, a dish screwed fast and a split pin. Neither the text nor the drawing gives the gearing's form; ours is a plain crank. His D is "say eight inches in diameter", which we use; every other size here is ours.
Materials
15- 4 piecesPlaceholder
- 2 piecesPlaceholder
- 2 piecesPlaceholder
- 52 piecesPlaceholder
- 1 piecePlaceholder
- 1 piecePlaceholder
- 1 piecePlaceholder
- 1 piecePlaceholder
- 2 piecesPlaceholder
- 2 piecesPlaceholder
- 1 piecePlaceholder
- 2 piecesPlaceholder
- 8 lPlaceholder
- 1 piecePlaceholder
- 1 piecePlaceholder
Tools Required
18- 1 vendor sell this, none ship to you yetPlaceholder
- Placeholder
- 1 vendor sell this, none ship to you yetPlaceholder
- Placeholder
- Placeholder
- Placeholder
- Placeholder
- 1 vendor sell this, none ship to you yetPlaceholder
- Placeholder
- Placeholder
- Placeholder
- Placeholder
- Placeholder
- Placeholder
- Placeholder
- Placeholder
- Placeholder
- Placeholder
Design Files
3This blueprint makes


Related Blueprints
These blueprints share knowledge with this one — techniques, materials, or principles that connect them in the learning graph.
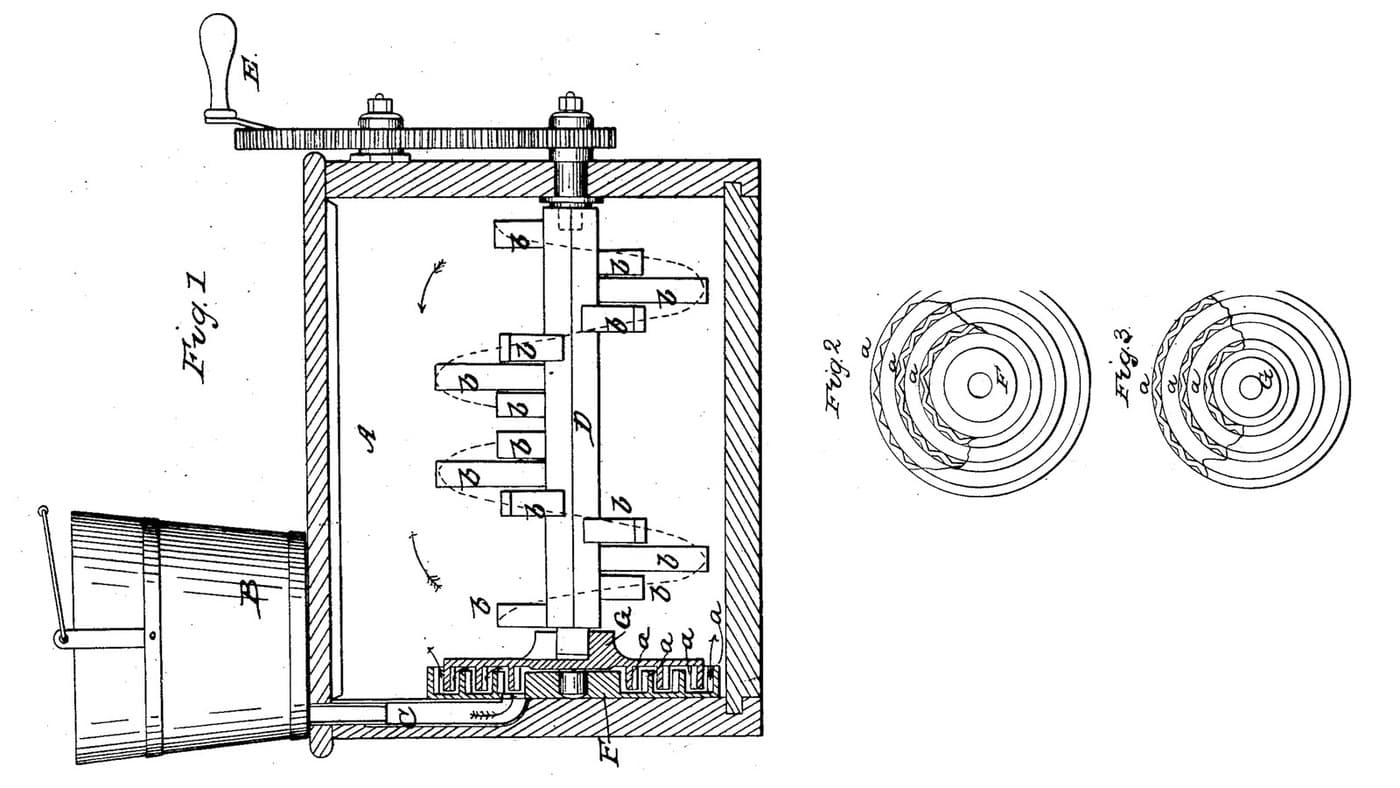
Ring-Disk Spiral-Pin Churn: Cream Forced Out Between Corrugated Rings, Then Drawn to the Middle by Spiral Pins
by Buttercup
Woodworking
0
0
0
0
0
0
Roller-and-Concave Churn: Cream Falls Between a Turning Roller and an Adjustable Concave, Then Onto a Dasher Below
by Buttercup
Woodworking
0
0
0
0
0
0
Hot-Water Cylinder Churn: Cream Is Crushed Between a Warm Turning Cylinder and an Adjustable Plate, Then Falls to a Dasher
by Buttercup
Woodworking
0
0
0
0
0
0

Churning Butter from Cream — The 5,000-Year-Old Fat Separation
by TheChef
CRAFT
60
0
0
0
0
0
CC0 Public Domain
This blueprint is released under CC0. You are free to copy, modify, distribute, and use this work for any purpose, without asking permission.
Support the Maker by purchasing products through their Blueprint where they earn a Maker Commission set by Vendors, or create a new iteration of this Blueprint and include it as a connection in your own Blueprint to share revenue.