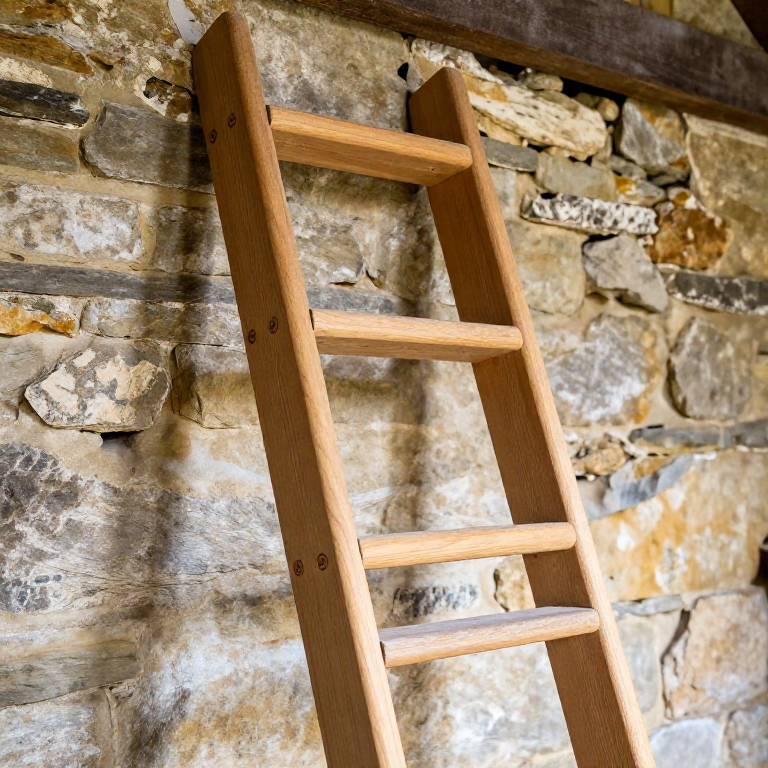
Making a Wooden Ladder — Rung Mortises and Wedged Tenons
A wooden ladder is one of the most essential structures in any building project — and one of the most dangerous if poorly made. A rung ladder consists of two long poles (the stiles) with a series of horizontal rungs mortised through them. Every rung is a structural beam carrying the full weight of the climber, and every joint must hold under dynamic loading — the shock of a foot landing on a rung is several times the climber's static weight.
The stiles must be straight-grained poles, ideally from a naturally straight tree like ash, spruce, or larch. Ash is the traditional choice — strong, flexible, and light for its strength. The rungs are short pieces of hard, dense wood — oak or beech — with tenons that pass through the stile and are wedged on the far side. The wedge locks the rung permanently and prevents the joint from working loose under repeated loading.
A well-made wooden ladder lasts for decades and has one advantage over metal: it does not conduct electricity. For this reason, wooden ladders remain in use by electricians even today. The technique described here — through-mortised, wedged rungs — is the strongest form of ladder construction and has been used unchanged since at least the Bronze Age.
说明
Select and prepare the stiles
Select and prepare the stiles
所需工具:
 Drawknife
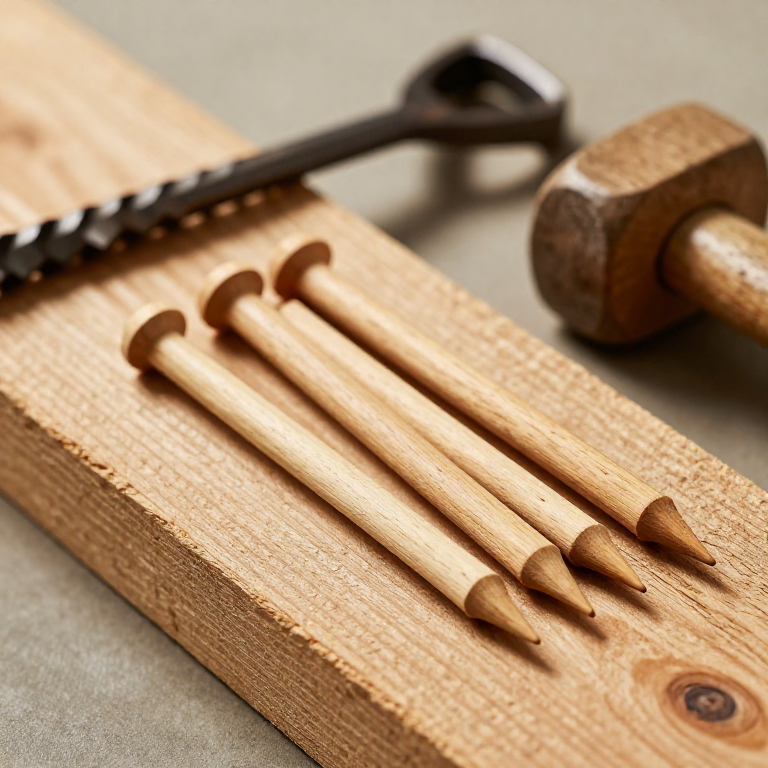
Bore the rung mortises
Bore the rung mortises
所需工具:
 Hand Auger
Turn or shape the rungs
Turn or shape the rungs
Assemble the ladder
Assemble the ladder
所需工具:
 Wooden Mallet
Wedge the rung tenons
Wedge the rung tenons
Test and inspect every joint
Test and inspect every joint
已连接蓝图材料
相关蓝图
这些蓝图共享知识——技术、材料或原理
Related blueprints
Other builds that share materials, tools, or techniques with this one.
CC0 公共领域
此蓝图以 CC0 协议发布。你可以自由复制、修改、分发和使用此作品,无需征得许可。
通过购买蓝图中的产品支持创客,他们将获得 创客佣金 (由供应商设定),或创建此蓝图的新版本并将其作为连接包含在你自己的蓝图中以分享收入。